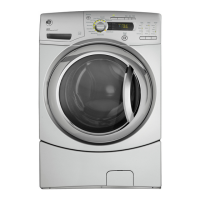
Installation Instructions
9. Plug the power cord into a grounded outlet.
NOTE: Check to be sure the power is off at the circuit
breaker/fuse box before plugging the power cord into
an outlet.
10. Turn on the power at the circuit breaker/fuse box.
11. Read the rest of this Owner’s Manual. It contains
valuable and helpful information that will save you
time and money.
12. Before starting the washer, check to make sure:
Main power is turned on.
The washer is plugged in.
The water faucets are turned on.
The unit is level and all four leveling legs are firmly
on the floor.
The shipping support hardware is removed
and saved.
The drain hose is properly tied up.
There are no leaks at the faucet, drain line
or washer.
13. Run the washer through a complete cycle.
Check for water leaks and proper operation.
14. If your washer does not operate, please review
the Before You Call For Service section before
calling for service.
15. Place these instructions in a location near the washer
for future reference.
If replacement parts are needed for your washer, they can be
ordered in the United States by visiting our Website
at GEApplianceparts.com or by calling 800.GE.CARES. In
Canada, visit geappliances.ca or call 1.800.561.3344.
REPLACEMENT PARTS
23
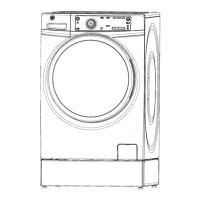
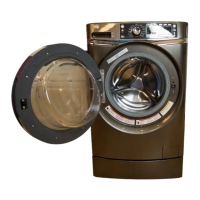
7. With the washer in its final
position, place a level on top
of the washer (if the washer
is installed under a counter,
the washer should not be
able to rock). Adjust the front
leveling legs up or down to
ensure the washer is resting
solidly. Turn the lock nuts on each leg
up toward the base of the washer
and snug with a wrench.
NOTE: Keep the leg extension at
a minimum to prevent excessive
vibration. The farther out the legs
are extended, the more the washer
will vibrate.
If the floor is not level or is damaged,
you may have to extend the rear
leveling legs.
8. Attach U-shaped hose guide to the end of the drain
hose. Place the hose in a laundry tub or standpipe and
secure it with the cable tie provided in the enclosure
package.
NOTE: Placing the drain hose too far down the drain pipe
can cause a siphoning action. No more than 7 inches of hose
should be in the drain pipe. There must be an air gap around
the drain hose. A snug fit can cause a siphoning action.
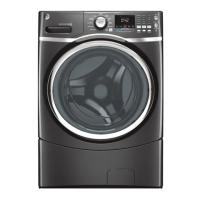
INSTALLING THE WASHER
(cont.)
Leveling Leg
Cable Tie
Cable Tie
Cable Tie
Video
Scan this code
to watch a video
on Step 7.
 Loading...