This document is an owner's manual for GE dishwashers, specifically covering the GSD2000, GSD2200, GSD2300, and GSD2600 series models. It serves as a comprehensive guide for users to understand, operate, and maintain their appliance effectively. The manual emphasizes user empowerment, encouraging owners to troubleshoot common issues before seeking professional service.
Function Description:
The GE dishwasher is designed to efficiently clean and sanitize dishes, glasses, flatware, and cookware. It operates by circulating hot water and detergent to remove food soils, followed by rinse cycles and an optional heated drying phase. The various wash cycles and energy options allow users to customize the cleaning process based on the soil level and type of items being washed, aiming for optimal cleaning performance while managing energy and water consumption.
Usage Features:
The manual details several key usage features to ensure proper operation and optimal results:
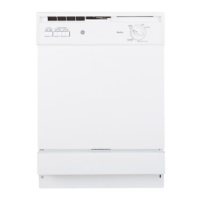
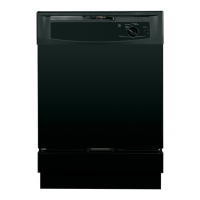
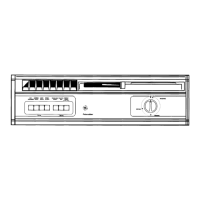
- Control Panel and Settings: The control panel, located on the tub wall just inside the door, provides access to various cycles and energy options. Models vary in their specific controls, but generally include options like:
- Cycles:
- POTS & PANS/HEAVY WASH: For heavily soiled dishes or cookware with dried-on or baked-on soils.
- NORMAL WASH: For everyday dishes, glasses, and cookware with medium soils. This is highlighted as an energy-saving option if a lighter soil cycle is chosen.
- SHORT WASH: For quickly washing loads of everyday dishes with medium soils that have not dried on, often consisting mostly of glasses.
- RINSE ONLY: For rinsing partial loads that will be washed later, without detergent.
- PLATE WARMER: A cycle specifically for warming clean dishes and serving plates, taking approximately 31 minutes.
- HOT START: Preheats wash water to the correct temperature for improved cleaning.
- Energy Options:
- HI TEMP WASH: Provides extra heat for enhanced performance, particularly with heavily soiled dishes.
- HEATED DRY ON: Activates the drying heater for faster drying, extending the wash cycle time.
- HEATED DRY OFF: Disables the drying heater, allowing dishes to air dry naturally and saving energy.
- Starting a Cycle: The process involves latching the door and slowly turning the Dial to the desired cycle or START position, being careful not to turn past it to avoid missing a rinse. A time delay before water fill is noted.
- Water Temperature: It's crucial for the entering water to be between 120°F and 150°F for effective cleaning and to prevent dish damage. Users are advised to check water temperature with a thermometer.
- Rinse Agent Usage: The manual strongly recommends using Jet-Dry® rinse agent to prevent spots and film build-up. Instructions are provided for filling the dispenser, checking levels, and wiping up spills. A full dispenser should last about one month.
- Detergent Use: Only dishwasher-specific detergents (powder, tabs, or liquid) are recommended, with Cascade® Automatic Dishwashing Detergent specifically approved. The amount of detergent depends on water hardness, with more needed for hard water and less for soft water to prevent etching. Users are instructed to add detergent to the main cup and, for two-wash cycles, also to the open cup. The Dial should be OFF before adding detergent to ensure proper cup closure.
- Adding a Forgotten Dish: A simple procedure is outlined for adding dishes mid-cycle before the main wash, involving pushing the door latch, opening the door once water calms, adding the dish, and re-latching the door.
- Loading the Racks: Detailed guidelines are provided for loading both the upper and lower racks to maximize cleaning efficiency:
- Upper Rack: Ideal for glasses, cups, saucers, and dishwasher-safe plastics. Cups and glasses fit best along the sides, and odd-shaped utensils, saucepans, and mixing bowls should be placed face down. Small plastic items should be secured to prevent them from falling onto the heating element.
- Lower Rack: Best for plates, saucers, and cookware. Large items like broiler pans and racks should be placed along the sides, in corners, or at the back, with soiled sides facing the center.
- Wash Tower: Emphasized to keep the center area of the lower rack clear, as the wash tower rises during cycles. Blocking it or placing tall items next to it can obstruct the wash arm and lead to poor cleaning.
- Silverware Basket: Flatware should be placed in the removable basket, with fork and knife handles up for safety, and spoon handles down. Mixing knives, forks, and spoons prevents nesting, and small plastic items can be placed at the bottom with silverware on top. Large platters or trays should not be loaded in the front right corner of the lower rack, as they can prevent detergent circulation.
Maintenance Features:
The manual also covers essential maintenance to prolong the dishwasher's life and ensure continued performance:
- Cleaning the Control Panel and Exterior: Use a lightly dampened cloth for the control panel, followed by thorough drying. For the exterior, a good appliance polish wax is recommended. Users are warned against using sharp objects, scouring pads, or harsh cleaners.
- Protect Against Freezing: For dishwashers in unheated areas during winter, a five-step procedure is provided to prevent freezing damage: cut off electrical power, turn off water supply and disconnect the inlet line, drain water from the inlet line and valve, reconnect the inlet line, and remove the plastic sump cover to soak up water from the rubber boot.
- Air Gap Maintenance: If the dishwasher has an air gap (not part of the dishwasher itself, but a plumbing component), instructions are given for cleaning it, especially if the dishwasher isn't draining well. This involves turning off the dishwasher, lifting the chrome cover, unscrewing the plastic cap, and cleaning with a toothpick.
The manual concludes with troubleshooting tips for common problems, warranty information, and customer service contact numbers, reinforcing GE's commitment to support and service.