49-80691-1
19
%HVXUHWKHFRQWUROVDUHWXUQHGWR2))DQGWKHVXUIDFHXQLWVDUHFRROEHIRUHDWWHPSWLQJWRUHPRYHWKHP
CARE AND CLEANING: Cleaning the Range – Exterior
Cleaning the Range – Exterior (Cont.)
Surface Units (on some models)
To clean the surface units, turn the control to the highest
setting for a minute. The coils will burn off any soil.
To remove a surface unit:
To remove the drip pans for cleaning, the surface units
must be removed first.
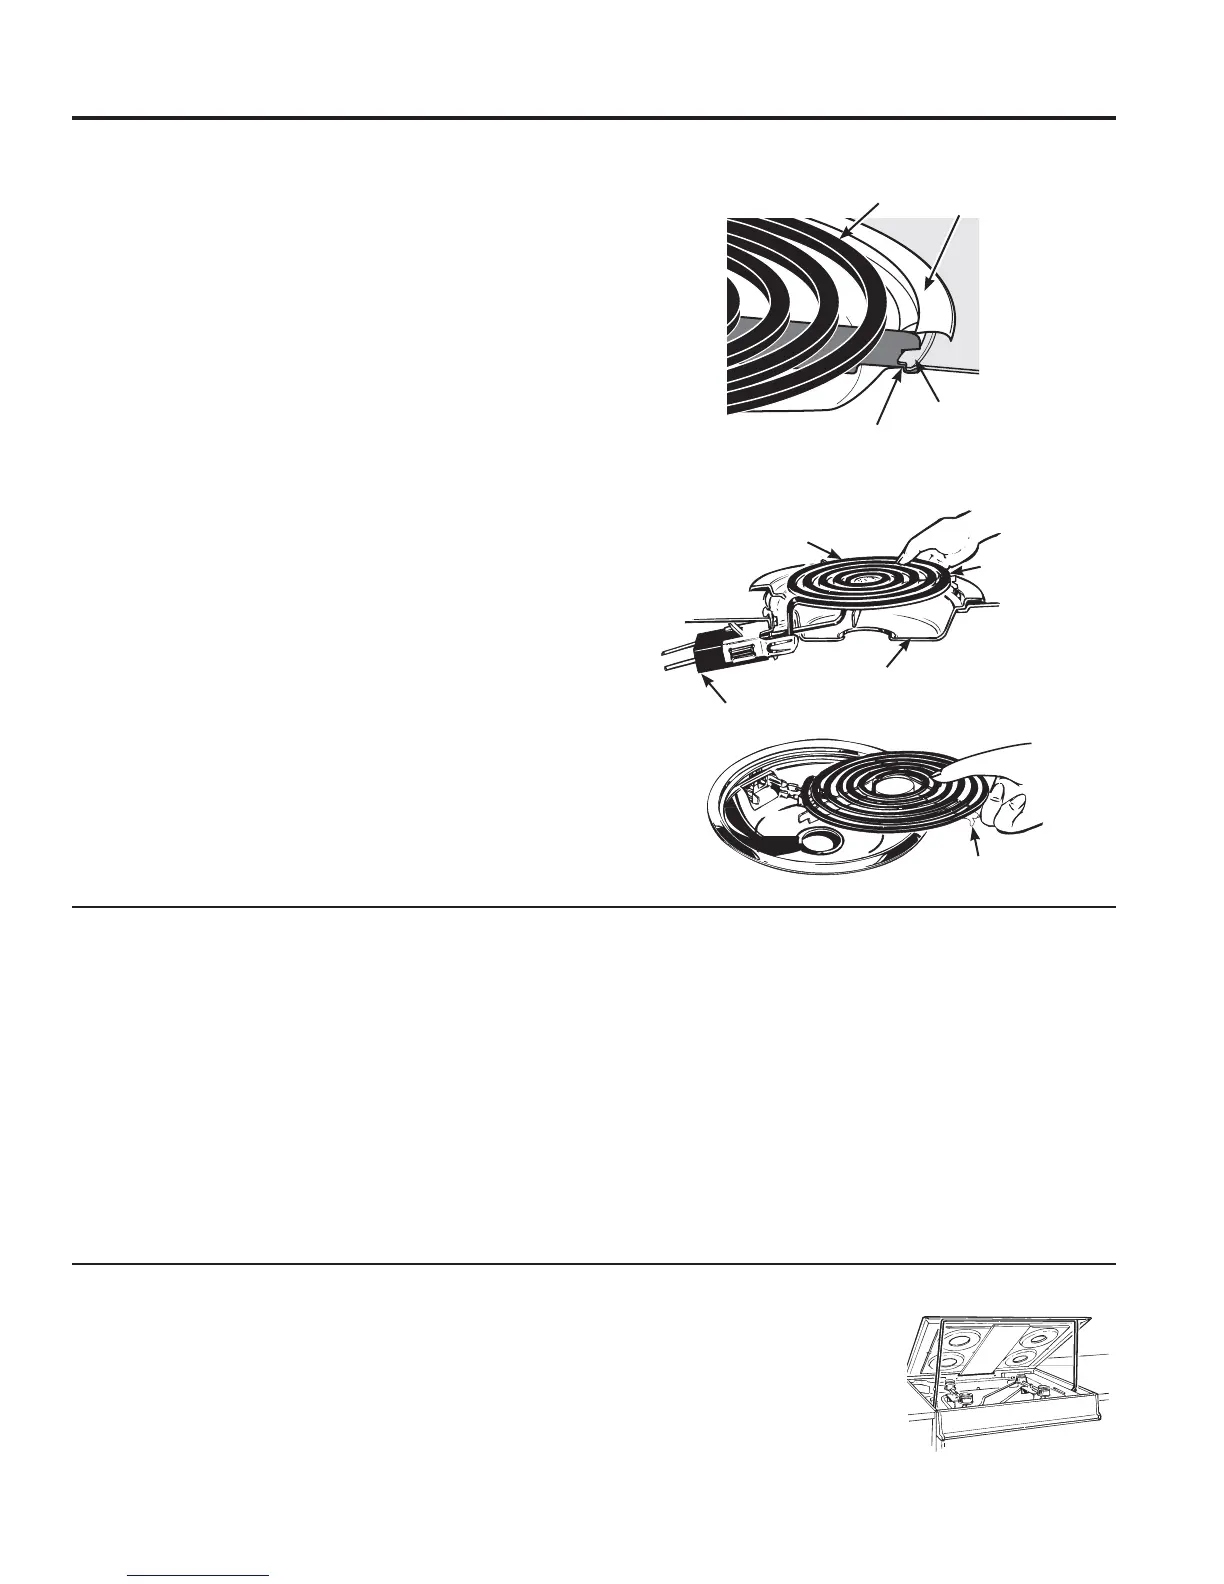
1. Push the surface unit back toward the receptacle to
free the locking tab from the cooktop.
/LIWWKHVXUIDFHXQLWDERXWFPLQFKDERYHWKH
drip pan and pull it out.
'RQRWOLIWWKHVXUIDFHXQLWPRUHWKDQLQFK,I\RXGRLW
may not lie flat on the drip pan when you plug it back in.
NOTE: Repeated lifting of the surface unit more than 1
inch above the drip pan can permanently damage the
receptacle.
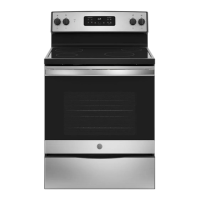
To replace a surface unit:
1. Replace the drip pan into the recess in the cooktop.
Make sure the opening in the pan lines up with the
receptacle.
,QVHUWWKHWHUPLQDOVRIWKHVXUIDFHXQLWWKURXJKWKH
opening in the drip pan and into the receptacle.
3XVKWKHVXUIDFHXQLWLQDQGGRZQWRORFNWKHWDELQ
place so it rests evenly in the cooktop.
'RQRWLPPHUVHWKHVXUIDFHXQLWVLQOLTXLGVRIDQ\NLQG
'RQRWFOHDQWKHVXUIDFHXQLWVLQDGLVKZDVKHU
'RQRWEHQGWKHVXUIDFHXQLWSOXJWHUPLQDOV
'RQRWDWWHPSWWRFOHDQDGMXVWRULQDQ\ZD\UHSDLUWKH
plug-in receptacle.
Drip Pans (on some models)
Remove the surface units. Then lift out the drip pans.
For best results, clean the drip pans by hand. Place
WKHPLQDFRYHUHGFRQWDLQHURUDSODVWLFEDJZLWK
PO»FXSDPPRQLDWRORRVHQWKHVRLO5LQVH
with clean water and polish with a clean soft cloth.
The drip pans may also be cleaned in a dishwasher.
&OHDQWKHDUHDXQGHUWKHGULSSDQVRIWHQ%XLOWXSVRLO
especially grease, may catch fire.
'RQRWFRYHUWKHGULSSDQVZLWKIRLO8VLQJIRLOVRFORVH
to the receptacle could cause shock, fire or damage to
the range.
NOTE: If your cooktop is equipped with shiny, silver-
colored drip pans, do not clean them in the self-cleaning
oven. Permanent damage to the finish can occur.
If your cooktop is equipped with black or gray porcelain-
coated drip pans, they can be cleaned in the oven during
WKHVHOIFOHDQLQJF\FOH%HIRUH\RXEHJLQDVHOIFOHDQLQJ
cycle, remove any heavy soil from the drip pans and
SODFHWKHPRQWKHSRUFHODLQFRDWHGRYHQUDFNV'RQRW
place the drip pans directly on the oven bottom. After
the self-cleaning cycle is completed and the drip pans
are cool, wipe them with a damp cloth to remove any
remaining ash or residue.
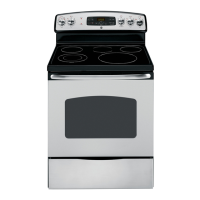
Lift-Up Cooktop (on some models)
The entire cooktop may be lifted up and supported in the
up position for easier cleaning.
The surface units do not need to be removed; however,
you may remove one to make raising the cooktop easier.
There are two side supports that lock into position when
the cooktop is lifted up.
After cleaning under the cooktop with hot, mild soapy
water and a clean cloth, lower
WKHFRRNWRS%HFDUHIXOQRWWR
pinch your fingers.
To lower the cooktop, push the
rods back and gently lower the
cooktop until it rests in place.
When properly seated, the locking tab
should lock onto the cooktop rim through
the notch in the drip pan.
Locking Tab
Cooktop Rim
Drip pan
Surface unit
Receptacle
Drip Pan
Locking
Tab
Surface Unit
Locking Tab
Be sure all surface units
are turned off before
raising the Cooktop.