Installation Instructions
CHECK IGNITERS
Operation of the electric igniters should be
checked after the cooktop and supply line
have been carefully checked for leaks and
the cooktop has been connected to the
electrical power.
On models so equipped, check to be sure the
cooktop is in the UNLOCKED position.
r_ Push and turn a burner valve to the LITE
position. All spark igniters will make a
series of sparks (ticking sounds), but only
the burner turned to LITE will light.
• The burner should light when gas is
available to the burner.
• Once the burner lights, it should be
turned out of the LITE position.
[] Try each valve separately until all
burners have been checked.
BURNER IGNITION
Cooktop Spark IgnitionmWhen you turn
the cooktop knob to LITE, the spark igniter
makes a series of electric sparks (ticking
sounds) which light the burner. During a
power failure, the burners will not light
automatically. In an emergency, a cooktop
burner may be lit with a match by following
the steps below.
_4,WARNING: Lightinggasburners
with a match is dangerous. You should
match light the cooktop burners only in
an emergency.
On models so equipped, check to be sure the
cooktop is in the UNLOCKED position.
r_ Light a match and hold the flame near
the burner you want to light. Wooden
matches work best.
Push in and turn the control knob slowly.
Be sure you are turning the correct knob
for the burner you are lighting.
NOTE: If the burner does not light within five
seconds, turn the knob off and wait one minute
before trying again.
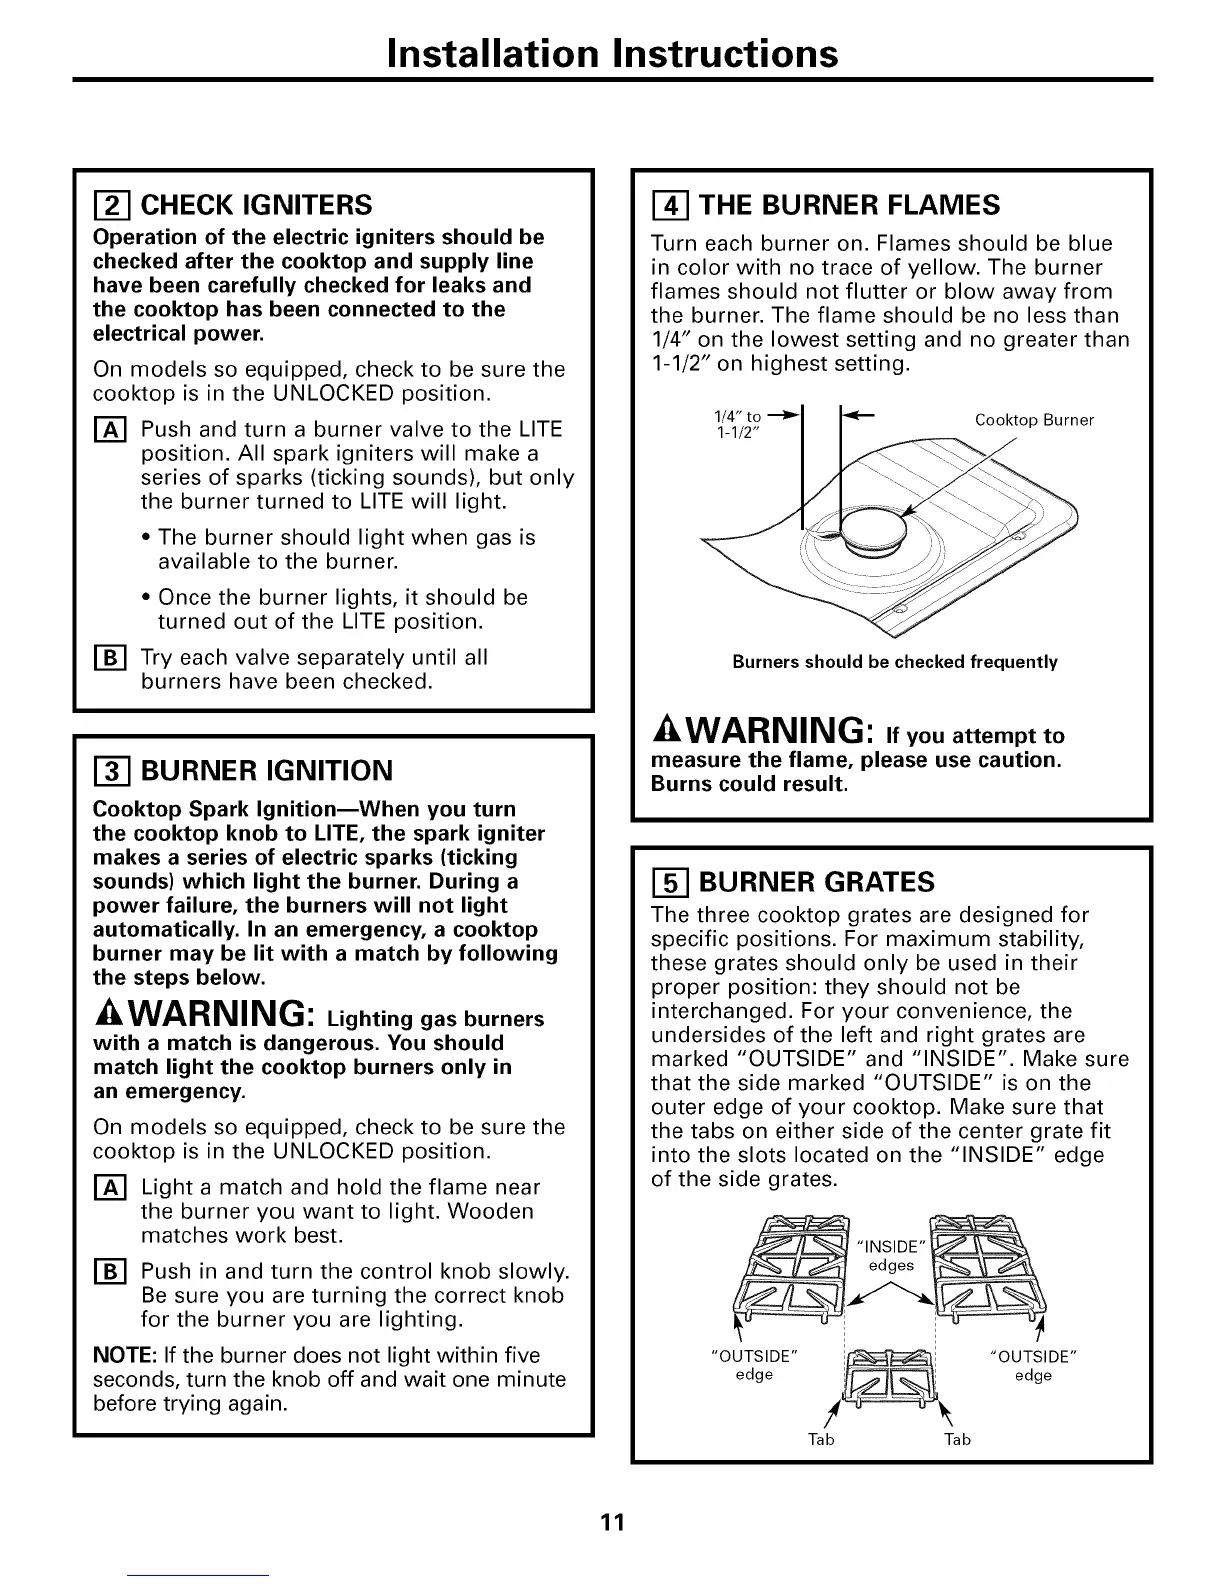
THE BURNER FLAMES
Turn each burner on. Flames should be blue
in color with no trace of yellow. The burner
flames should not flutter or blow away from
the burner. The flame should be no less than
1/4" on the lowest setting and no greater than
1-1/2" on highest setting.
1/4" to _ Cooktop Burner
1-1/2" /
Burners should be checked frequently
^ WARNING: Ifyouattempt to
measure the flame, please use caution.
Burns could result.
BURNER GRATES
The three cooktop grates are designed for
specific positions. For maximum stability,
these grates should only be used in their
proper position: they should not be
interchanged. For your convenience, the
undersides of the left and right grates are
marked "OUTSIDE" and "INSIDE". Make sure
that the side marked "OUTSIDE" is on the
outer edge of your cooktop. Make sure that
the tabs on either side of the center grate fit
into the slots located on the "INSIDE" edge
of the side grates.
11
 Loading...


