and spatterstire efwyto
removef walk and fkor’.
‘- That’sbecause there’slittleheat
~ exceptin the food, or sometimesin
the utensil. Some spatterswipeup
‘itha paper towel, some may
quire a damp cloth. Remove
greasy spatters with a sudsycloth,
then rinse and dry.
r+33VER
I A
OVEN
FART
OFMXIR CWEN,
wipe upspattersonthi window
ontheinsideQfthedoordaily,
Washwindow,when it’ssoiled,
with a minimum of sudsy,warm
water. Rinse thoroughly and dry.
wipe metal and plastic parts on
the inside Ofthe door frequently.
Use a damp cloth to removeall
soil. DO NOT USE A13RASIVES,
such as cleaning powdersor steel
and plastic pads. They may mar the
surface.
Door Surface. When cleaning
surfaces of door and oventhat
come together on c~osingthe door,
—
use only mild, nonabrasive soaps
or detergents applied with a sponge
—
or soft cloth.
sing a Brown ‘N sear Dish?
se I&mAmi@brand cieanwx=.
igh heat generated on the bottom
of the Brown ‘N Sear Dish can
cause scorched appearing stainsto
bake onto the floor if grease is
present. These may be removed
with Bon Ami@brand cleanser.
After using thiscleaner, rinse and
dry thoroughly,followinginstructions
on can. Do not use it on the painted
NJrf!!cessuch as the walls—itmay
scratch the paint.
~~’~~
The ovenis vented through a duct
that’slocated on the right sideof
the ovenjust abovethe door handle
(see page 7). Moisture and vapors
from,the ovenare ventedthrough it
whenovenis in use. Nevercoverthe
hole in the duct. Todo so prevents
it fkomfunctioningproperly during
cooking and cleaning.
L
C.AmON: BeforeI=epkacingymr
oven
kmp hdb9 dis(xm’md the
ektric
pm%’er f your Cooking
centeratthe
m fuse or c
breakerprBesure to let the
kunpcoverandbulbcoolcompletely
before removing or replacing them.
The ovenlamp (bulb)is covered
with a glass removablecover which
is heki~n place with a bail-shaped
wire. Removeovendoor, ifdesired,
to reach cover easily.
TOremove:
@Hold hand undercover soitdoesn’t
fhllwhen released. With fingersof
same hand, firmly push back wire
bail untilit clears cover. Liftoff
cover. DO NOI’ REMOVE ANY
SCREWS TO REMOVE COVER.
@Replace bulb with 40-watthome
appliance bulb.
T H!phx?cover:
@Place it into grooveof lamp
receptacle. Pull wire bail forward
to center of coveruntil it snaps into
place. When in place, wire holds
coverfirmly. 13ecertain wire bail is
in depression in center of cover.
@Connect e~ectricpower to oven.
——
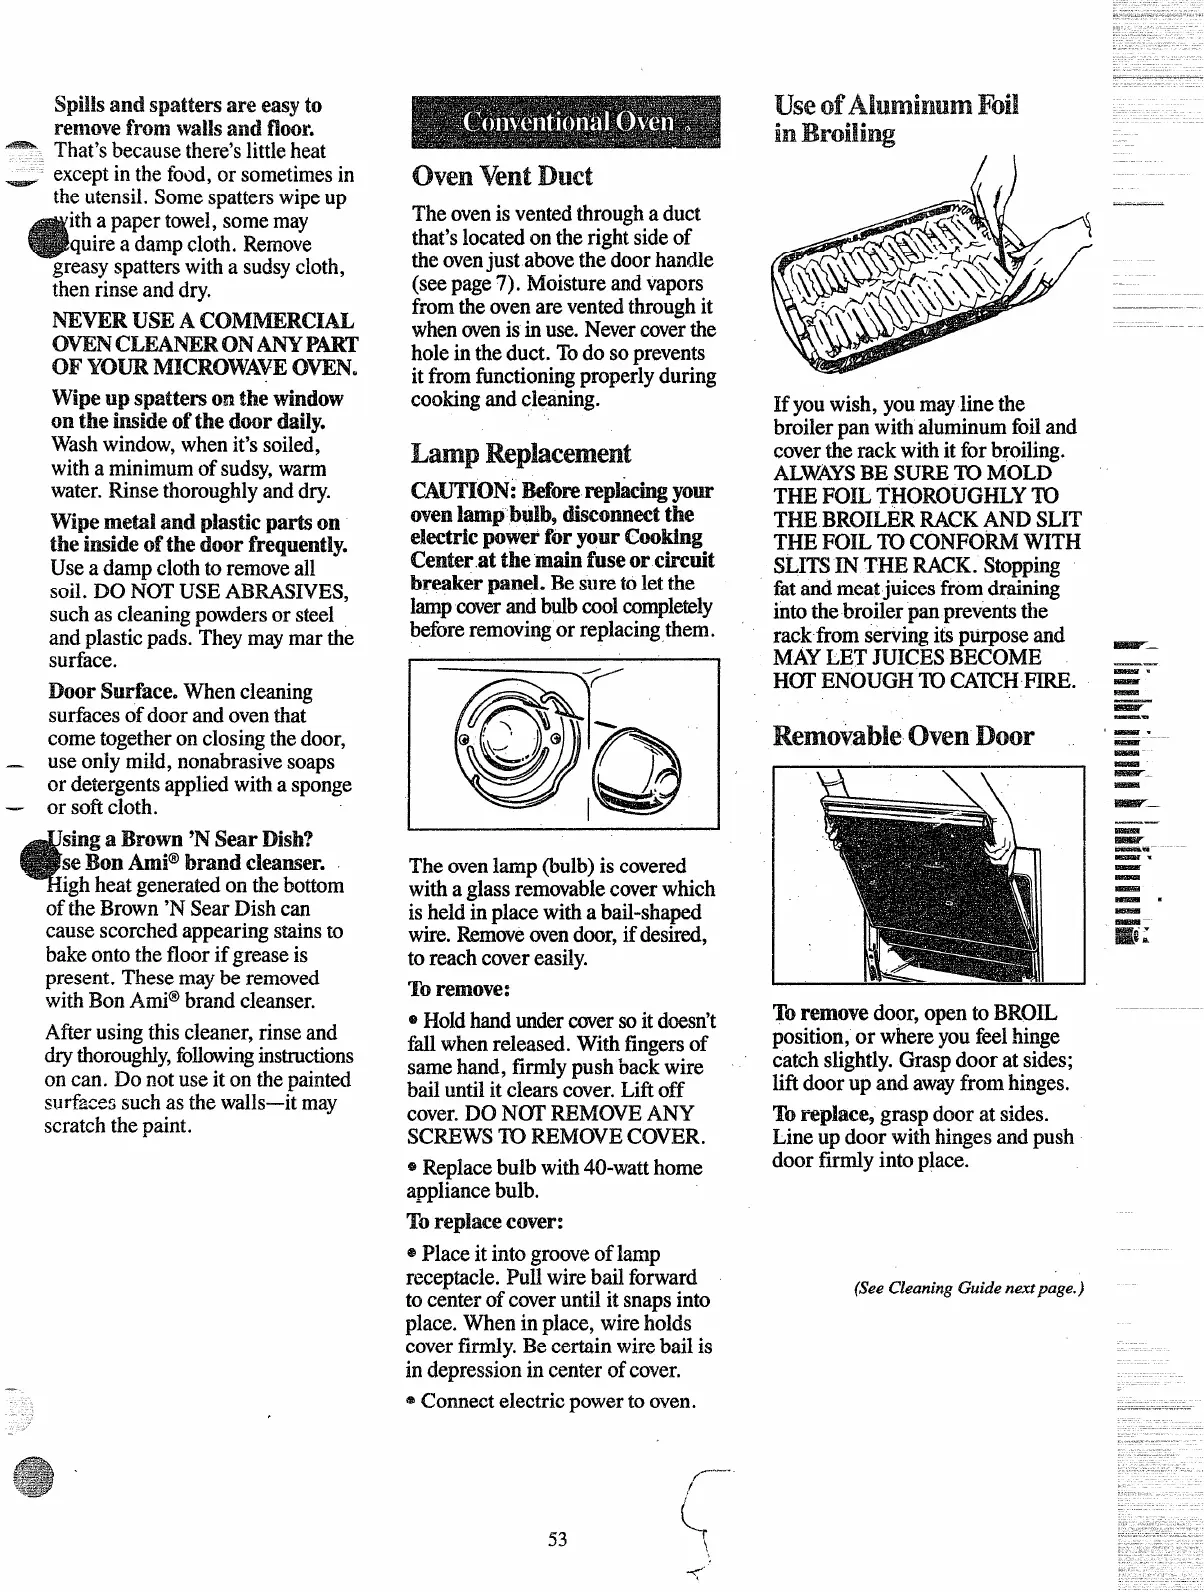
If you wish, you mayline the
broiler pan with aluminum foil and
coverthe rack with it for broiling.
ALWAYS13ESURE ‘IX)NIOLD
THE IKXLTH(XUXJGHLY TO
THE 13R0HJ3RRACK&Wl SLIT
THE HXL ’10 CXXWWRMWITH
SLITS IN THE RACK. Stopping
fat and meat juices from draining
into the broiler pan prevents the
rack horn serving its purpose and ~–
MAYLET JUKXlS13EC0ME —–
EKYI’
13N0UGH’10CATCHFIRE. = -
D
‘Eoremove door, open to BROIL
position, or where~ou. feel hinge
catch slightly. Grasp door at sides;
lifi door up and awayfrom hinges.
TOIFeplace, grasp door at sides.
Line up door with hinges and push
door firmly into place.
(See Cleaning Guide nextpage.)
y’ ‘
 Loading...