Installation Instructions
DAMAGE - SHIPMENT/INSTALLATION
• If the unit is dmnaged in shipment, return the unit to the
store in which it was bought for repair or replacement.
• If the unit is dmnaged by the customer, repair or
replacement is the responsibility of the customer;
• If the refit is dmnaged by the installer (if other than
the customer), repair or replacement must be made
by arrangement between customer and installe_:
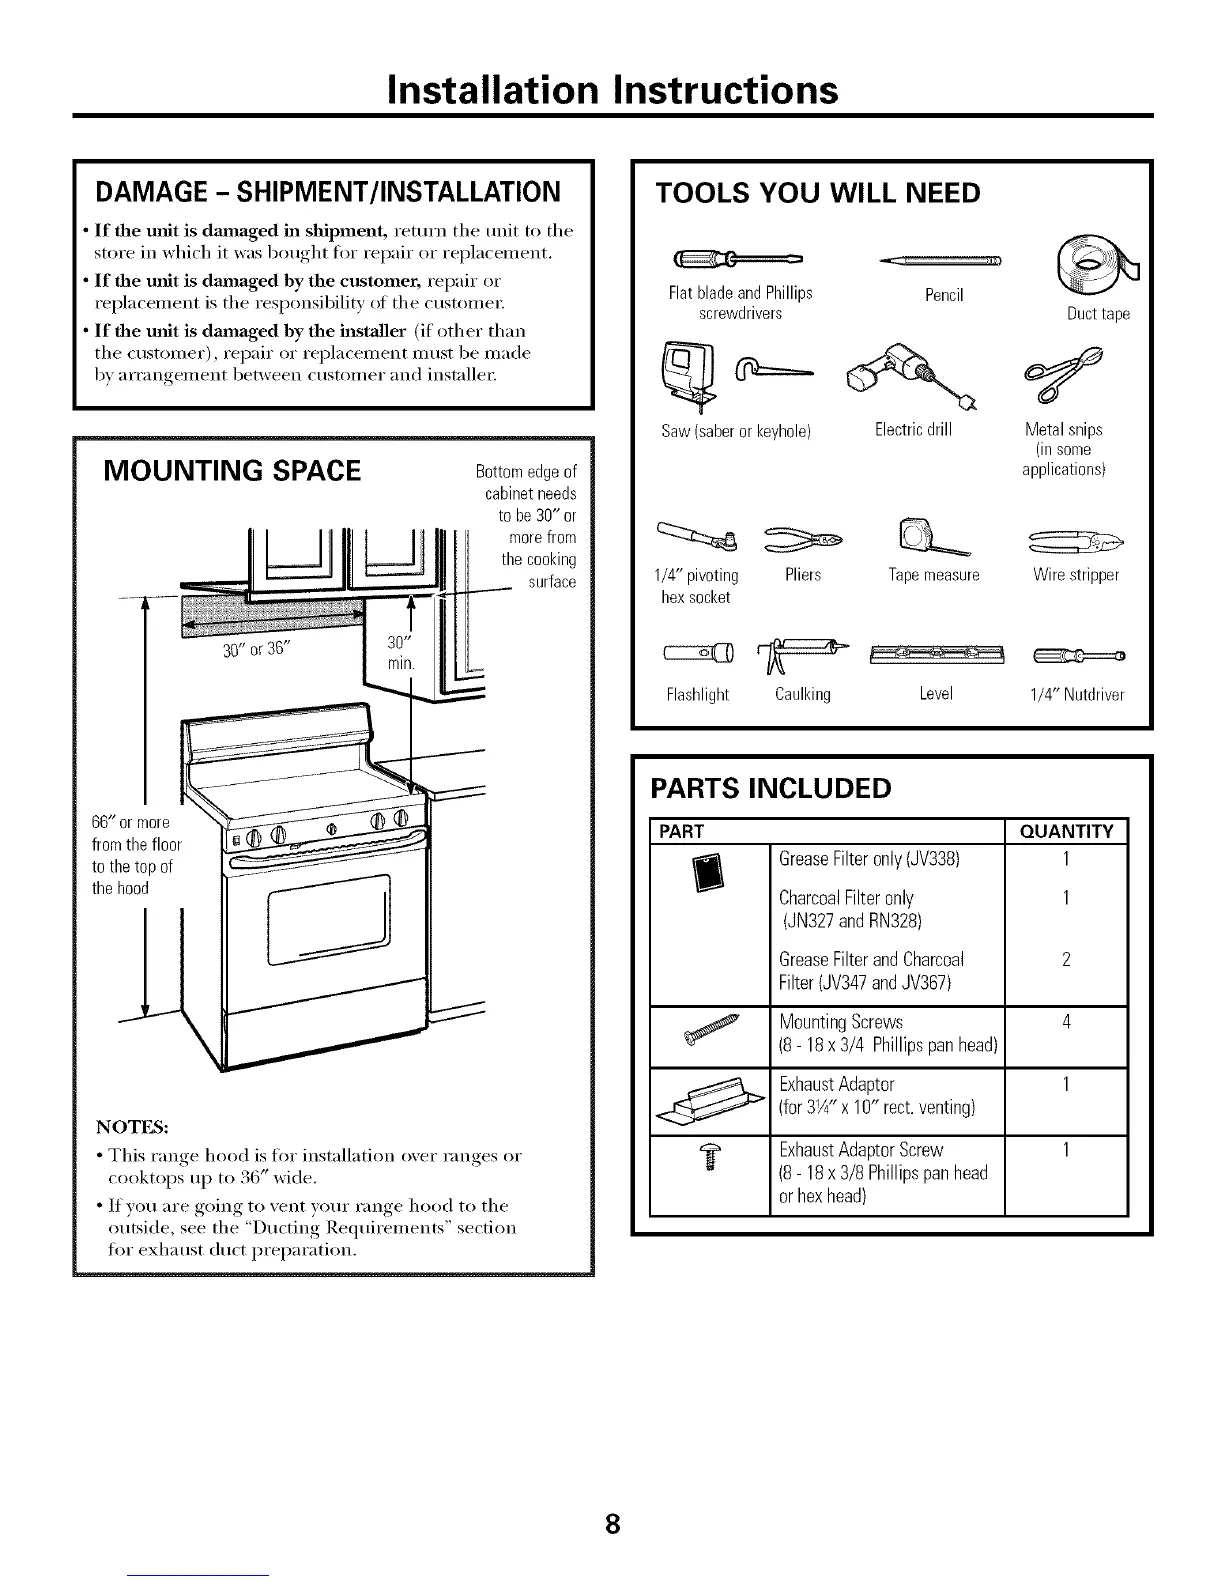
MOUNTING SPACE
...._ L
Bottomedgeof
cabinetneeds
to be30" or
_j morefrom
the cooking
surface
66" or more __
from the floor
to the top of
the hood
NOTES:
• This range hood is for installation over ranges or
cooktops up to 36" wide.
• If w)u are going to vent your range hood to the
outside, see the "Ducting Requirements" section
fl)r exhaust duct preparation.
TOOLS YOU WILL NEED
Flatbladeand Phillips
screwdrivers
Pencil
Duct tape
Saw (saber or keyhole) Electric drill Metal snips
(in some
applications)
1/4" pivoting Pliers Tapemeasure
hex socket
Wire stripper
Flashlight Caulking Level 1/4" Nutdriver
PARTS INCLUDED
PART
ExhaustAdaptorScrew
(8- 18x3/8 Phillipspanhead
orhexhead)
GreaseFilteronly(JV338)
CharcoalFilteronly
(JN327andRN328)
GreaseFilterandCharcoal
Filter(JV347andJV367)
MountingScrews
(8- 18x3/4 Phillipspanhead)
ExhaustAdaptor
(for3X" x 10"rect.venting)
QUANTITY
1
1
2
4
1
1
8