– 34 –
Rear Access Panels
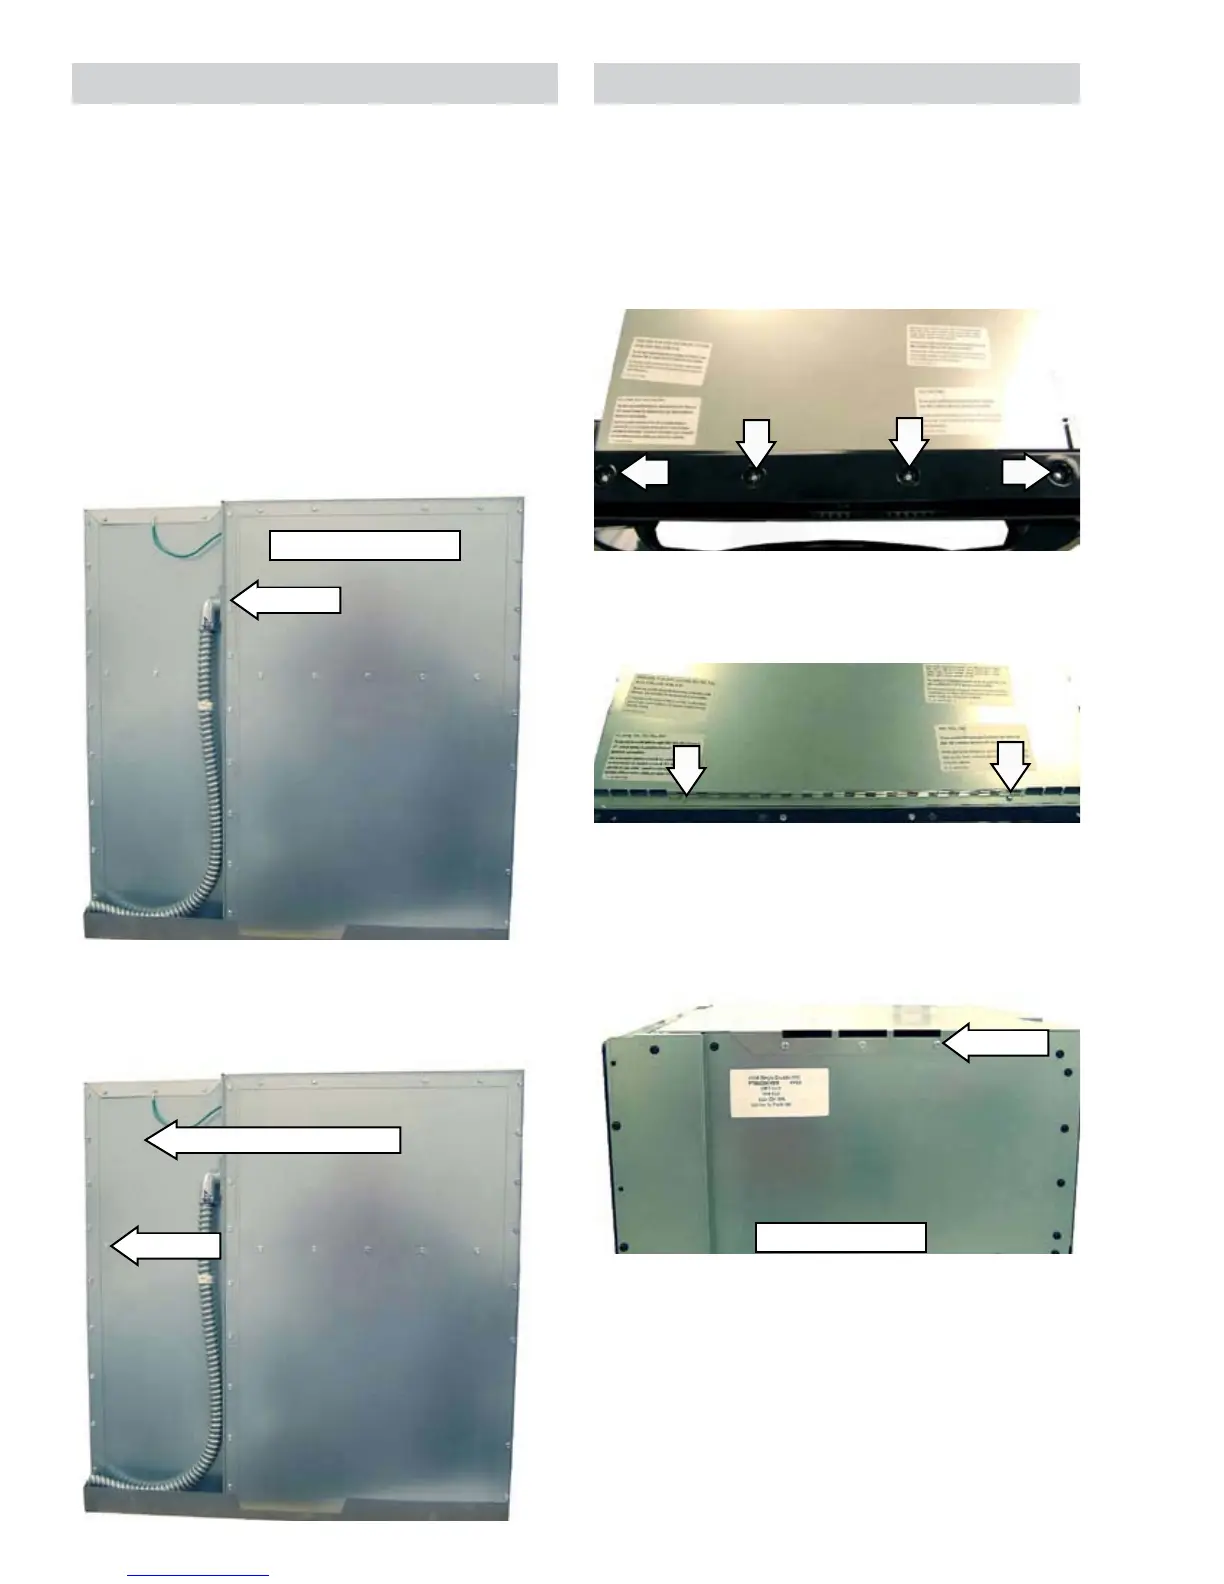
There are two rear access panels: the main rear
access panel and the secondary rear access panel.
To remove many of the oven components, it is
necessary to remove one or both of the rear access
panels.
To remove the rear access panels:
Remove the oven. (See 1.
Oven Removal.)
To remove the main rear access panel, remove 2.
the twenty-five 1/4-in. hex-head screws that
hold the main rear panel in place.
1 of 25
Main Access Panel
3. To remove the secondary rear access panel,
remove the twenty-five 1/4-in. hex-head screws
that hold the secondary rear panel in place.
1 of 25
Secondary Access Panel
Top Access Panels
To remove the top access panels:
Remove the oven. (See1. Oven Removal.)
Remove the four 1/4-in. hex-head screws that 2.
hold the top trim in place.
3. Remove the two 1/4-in. hex-head screws from
the top of the top access panel.
4. Remove the fifteen 1/4-in. hex-head screws
from the sides and back of the oven that hold
the top access panel in place. There are 4
screws on the left side, 3 screws on the right
side and 8 screws on the back of the oven.
1 of 15
Right Side Shown
(Continued next page)





 To Next Page