Sto-e Drawers (continued)
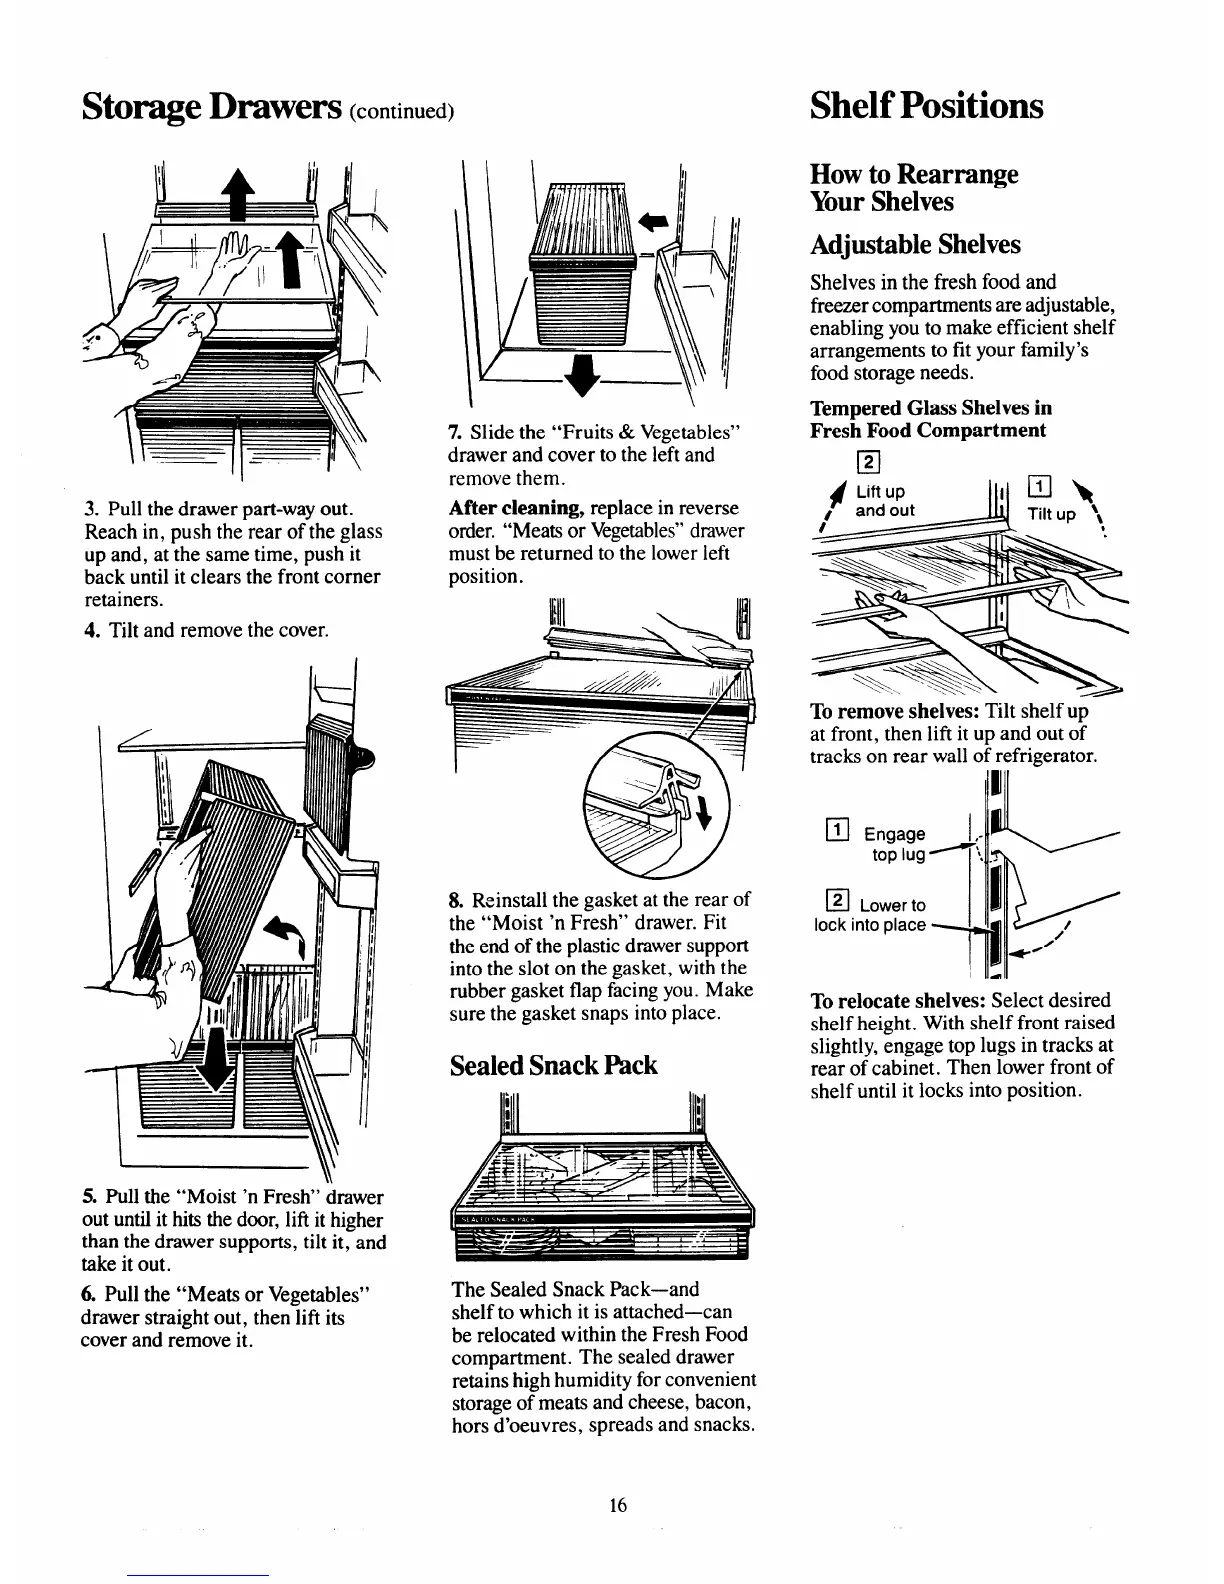
7. Slide the “Fruits& Vegetables”
drawer and cover to the left and
remove them.
3. Pull the drawer part-way out.
Reach in, push the rear of the glass
up and, at the same time, push it
back until it clears the front corner
retainers.
4. Tilt and remove the cover.
After cleaning, replace in reverse
order. “Meats or Vegetables” drawer
must be returned to the lower left
position.
8. Reinstall the gasket at the rear of
the “Moist ‘n Fresh” drawer. Fit
the end of the plastic drawer support
into the slot on the gasket, with the
rubber gasket flap facing you. Make
sure the gasket snaps into place.
Sealed Snack Rack
5. Pull the “Moist ‘n Fresh” drawer
out until it hits the door, lift it higher
than the drawer supports, tilt it, and
take it out.
6. Pull the “Meats or Vegetables”
drawer straight out, then lift its
cover and remove it.
I N
\
The Sealed Snack Pack—and
shelf to which it is attached-can
be relocated within the Fresh Food
compartment. The sealed drawer
retains high humidity for convenient
storage of meats and cheese, bacon,
hors d’oeuvres, spreads and snacks.
Shelf Positions
How to Rearrange
YourShelves
Adjustable Shelves
Shelves in the fresh food and
freezercompartments are adjustable,
enabling you to make efficient shelf
arrangements to fit your family’s
food storage needs.
Tempered Glass Shelves in
Fresh Food Compartment
H
—
To remove shelves: Tilt shelf up
at front, then lifl it up and out of
tracks on rear wall of refrigerator.
To relocate shelves: Select desired
shelf height. With shelf front raised
slightly, engage top lugs in tracks at
rear of cabinet. Then lower front of
shelf until it locks into position.
16