Getting started with Vivid E9
1. Circuit breaker
Assure switch is in the on position on rear of system
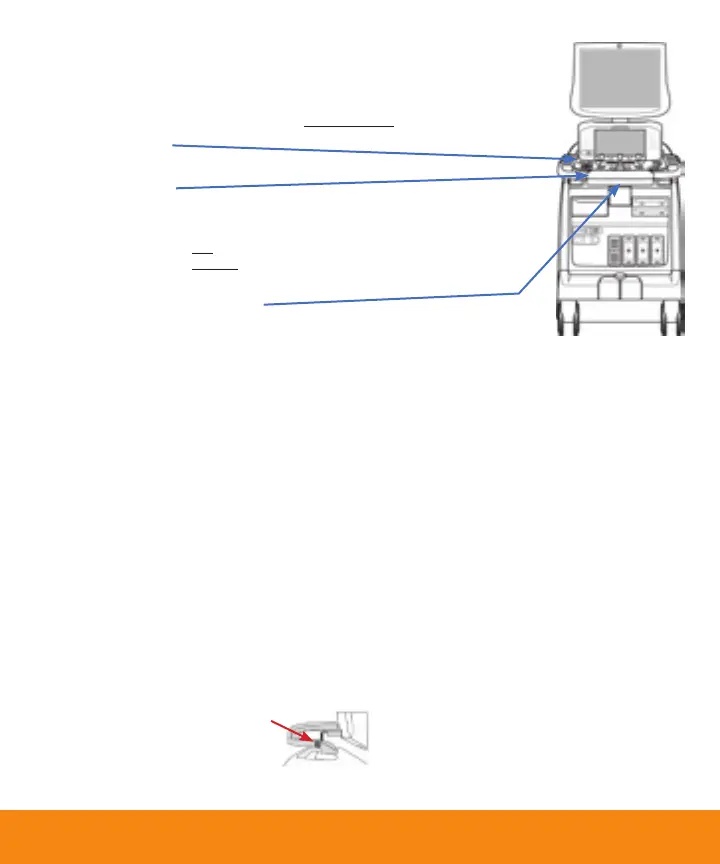
2. Power on/off
On top left corner of control panel
3. Control panel
Outer button: Press and hold this brake release for floating control panel
DO NOT transport system with control panel in free position
Inner button: Press top portion of the button to move control panel up
Press bottom portion of the button to move control
panel down
4. Alpha-numeric keyboard
Push corners of black keyboard under control panel to lock/unlock
the keyboard
5. Probe ports
Only use far right port for 4D imaging
transducer
6. Wheels and brakes
Left pedal: swivel lock
Right pedal: brake
Middle pedal: brake release
7. Monitor lock (on adjustable arm)
• Turn release counter clockwise to unlock
• Turn release clockwise to lock
• Grab top of monitor to adjust
angle for viewing
• DO NOT transport system with LCD
in free position
8. Start a new exam
• Press Patient on control panel
• Enter patient information
• Select Create Patient
9. Probe selection
Press Probe key on left side of control panel
to select transducer and application
10. Touch panel
Intuitive ‘‘one touch’’ user interface for
modes and measurements
11. End exam
• Press Patient on control panel
• Select End Exam
Getting started
(Getting started with Vivid E9 – cont.)