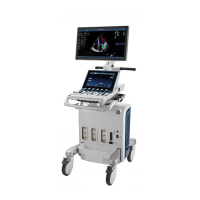
Quick Card Vivid S60 / S70
On/Off button
To switch on the unit
Press the On/Off button (2) on the top left of the control
panel.
After initialization the default scanning screen is
displayed.
During the boot-up process the system may require the
user to enter a password to operate it.
By factory Login default, the Operator ID is USR and there
is no need to enter a password.
To switch off the system
Press the on/off button (2) on the top left of the control
panel.
The Exit dialogue window is displayed. Select Shutdown.
The shutdown process takes a few seconds and is
completed when the color of the on/off button changes
from green to amber.
TGC screen activation
The sliders nearest the operator (4) affect the far field.
TGC amplifies returning signals to correct for the
attenuation caused by tissue at increasing depths.
Touch Panel
Touch to select on the touch panel (1).
Rotaries can be rotated or pressed to adjust parameters.
Active mode gain
Rotate (3) to adjust gain in the active mode (2D, M-
Mode, Color, PW/CW, TVI).
2D Gain
When rotated clockwise (5), increases the overall gain
applied to the received echo signals equally for all depth.
Cursor
1. Press Cursor (7) on the control panel. A cursor line is
displayed on the 2D image.
2. Select the cursor type on the Touch panel.
3. With the trackball (9.1) adjust the position of the
cursor line.
4. Activate the desired mode.
M-Mode
2D
Press 2D (8.1) on the control panel to access 2D mode.
1. To access M-Mode from any other scan mode, press
MM (8.2) on the control panel.
2. Use the trackball (9.1) to position the cursor over the
required area of the image.
3. Press Freeze (17).
4. Use the trackball to scroll through the data acquired.
Auto (Auto-tissue, ASO)
Press Auto (6) on the Control panel to activate Automatic
Optimizations (Auto Tissue/Automatic Spectrum
Optimization).
Two Auto Tissue settings are available:
• Soft: optimizes the radial and lateral uniformity and
brightness of the tissue continuously in real-time.
• Sharp: further enhances the image display by optimizing
the gray scale curve.
The Auto Tissue (AT) setting (Soft or Sharp) can be turned
on/off by pressing Auto on the Control panel. The last used
setting is then applied. The Auto Tissue setting is
preserved when switching to 2D duplex mode.
The Auto Tissue settings are only available in live scanning
and cannot be turned off when the image is stored.
Automatic Spectrum Optimization (ASO) is used to
automatically adjust baseline and scale of the PW/CW
spectrum to optimize the spectral display. It will avoid the
display of a folded spectrum and stretch the spectrum
vertically as large as possible. ASO optimization is not
continuous but performed instantaneously each time Auto
is pressed.

 Loading...