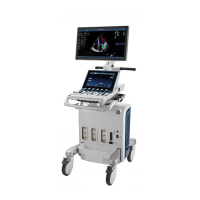
Quick Card Vivid S60 / S70
Zoom
Display zoom
1. Rotate the Zoom knob clockwise (13). The resulting
magnified image appears in the acquisition window.
An un-magnified image is displayed in the right
corner showing the outlined zoomed region.
2. Use the trackball (9.1) to position the zoom area
over the desired portion of the image.
3. To turn off the Display zoom, rotate the Zoom knob
counter clockwise.
High Resolution zoom
1. Press the Zoom knob (13).
2. Use the trackball (9.1) to position the zoom area
over the desired portion of the image.
3. Increase size as desired by turning the Zoom knob
clockwise.
4. Press Zoom one more time to turn off the HR zoom.
Clear
Press Clear (14) on the control panel. The text annotation
is erased. If text annotation contains a yellow portion,
typed previously, and a green portion which is the
currently typed text, the first press on Clear erases green
text. A second press erases the yellow text.
Depth
Rotating the depth knob (15) sets the maximum (far field)
distance that will be imaged. Decreasing the depth may
allow higher frame rates.
To print an image:
1. Press P1 (16) on the Control panel.
The image displayed on the screen is printed on the
printer, depending on the key assignment configuration.
P1 button configuration:
NOTE: The P1 button on the Control panel can be
configured to perform several actions (e.g. Video Print,
Laser print, DICOM storage...etc.).
1. Press Utility/Config on the Touch panel
2. Select the Connectivity category and Additional
outputs subgroup
3. In Button field select P1
4. Select an output device in the Available output field
and press the Right arrow button to assign the
device to the selected button
5. Adjust the device specific parameters and select OK
6. Adjust the image specific parameters
P1 (Print, Capture)
Freeze & 2D Freeze
1. Press Freeze (17).
The left and right markers are displayed on either
side of the last detected heart cycle on the ECG
trace.
2. Press 2D
The selected heart beat is played back.
3. Press 2D to freeze the cineloop.
4. Use the trackball to scroll through the acquisition
and find the sequence of interest.
5. Adjust Cycle Select and Num Cycles on the touch
panel.
6. In Freeze, press Set left or Set right to set the
corresponding cineloop boundary to the current
frame.
7. Adjust Left marker and Right marker to trim or
expand the cineloop boundaries.
8. Press 2D to run the cineloop and Store to store the
cineloop or Freeze to return to live scanning.
NOTE: Cineloop storage can be configured to store heart cycles
with additional time before and after the R-wave and to
display a preview before storage ( ‘Global imaging settings’)

 Loading...