10
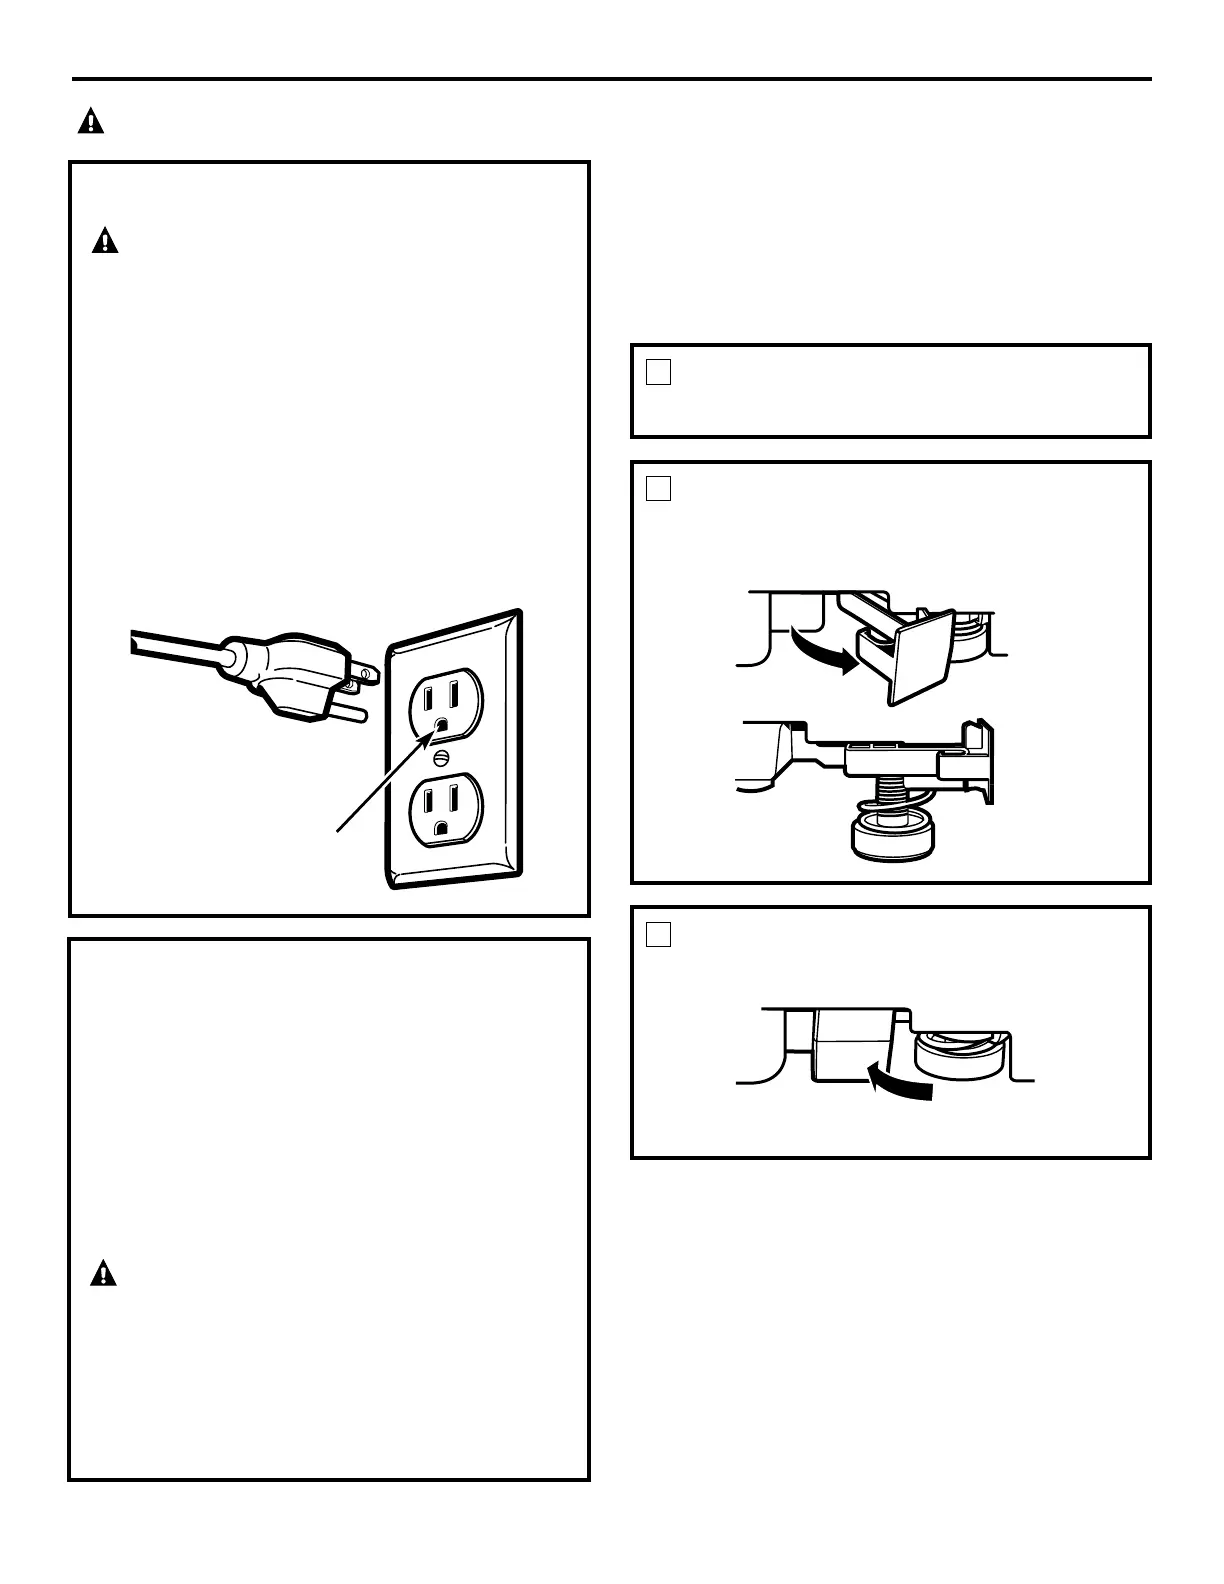
CAUTION: For personal safety, do
not use an extension cord or adapter plug with this
appliance.
Do not, under any circumstances, cut or remove the
third grounding prong from the power cord. Follow
National Electrical Codes or prevailing local codes
and ordinances.
This appliance must be supplied with the voltage and
frequency indicated on the rating plate (located on the
back of the washer), and connected to an individual,
properly grounded branch circuit, protected by a
15 or 20 amp circuit breaker or time-delay fuse.
If the electric supply provided does not meet the above
requirements, call a licensed electrician.
ELECTRICAL REQUIREMENTS
Installation Instructions
This appliance must be grounded. In the event of a
malfunction or breakdown, grounding will reduce
the risk of electric shock by providing a path of least
resistance for electrical current.
This appliance is equipped with a cord having an
equipment grounding conductor and a grounding
plug.
The plug must be plugged into an appropriate outlet
that is properly installed and grounded in accordance
with all local codes and ordinances.
DANGER: Improper connection of the
equipment-grounding conductor can result in a risk of
electrical shock. Check with a qualified electrician if
you are in doubt as to whether the appliance is
properly grounded.
Do not modify plug with this appliance; if it will not fit
the outlet installed, have a proper outlet installed by a
qualified electrician.
Insure proper ground
exists before use
CAUTION: Before plugging in washer, read the following electrical requirements.
GROUNDING INSTRUCTIONS
Before connecting the hoses, the washer must be level.
Leveling locks are located at the bottom front of the
left and right sides of the washer.
LEVELING THE WASHER—
STATIONARY MODELS
MAKE SURE THE WASHER IS IN
ITS FINAL LOCATION
1
PULL OUT THE LEVELING LOCKS
2
This releases the spring loaded leveling feet. The
washer will automatically level itself.
PUSH THE LEVELING LOCKS
BACK IN
3
Do not kick or step on the leveling locks.
 Loading...