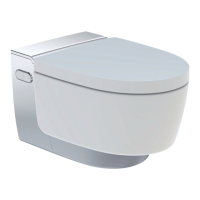
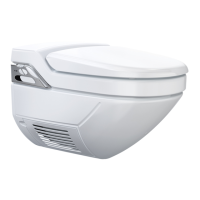
Do you have a question about the Geberit AquaClean Mera Comfort 146.210.11.1 and is the answer not in the manual?
| Rimless WC ceramic appliance | Yes |
|---|---|
| WC seat with automatic opening and closing | Yes |
| Heated WC seat | Yes |
| Adjustable spray arm position | Yes |
| Oscillating spray | Yes |
| Pulsating spray | Yes |
| Automatic pre- and post-cleaning of the spray nozzle with water | Yes |
| Descaling programme | Yes |
| Warm air dryer | Yes |
| Odour extraction with ceramic honeycomb filter | Yes |
| Odour extraction can be activated | Yes |
| Infrared user detection | Yes |
| Remote control | Yes |
| Power supply connection | 230 V |
| Approval according to | EN 1717 |
| Protection class | I |
| Protection degree | IPx4 |
| Nominal voltage | 230 V |
| Mains frequency | 50 Hz |
| Power consumption standby | 0.5 W |
| Operating temperature | 5 - 40 °C |
| Maximum load WC seat | 150 kg |
| Flushing System | Dual flush |
| Bidet Functions | Yes |
| Drying Function | Yes |
| Seat Heating | Yes |
| Color | White |
| Installation Type | Wall-mounted |
| Manufacturer Warranty | 2 years |
| Flush Volume | 3/6 liters |
| Material | Ceramic |
| Power Supply | Concealed |
| Type | Wall-hung |
Visual checks and diagrams for ensuring correct installation and compatibility with different models.
Instructions for unboxing and placing the first components during installation.
Detailed steps for mounting the unit, connecting water supply, and positioning.
Instructions for connecting the water supply hoses to the device and plumbing.
Installation steps specific to Sigma cisterns, including required components and page references.
Installation steps specific to Omega/Kappa cisterns (82cm/98cm), with page references.
Installation steps specific to Omega PEX cisterns, including required components and page references.
Installation steps specific to Geberit Monolith installations, with page references.
Detailed steps for making water connections for Sigma cistern installations.
Detailed steps for making water connections for Omega/Kappa cistern installations.
Detailed steps for making water connections for Omega PEX cisterns.
Detailed steps for making water connections for Geberit Monolith installations.
Diagrams illustrating the process of connecting the device to the water inlet.
Diagrams showing how to connect the device to the waste pipe, including measurements.
Step-by-step assembly of components for the water inlet connection.
Instructions for attaching the main body of the shower toilet to the mounting frame.
Steps for final hose connections and securing the main unit after mounting.
Instructions for making the final electrical and water connections, including a diameter check.
Testing the functionality of the spray nozzle after installation.
Testing the water supply connection and flow after installation.
Detailed steps for conducting the water supply test, including connection checks.
Instructions for mounting the flush plate onto the wall or frame.
Identifying specific components related to the flush actuator installation.
Instructions for attaching the toilet seat and lid to the main unit.
Final steps for securing the toilet seat assembly to the main unit.
Adjusting components related to the toilet seat and lid.
Instructions for fitting the main lid onto the toilet seat assembly.
Instructions for final tightening of all installed components.
Performing final inspections and securing the unit after installation.
List of prerequisites that must be met before switching on the device.
Steps for lifting the design cover and switching the device on.
Instructions for closing the design cover after functional testing.
Steps for inserting the battery and operating the remote control.
Procedure for re-assigning the remote control to the device.
Testing the automatic flush function with the optional interface module.
Testing the anal shower function, including nozzle cleaning and spray arm extension.
Verifying that the shower water is heated correctly.
Checking if the spray intensity can be adjusted during a shower cycle.
Testing the Lady shower function, including nozzle extension and spray start.
Testing the <Shower> button for the anal shower function.
Testing the <+> and <-> buttons for adjusting spray intensity.
Testing the <left> and <right> arrow keys for spray arm position.
Testing the button combination for activating oscillating spray.
Testing the <Lady shower> button to start and interrupt the shower.
Testing the <Dryer> button for arm extension and warm air drying.
Testing the activation of the odour extraction unit.
Testing the <User profile> buttons for saving and recalling settings.
Prerequisite for resetting the storage water heater, related to temperature cut-out.
Procedure to reset the thermal cut-out of the storage water heater.
Activating the shower procedure after resetting the water heater.
Re-mounting the front cladding after reset procedures.
Testing the automatic lid lifting and closing functions of the Comfort model.
Verifying the heating function of the WC seat.
Checking the status of the storage water heater via the control panel LED.
Activating the lid lifter using the remote control's <Shower> button.
Prerequisites and steps for accessing settings, selecting language, and setting water hardness.
Configuring system flush, orientation light, and WC lid detection range.
Saving adjusted settings and confirming correct device installation.
Prerequisites for settings and configuration steps for the Classic model, including language and water hardness.
Final steps for commissioning the Classic model, including device preparation and cleaning.
Prerequisites for handover, attaching serial number sticker, and providing user documentation.
Instructing the customer on operation and cleaning, and completing the warranty card.
