EasyManua.ls Logo

Geevon 22116 User Manual

Geevon 22116
2 pages
To Next Page IconTo Next Page
Page #1 background imageLoading...
Page #1 background image
1. Auto-dim Atomic Clock
2. Instructions Manual
Getting started
Inserting the batteries
• Place 2xAAA batteries into the clock.
Note:
• Do not place the clock in direct sunlight as this
will give you an inaccurate temperature reading.
Replacing Batteries:
• We recommend using high quality batteries for
the best product performance.
• Heavy duty or rechargeable batteries are not
recommended.
•The outdoor sensor requires lithium batteries in
low temperature conditions. Cold temperatures
would cause alkaline batteries workimproperly.
• Do not mix old and new batteries. Do not mix
alkaline, standard, and rechargeable batteries.
Low Battery Indicator:
If the low battery indicator is displayed on the
LCD for either the outdoor sensor or the display
unit, immediately change the batteries to prevent
disruptions in communications of the devices.
Default settings
1.Default time: 12:00(US)
2. Default date: 01/01 (Year: 2019, date form:
M/D[US])
3. Default temperature: °F(US)
4. Default alarm: AM 6:00, AM 7:00.
5. Default snooze time: 5min.
6. Default week: TU
Note:
The LCD display fully for 2 seconds with backlight
when changing new battery or resetting, then with
a sound BI into the standard mode.
Operation
TIME SETTING
a. In the standard mode, hold and press “SET” for
2 seconds to enter time setting, Digits to be set
are flashing.Press UP or DOWN button to change
the value.
b. Setting order: RCC ON/OFF→12/24HR→Time
zone→DST ON/OFF→Hour→Minute→MD/DM→
Year→Month→Day →Exit .
c. Press “SET” or no key handling for 10s,will exit
and save the setting.
d. Press “UP” once and ahead at one step; press
and hold for 2 seconds, go ahead at an 8
step/second speed.
e. Press “DOWN” once and back at one step,
GEEVON Auto-Dim Atomic Clock
Item No.22116
User Manual
Thank you for purchasing 22116 Auto-Dim
Atomic Clock
Please take a moment to read this guide and
store it for future reference.
Controls and Buttons:
1. SNOOZE/LIGHT button
2. Alarm time 1 ON/OFF switch
3. Alarm time 2 ON/OFF switch
4. Time display
5. Date
6. Week
7. Temperature
8. Alarm time 1
9. Alarm time 2
10. SET button
11. UP button
12. DOWN button
13. Alarm button
14. AUTO LIGHT ON/OFF switch
15.Battery Compartment 2xAA (batteries not
included)
Package Contents:
3
1
2
8
6
4
5
10
14
15
11 12 13
7
9
Question and Answer IconNeed help?

Do you have a question about the Geevon 22116 and is the answer not in the manual?

Geevon 22116 Specifications

General IconGeneral
BrandGeevon
Model22116
CategoryClock
LanguageEnglish

Summary

Getting Started

Inserting the Batteries

Instructions for inserting 2xAAA batteries into the clock unit.

Battery Replacement and Care

Recommendations for high-quality batteries and notes on heavy-duty or rechargeable batteries.

Low Battery Indicator

Explanation of the low battery indicator and the need to change batteries promptly.

Default Settings

Default Clock and Alarm Configuration

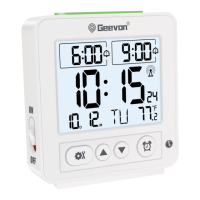
Details the default time, date, temperature units, alarm times, snooze duration, and week setting.

Operation and Features

Time Setting

Step-by-step guide to setting the clock time, including order of settings and button functions.

Alarm Setting

Instructions on how to set and enable/disable Alarm 1 and Alarm 2.

RCC Function

Details on manual receiving of RCC signal and automatic syncing times.

Time Zone and DST Mode

Information on selecting time zones and enabling/disabling Daylight Savings Time.

Temperature Unit and Range

How to select temperature units (°C/°F) and the operational temperature range.

Auto Light Function

Instructions on how to activate the automatic backlight feature.

Care and Maintenance: Placement Guidelines

Crucial advice on placing the clock for accuracy, reception, and preventing interference.
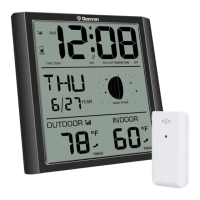
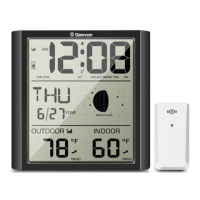
Related product manuals