The following initial oil and filter changes should be
made at this time on a new machine. Thereafter these
changes should be made at the regular maintenance
schedule listed. Refer to those schedules for proce-
dures necessary.
Engine Oil and Filter (250 Hours)
Transmission Filter (1000 Hours)
Hydraulic Oil Filter (1000 Hours)
NOTE: Perform all other service requirements
up to this point as well as the following:
CHANGE AIR FILTER ELEMENT
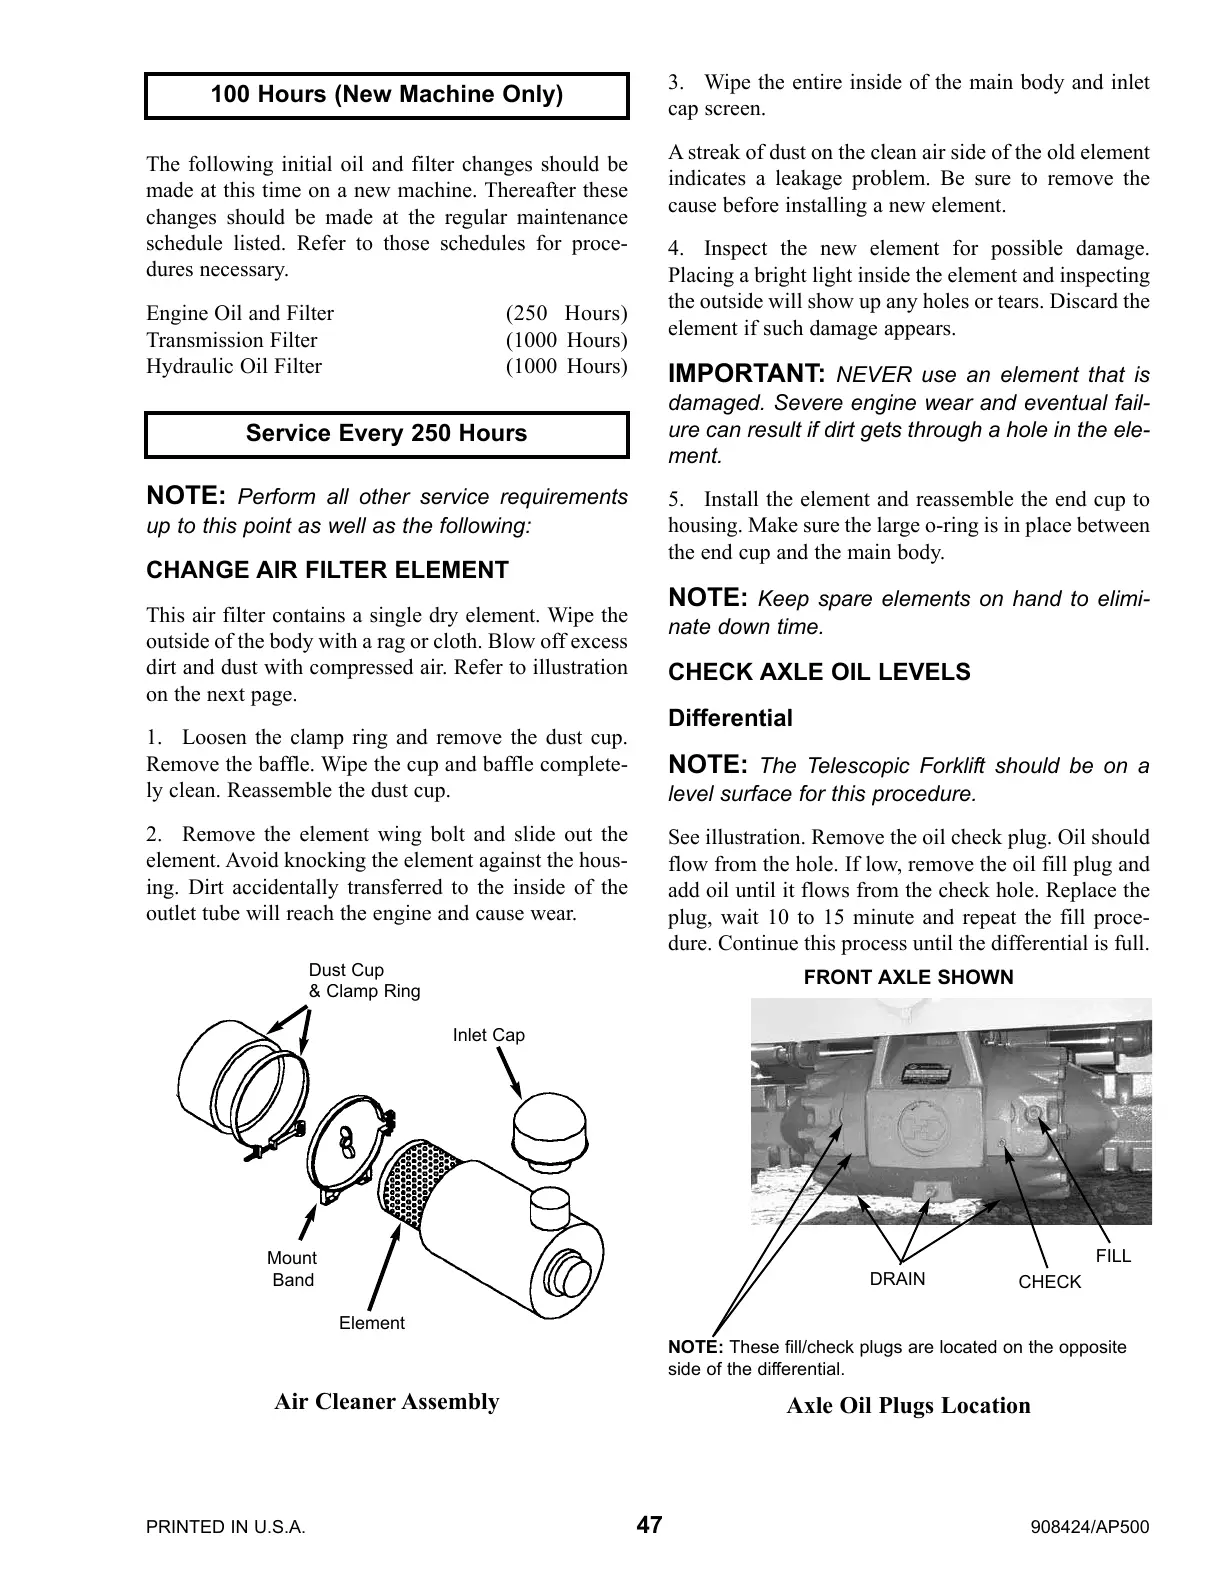
This air filter contains a single dry element. Wipe the
outside of the body with a rag or cloth. Blow off excess
dirt and dust with compressed air. Refer to illustration
on the next page.
1. Loosen the clamp ring and remove the dust cup.
Remove the baffle. Wipe the cup and baffle complete-
ly clean. Reassemble the dust cup.
2. Remove the element wing bolt and slide out the
element. Avoid knocking the element against the hous-
ing. Dirt accidentally transferred to the inside of the
outlet tube will reach the engine and cause wear.
Service Every 250 Hours
100 Hours (New Machine Only)
3. Wipe the entire inside of the main body and inlet
cap screen.
A streak of dust on the clean air side of the old element
indicates a leakage problem. Be sure to remove the
cause before installing a new element.
4. Inspect the new element for possible damage.
Placing a bright light inside the element and inspecting
the outside will show up any holes or tears. Discard the
element if such damage appears.
IMPORTANT: NEVER use an element that is
damaged. Severe engine wear and eventual fail-
ure can result if dirt gets through a hole in the ele-
ment.
5. Install the element and reassemble the end cup to
housing. Make sure the large o-ring is in place between
the end cup and the main body.
NOTE: Keep spare elements on hand to elimi-
nate down time.
CHECK AXLE OIL LEVELS
Differential
NOTE: The Telescopic Forklift should be on a
level surface for this procedure.
See illustration. Remove the oil check plug. Oil should
flow from the hole. If low, remove the oil fill plug and
add oil until it flows from the check hole. Replace the
plug, wait 10 to 15 minute and repeat the fill proce-
dure. Continue this process until the differential is full.
Axle Oil Plugs Location
PRINTED IN U.S.A. 47 908424/AP500
Air Cleaner Assembly
Dust Cup
& Clamp Ring
Inlet Cap
Mount
Band
Element
FILL
CHECK
DRAIN
NOTE: These fill/check plugs are located on the opposite
side of the differential.
FRONT AXLE SHOWN
Courtesy of Crane.Market
 Loading...