913218/CP0307 56 PRINTED IN U.S.A.
IMPORTANT: Fill the cooling system with a
low-silicate ethylene glycol base coolant mixed
with quality water and supplemental coolant addi-
tives (SCAs) suitable for heavy-duty diesel
engines. See your engine manual for additional
information.
4. Inspect the radiator cap seal before installing it.
Replace it if it appears to be damaged. The 10 psi
(70 kPa) pressure cap and engine thermostat work
in conjunction with each other to maintain proper
engine cooling.
NOTE: Check the engine temperature gauge
every minute or two after coolant has been
changed. Air pockets can form and it may be nec-
essary to refill the cooling system after a short
period of use, as the air will naturally bleed out of
the system.
CHANGING HYDRAULIC RETURN
FILTER ELEMENT
This element is a cartridge type accessible from a hous-
ing on top of the hydraulic reservoir. Initial replace-
ment is after the first 100 hours. See illustration.
Remove the top cover of the housing. Remove the ele-
ment and discard. Insert the new element into the hous-
ing and replace the cover.
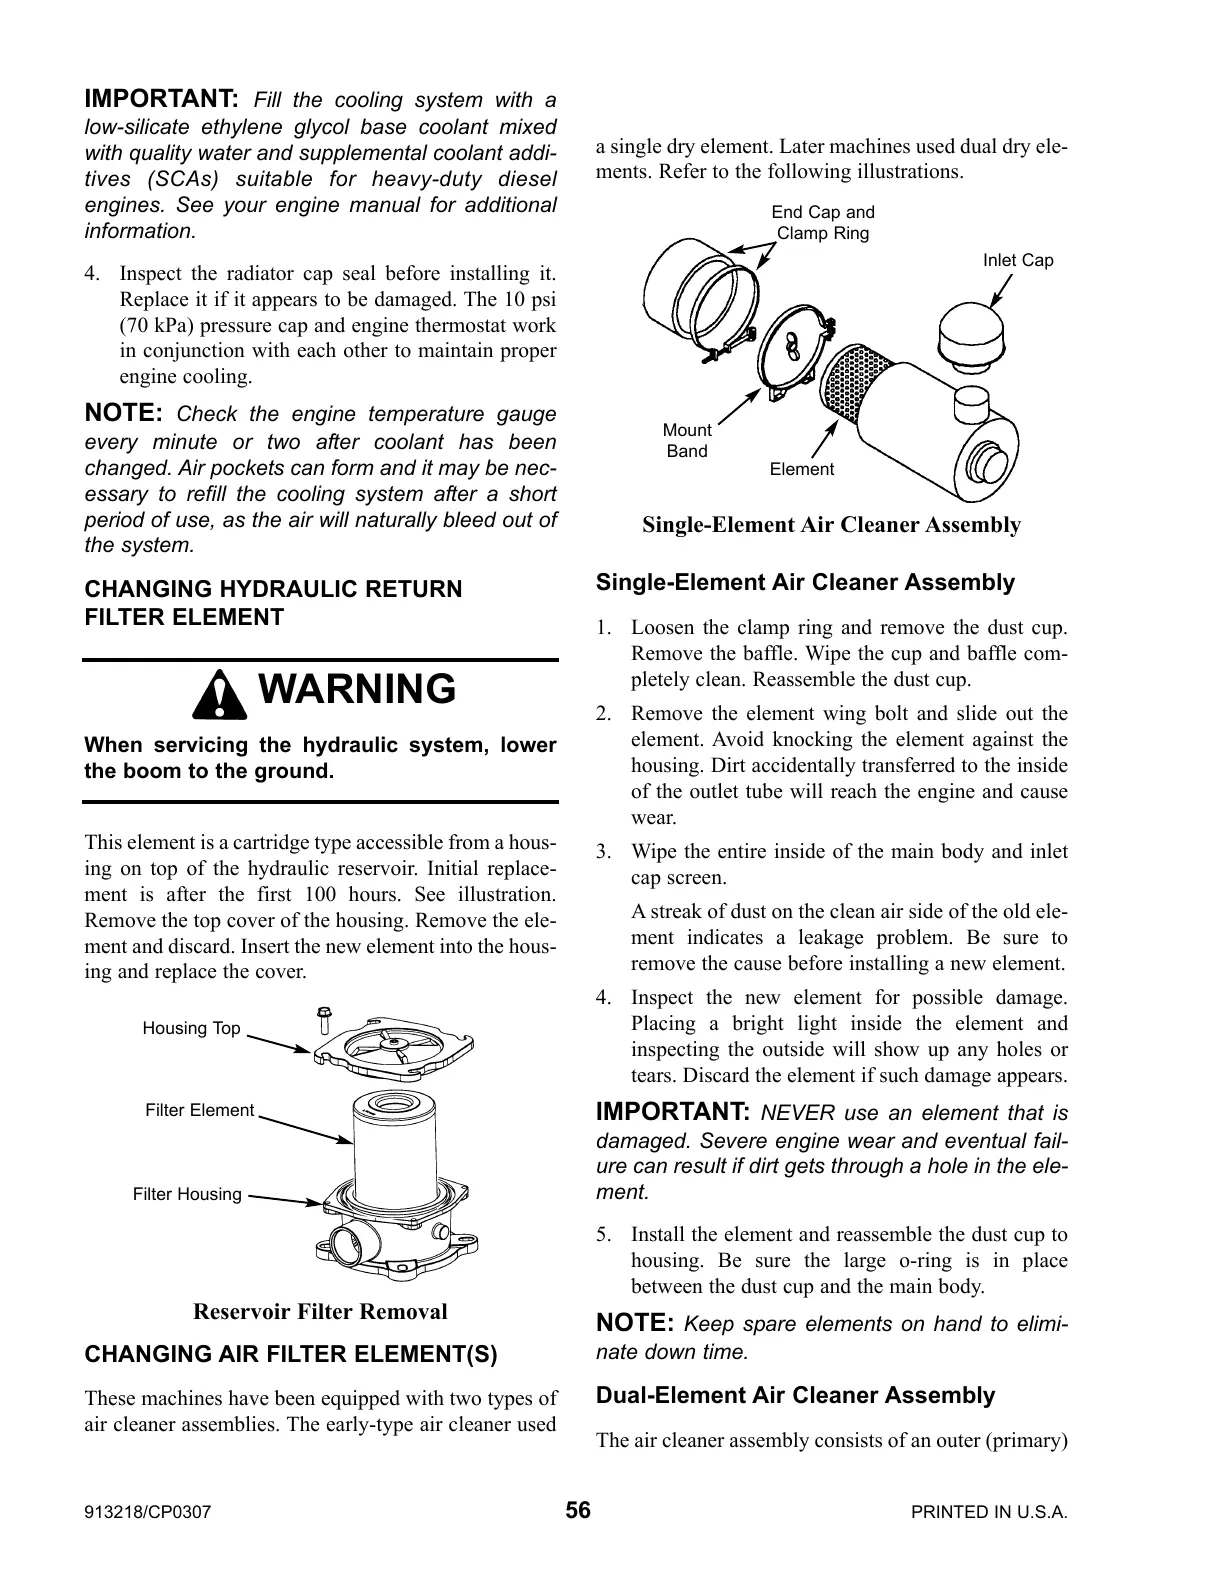
CHANGING AIR FILTER ELEMENT(S)
These machines have been equipped with two types of
air cleaner assemblies. The early-type air cleaner used
a single dry element. Later machines used dual dry ele-
ments. Refer to the following illustrations.
Single-Element Air Cleaner Assembly
1. Loosen the clamp ring and remove the dust cup.
Remove the baffle. Wipe the cup and baffle com-
pletely clean. Reassemble the dust cup.
2. Remove the element wing bolt and slide out the
element. Avoid knocking the element against the
housing. Dirt accidentally transferred to the inside
of the outlet tube will reach the engine and cause
wear.
3. Wipe the entire inside of the main body and inlet
cap screen.
A streak of dust on the clean air side of the old ele-
ment indicates a leakage problem. Be sure to
remove the cause before installing a new element.
4. Inspect the new element for possible damage.
Placing a bright light inside the element and
inspecting the outside will show up any holes or
tears. Discard the element if such damage appears.
IMPORTANT: NEVER use an element that is
damaged. Severe engine wear and eventual fail-
ure can result if dirt gets through a hole in the ele-
ment.
5. Install the element and reassemble the dust cup to
housing. Be sure the large o-ring is in place
between the dust cup and the main body.
NOTE: Keep spare elements on hand to elimi-
nate down time.
Dual-Element Air Cleaner Assembly
The air cleaner assembly consists of an outer (primary)
Single-Element Air Cleaner Assembly
WARNING
When servicing the hydraulic system, lower
the boom to the ground.
Reservoir Filter Removal
Housing Top
Filter Element
Filter Housing
Inlet Cap
Element
Mount
Band
End Cap and
Clamp Ring
 Loading...