2
WWW.GEMINISOUND.COM
Thank you for purchasing our RMR-1000 Digital Rackmount Recorder. We are condent
that the Gemini platform of products will not only make your life easier through the
use of the latest technological advancements in cross-platform connectivity and sound
reproduction but will raise the bar for DJ and pro audio products. With the proper care &
maintenance, your unit will likely provide years of reliable, uninterrupted service. All Gemini
products are backed by a 1-year limited warranty*.
REGISTRATION
Please go to www.geminisound.com to register your RMR-1000. Registering your product
allows Gemini to keep you up-to-date with any new product developments such as product
updates or enhancements.
i n t r o d u c t i o n
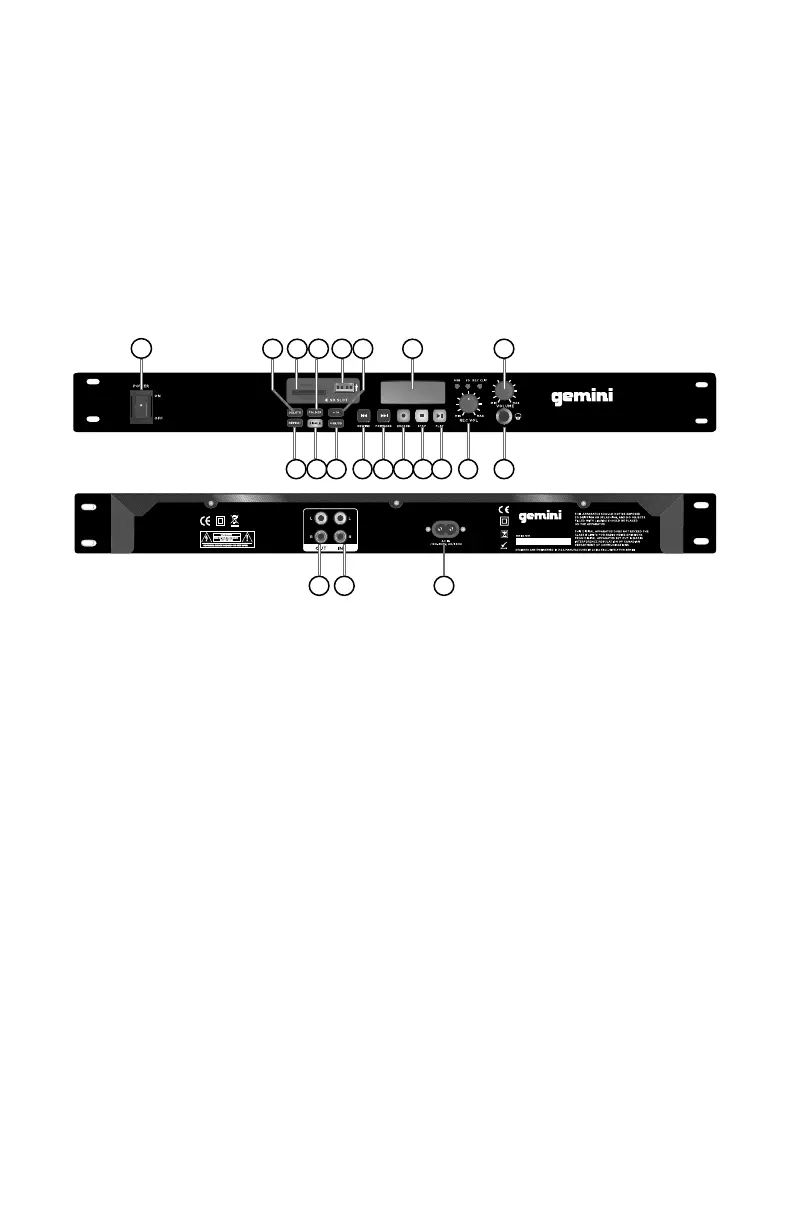
1
23 4 5 11
1213 15 16 17
19
20
21
6 78 9 10
14
18
1. POWER BUTTON: Press the power switch to turn the unit
on. To switch the POWER o press the POWER switch again.
2. RECORD VOLUME: Used to adjust the level of volume which
is recording.
3. SKIP BUTTON BACK: Use this switch to restart the track or
to select the last track.
4. SKIP BUTTON FORWARD: Use this button to select the next
track.
5. RECORD BUTTON: Enter the recording mode.
6. STOP BUTTON: Pressing the CUE button during play pro-
vides a return to the position at which play was started.
7. PLAY BUTTON: Each time you press the PLAY/PAUSE but-
ton, the operation changes from play to pause or from pause
to play.
RMR-1000
RMR-1000