Followtheseinstructionstobridgetheunit’soutputs.Bridg-
ingtheamplierconvertstheunittoamonophonicorsingle
channel.The amplier canbe used with4 ohm or higher
loads only in mono bridge mode. This mode is used to pro-
vide a higher voltage with greater headroom to your speak-
er.Beforesettingyouramplierformonobridgeoperation,
make sure that your speaker can handle the high power
levelprovidedbytheamplierinmonobridgemode.
Siga estas instrucciones para las salidas de unidad en
puente.Puenteandoelamplicadorconviertelaunidaden
monofónicoocanalúnico.Elamplicadorpuedeserusado
con 4 ohm o cargas superiores sólo en modo mono puente.
Estemodoesusadoparaproveerunvoltajemásaltocon
un mayor margen en tus altavoces. Antes de seleccionar
suamplicadorparaoperarcomomonopuente,asegura-
rsequesualtavozpuedesoportarelaltoniveldepotencia
suministradaporelamplicadorenmodomonopuente.
Respectez les instructions suivantes an de congurer
l’amplicateur en mode bridge. Le mode bridge permet
detransformerunamplicateurà2voiesenamplicateur
monophonique(1voie).L’amplicateurpeutalorsfonction-
ner sous 4 Ohms avec un niveau de puissance de sortie
trèsimportantlorsquel’enceinte nécessite unepuissance
d’alimentation importante. Avant de congurer votre am-
plicateuren modebridge, assurezvous de la puissance
admissibleparvotreenceinteaurisquedel’endommager.
Folgen Sie diesen Anweisungen, um die Ausgänge des
Gerätes zu überbrücken. Eine Brückenschaltung verwan-
delt den Verstärker in einen mono/single-Verstärker. Der
Verstärker kann im mono-bridge Modus nur mit einer 4
Ohm Last oder höher betrieben werden. Dieser Modus er-
laubt mit höheren Spannungen mehr Spielraum für Ihren
Lautsprecher. Prüfen Sie vor der Verwendung von mono-
bridge, ob Ihr Lautsprecher die dann erhöhte Leistung des
Verstärkersverträgt.
CAUTION: VOLTAGE OVER 100 VOLTS MAY BE PRO-
DUCED AT THE BRIDGE OUTPUT TERMINALS IN THIS
MODE.
PRECAUCION:OPERANDOENESTEMODOPUEDELLE-
GARA APARECER EN LOS TERMINALES DEL AMPLIFI-
CADORUNVOLTAJEDEUNOS100VOLTIOS.
MISEENGARDE:UNNIVEAUDETENSIONDE100VPEUT
ETRE PRESENT AUX BORNES DE SORTIE EN MODE
BRIDGE.
ACHTUNG: SPANNUNG VON ÜBER 100 VOLT KÖNNEN
IN DIESEM MODUS AM BRIDGE LAUTSPRECHERAN-
SCHLUSSAUFTRETEN.
1. With the power off, set the operation mode switch (8) to
the bridge position. When the power is on, the bridge led
(14) on the front panel will light. If the led does not illumi-
nate, you have the switch in the wrong position. Correct
before continuing.
1.Conlaunidadapagada,ajusteelselectordemodode
operación (8) en posición puente. Cuando se encienda la
unidad, el LED de puente (14) en frente del panel se ilu-
minará. Si no se ilumina, tiene el selector en la posición
equivocada.Corrijaantesdecontinuar.
1.Avecl’amplicateur éteint(Off),positionnez lecommu-
tateur de mode de fonctionnement (8) sur bridge. En rallu-
mantl’amplicateur(On),laLEDbridge(14)-situéeenface
avant-doitêtreallumée.Sicelle-ciresteéteinte,vousavez
sélectionnélemauvaismodedefonctionnement.Répétez
l’opération en sélectionnant le mode de fonctionnement
adéquatavantdepoursuivre.
1. Im ausgeschalteten Zustand schalten Sie den Betrieb-
smodusschlater (8) auf die Bridge Position. Wenn einge-
schaltet,zeigtIhnendieBridgeLED(14)aufderVorderseite
an, dass der Bridge-Modus gewählt wurde. Leuchtet die
LED nicht, korrigieren Sie bitte die Schalterstellung bevor
Sie fortfahren.
2. With the power off, connect your input cables to channel
ainputonlyusingeithertheXLRinputjack(4)or1/4”input
jack(7)ofchannel1.Theotherchannel1inputcanbeused
tolinktoanadditionalamplier.
2. Con la unidad apagada, conecte sus cables de entrada al
canal sólo utilizando el Jack de entrada XLR (4) o el Jack de
entrada ¼” (7) para el canal 1. La otra entrada del canal 1 se
puedeutilizarparaconectaraunamplicadoradicional.
2. Avec l’amplicateur éteint (Off), branchez vos cordons
audioaucanal1uniquementenutilisantlesentréesXLR(4)
ouJack6.35mm(7).L’autreentréenonutiliséepeutalors
serviràrelierl’entréedecetamplicateuràunautreampli-
cateuralimentéparlemêmesignalaudio(Chainlink).
2. Im ausgeschalteten Zustand schließen Sie das Eingangs-
signal nur an Kanal A mit einem XLR-Kabel (4) oder 6,35mm
Klinke Kabel (7) an. Die übrige Eingangsbuchse von Kanal
1kannzurSpeisungeinesweiterenVerstärkersverwendet
werden.
3. Connect the loudspeaker to the bridge speaker output
(11) only. The total speaker load must be at least 4 ohms or
above. If you try to operate at a lower impedance, the am-
plierwillgointoprotectionmodeandstopoperationuntil
you correct the load conditions.
3. Conecte el altavoz sólo a la salida de puente del altavoz
(11).Lacargatotaldebesercomomínimo de4ohmpor
canal.Sitratadeoperarconunaimpedanciamásbaja,el
amplicadorsecolocaráen modo deprotecciónydejará
defuncionarhastaquecorrijalascondicionesdecarga.
3.Connectezl’enceinteaucanal1vialasortieenceinte(11).
L’impédancetotaledel’enceintenepeutêtreinférieureà4
Ohms.Sivoustentez-malgrétout-uneimpédancemoin-
dre, l’amplicateur se mettra automatiquement en mode
protection&cesseradefonctionnerjusqu’àmodicationde
l’installation.
3. Schließen Sie den Lautsprecher nur an den Bridge
Lautsprecheranschluss (11) an. Die Lautsprecherimpedanz
muss mindestens 4 Ohm betragen. Wenn Sie den Betrieb
miteinerniedrigerenImpedanzversuchen,sowirdderVer-
stärker in den Protection-Modus schalten und den Dienst
verweigern, bis Sie die Last korrigieren.
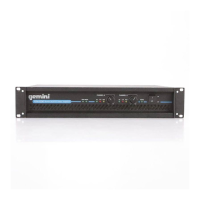
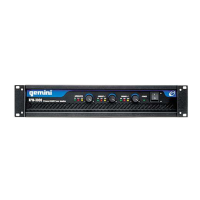
Connections and System Control
ConexionesyControldesistema•Connexions&Utilisation•AnschlüsseundSystemeinstellungen
13
Monobridgeoperation•OperaciónMonoPuente
Modebridge•MonoBrückenschaltung
 Loading...