English
18V Cordless Drill/Driver
Operator’s Manual GCD18BK
OPERATION
WARNING:
To reduce the risk of serious personal injuries, read and
follow all important safety warning and instructions before using this
tool.
NOTE: Always Check that the power supply corresponds to the voltage
on the ratings plate.
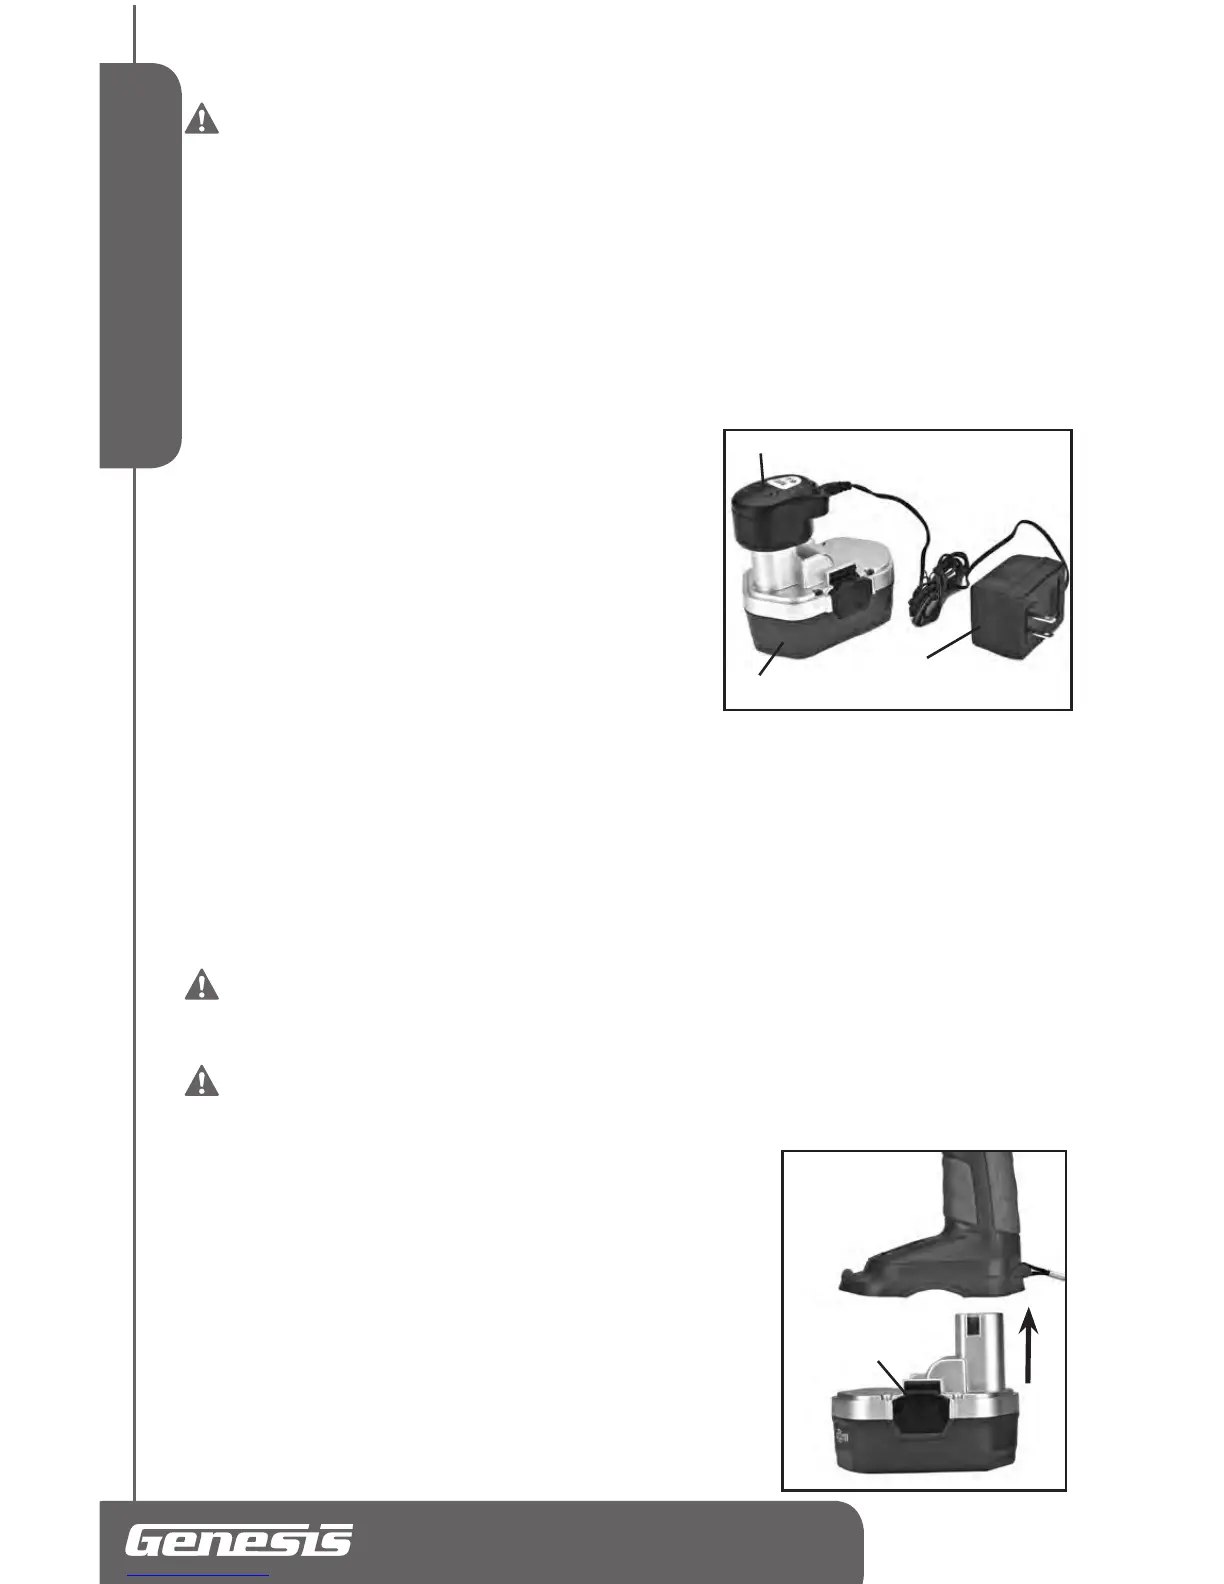
Charging the tool (FIG 2)
•UseonlytheBatteryChargerthatisincludedinthiskittorechargeyourbatteries.
•Useonly120VoltACPowerSource.
•Chargeyourbatteriesfullybeforeusingthedrillforthersttime.
•Connectthewalladaptor(2)tochargerstand(3)
•Plugthewalladaptor(1)intoa120VoltACPowerSource.
Theredlightonthechargerwillilluminate,indicatingthe
chargerispoweron.
•Insertthebattery(1)intotheslotonthechargerstand
(3). Make sure thatthebatteryisseatedrmlyinthe
charger.Thegreenlightonthechargerwillilluminate,
indicatingthatthebatteryischarging.
•Chargefor3hoursbeforeinitialuse,andafternormal
use.Ifdrillhasbeenusedcontinuously,andthebattery
iscompletelydischarged,itmayrequireupto5hoursto
fullyrechargethebattery.
•Thegreenandredlightswillremainlit,evenafterchargingiscomplete.
•Batteriesmaybecomewarmwhilecharging.Thisisnormal.
•Ifbatteryishotaftercontinuoususeinthedrill,allowittocooldowntoroomtemperaturebefore
charging.Thiswillextendthelifeofyourbatteries.
•Othertipsforextendingbatterylife:Donotstorebatteriescompletelydischarged.Chargethem
fullybeforestoring,andifdrillisnotusedforalongtime,takethebatteriesoutandchargethem
periodically.
WARNING: Always disconnect battery pack from tool or place the switch
in the locked or off position before any assembly, adjustments or changing
accessories
.
WARNING: Always be sure that the tool is switched off before insertion
or removal of the battery pack
.
Installing or Removing the Battery Pack (FIG 3)
•Toinstallthebatterypack,insertthebatterypackinto
drillhousingasshowninFIG3.Alwaysinsertitallthe
wayuntilitlocksinplacewithalittleclick.Lightlypullon
thebatterytoensureitislockedintoplaceandwillnot
accidentallyfalloutofthedrill,causinganinjury.
•Donotuseforcewheninsertingthebatterypack.Ifthe
batterydoesnotslideineasily,itisnotbeinginserted
correctly.
•To remove the battery pack, withdraw it from the tool
whiledepressingthetabs(1)onbothsidesofthebattery
pack.
FIG 2
3
1
2
FIG 3
1
 Loading...