Installation
Installation Notice
• Before installation, read through this manual thoroughly and obtain all materials and tools needed
for installation.
• All plumbing and electrical work should be performed by an accredited professional to ensure all
federal, state, local and municipal guidelines are met.
Unit Location
• The filter should be located close to the floor drain away from direct sunlight and any heat sources.
• Protect equipment form direct sunlight and precipitation exposure.
• Install equipment in a location safe from unauthorized access or vandalism.
• Ensure that the unit is installed with enough space for operation and maintenance.
• The installation surface should be clean and level.
• Install the unit in an environment which minimizes consumer risk of loss in the event of malfunction.
• Discount Water Softeners offers many different product for many different applications, for both indoor
and outdoor environments. If you are not 100% sure the equipment purchase is suitable for the
installation application or environment, please check with a Discount Water Softeners representative, or
your local equipment provider, to ensure the proper equipment is selected. Equipment installed in
inappropriate applications or environment are not covered by warranty.
Plumbing and Mechanical Setup
Note:
1) If making a soldered copper installation, all sweat soldering should be done before connecting pipes
to the valve. Torch heat will damage plastic parts.
2) When turning threaded pipe fittings onto plastic fitting, take precaution not to cross thread or over
tighten.
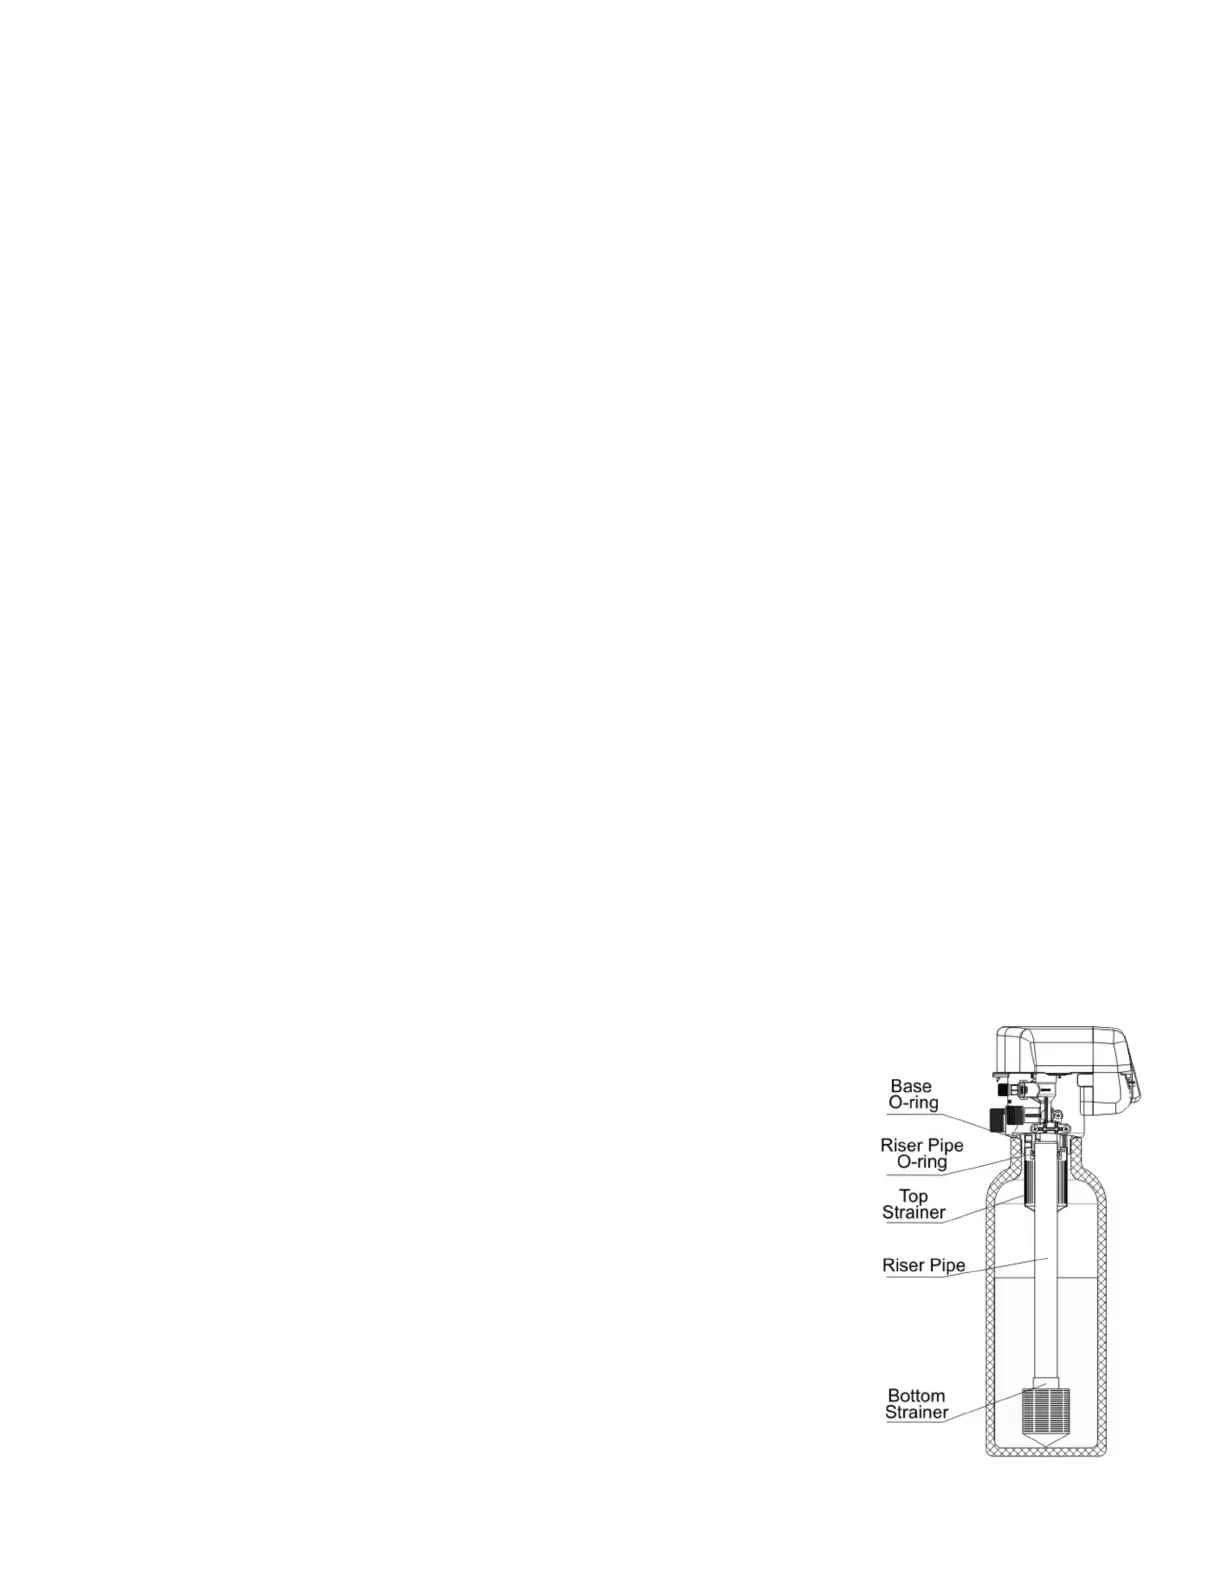
Control Valve Installation
• As Figure 1-1 shows; insert a 32mm riser pipe with bottom basket
into the center of the mineral tank. If pipe is higher than the tip of
the pressure tank, mark it, remove from tank, and cut. Take care to
keep foreign material out of pressure tank.
Note: The length of the
riser pipe should be below tank flange. The distance from the top of
the tank to the top of the pipe should be between
3/16" and 1/4".
The edges of the pipe should not be sharp to avoid damage to the
seal inside the Genesis 2 AIO valve.
• Install Valve Base O-ring around the neck of the valve.
• Lubricate the center hub O-ring of the Genesis 2 AIO valve.
• Install the top basket with a twist and lock action to center hub of
the Genesis 2 AIO valve.
• Place Genesis 2 AIO valve onto tank with the distribution pipe
inserted down the middle of the top basket. Rotate clockwise to
secure onto the tank. Do not overtighten! Overtightening may cause
the valve to crack and void the warranty.
Figure 1-1
7
 Loading...