English
20V Lithium-Ion Impact Driver
Operator’s Manual GLID20A
UNPACKING AND CONTENTS
IMPORTANT: Due to modern mass production techniques, it is unlikely the tool is
faulty or that a part is missing. If you find anything wrong, do not operate the tool until
the parts have been replaced or the fault has been rectified. Failure to do so could result
in serious personal injury.
CONTENTS IN PACKAGE
Description Q'ty Description Q'ty
OPERATION
WARNING:
To reduce the risk of serious personal injuries, read and follow all
important safety warning and instructions before using this tool.
WARNING: Always be sure that the tool
is switched off before insertion or removal of the
battery pack.
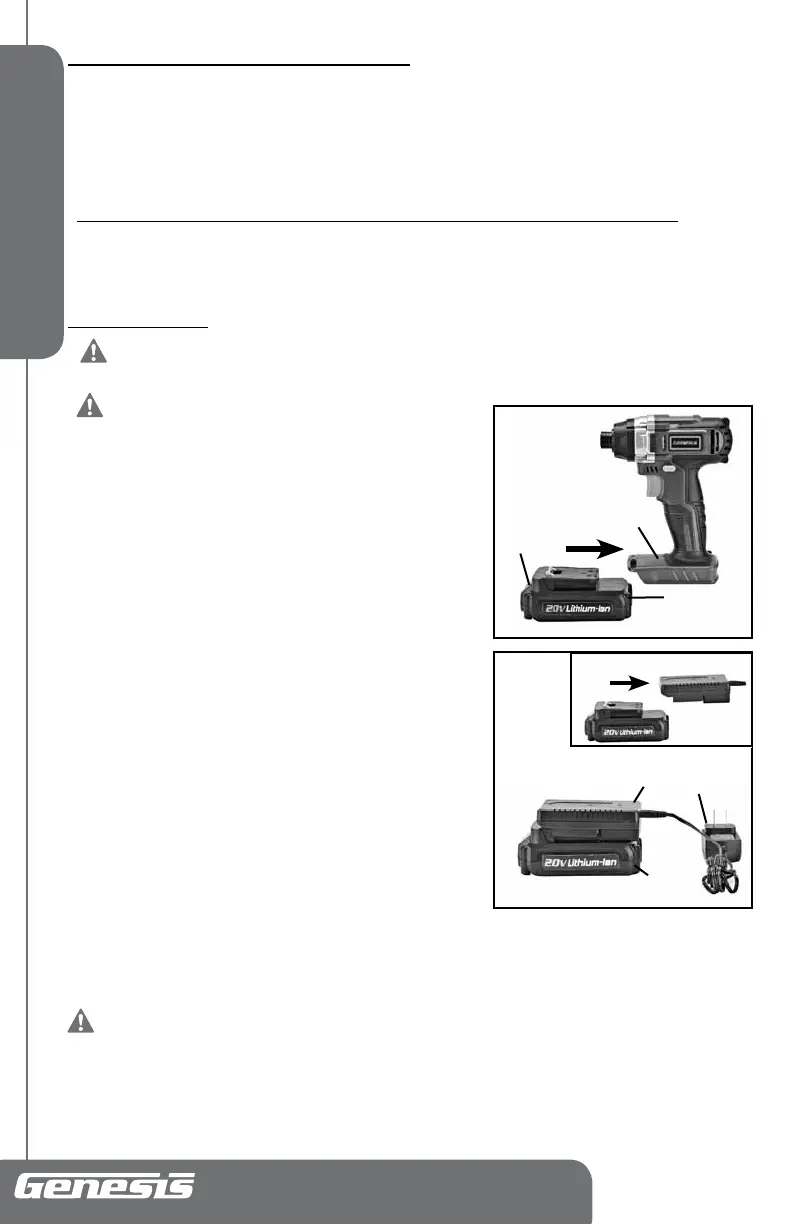
INSTALLING OR REMOVING THE
BATTERY PACK (FIG 2)
• To install the battery pack, slide the battery pack (1) into the
bottom of the tool housing (2) all the way until it locks in place
with a click, as shown in FIG 2. Lightly pull on the battery to
ensure it is locked into place and will not accidentally fall out of
the tool, causing an injury.
• To remove the battery pack, pull the battery pack away from the
tool while depressing the battery locking tab (3).
CHARGING THE BATTERY (FIG 3)
NOTE:
Always Check that the power supply corresponds to
the voltage on the ratings plate.
• Connect the charger adaptor (1) and the charger stand (3).
• Plug the charger adaptor (1) into a 120 Volt AC Power Source.
The green light on the charger stand (3) will illuminate,
indicating the charger is powered.
• Slide the battery (2) all the way into the charger stand (3) until
it locks in place with a click, as shown in FIG 3. The red light
on the charger stand will illuminate, indicating that the battery
is charging.
• The red light will go off after charging is complete.
• Batteries may become warm while charging. This is normal.
• If battery is hot after continuous use in the tool, allow it to cool down to room temperature before charging. This
will extend the life of your batteries.
NOTE: It takes approximately 3-5 hours to charge up a completely discharged battery.
WARNING: Always disconnect the battery pack from the tool or place the switch
in the locked or off position before any assembly, adjustments or changing accessories.
FIG 2
2
1
3
2
3
FIG 3
1
2
3
Impact Driver 1
Charger Adaptor 1
Charger Stand 1
Bit 1
Operator's Manual 1