9
English
OPERATION
WARNING: Always check that the power supply corresponds to the
voltage on the rating name plate.
WARNING: Always be sure that the tool is switched off and unplugged
before adjusting, adding accessories, or checking a function on the tool.
Switch Action
WARNING: Before plugging in the tool, always check to see that the tool
is switched off.
Theswitchcanbelockedin"ON"positionforeaseofoperatorcomfortduringextendeduse.Apply
cautionwhenlockingtoolin"ON"positionandmaintainarmgrasponthetool.Yoursanderis
equippedwithaclear,exibleplasticbootthatcoversthe"ON/OFF"switch;thisisreferredtoasa
"dust-protectedswitch".Itisnotuncommonforsanderstocollectlargeamountsofairbornesawdust
intheswitcharea,which,ifnotclearedout,maycausetheswitchtobecomenon-functional.The
dustprotectedswitch,ontheotherhand,cannotaccumulatedustintheswitcharea.
To start the sander, pressdownthe"I"(ON)sideoftheswitch.
To stop the sander, pressdownthe"O"(OFF)sideoftheswitch.
Installing and Removing Abrasive Paper:
WARNING: Always be sure that the tool is switched off and unplugged
before performing any work on the tool.
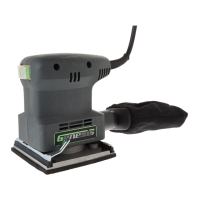
Yoursanderisdesignedtouse1/4sizedsandingsheets,measuring41/2"X51/2"insize.Youcan
purchaseabrasivepaperpre-cuttothe1/4sheetsizeoryoucanmakeyourown.Cutastandard,full
sizedsheet(9"X11")ofabrasivepaperinto4equalsizedpieces,41/2"x51/2".Cuta1/2sheetof
abrasivepaperintotwo41/2"x51/2"pieces.
Onceyouhavepreparedanadequatesupplyof1/4sheetsizedabrasivepaperinvariousgritsizesand
you’veensuredthetoolisunpluggedfromthepowersource,youinstallthepaperonthesanderas
follows:
Openthefrontpaperclampbyreleasingtheclamplever(leftside)andinsertingthe41/2"edgeofthe
abrasivepaperunderpaperclampuntilithitsthebuilt-instop.Centerthepaperandaligntheedges
paralleltothepad,thenre-securetheclamplevertosecurethepaper.
Removethedustcollectionbagandstretchthepapertightlyacrossthesandingpad.Releasetherear
paperclamplever;inserttheremainingpaperedgeundertheclamp;keepingthepapertightagainst
thesandingpad,thenre-securetherearpaperclamp.
Reinstallthedustcollectionbag.(HINT:Insertingtheabrasivepaperendsundertheclampscan
bemadeeasierbypre-bendingorsofteningtheseedgesrst.Tosoftentheedges,repeatedlypull
themovera90°tableorsimilaredgeuntiltheybecomepliableandeasytofold.Thepre-bendingor
softeningtechniqueisespeciallyusefulwiththelargergritsandtheirstifferabrasivepapers,36to
80Grit.)
Paper Punch Plate
Yoursanderisequippedwithaspecialsandingpadanddualpurposefan,givingitdustcollection
capability.Byhavingdustcollectioncapability,youareabletominimizetheamountofambientdustin
theairaroundyou,substantiallyreducemessydustontheworkpiece&workarea,andincreasethe
surfacenishqualityproducedbythesander.

 Loading...