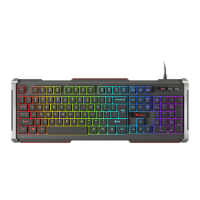
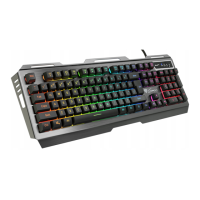
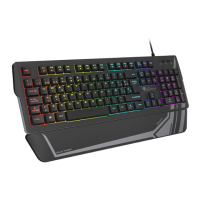
6 7| |
6. CUSTOM BACKLIGHT MODE
This mode allows to set individual illumination of each key.
To select custom backlight mode shortly press FN + Z.
Setting of custom backlight
• Select custom backlight mode by short press FN + Z
• Then hold the keys FN + Z for about 5 seconds to enter into recording mode
• Press requested key 1-8 times to select one of eight predened colors
• Press the keys FN + Z to exit from recording mode and save settings
7. RECORDING MACROS ONTHEFLY
This function allows to assign a macro for key A only.
• Hold the keys FN + Rec Macro for 5 seconds to enter into recording mode
• Press the combination of keys which you want to record
• Short press FN + Rec Macro to exit from recording mode and save settings
Note: You can remove the Macro settings by holding the keys FN + Q.
I. HOT KEYS
a. FN + BT1 Bluetooth device 1
b. FN + BT2 Bluetooth device 2
c. FN + BT3 Bluetooth device 3
d. FN + W Swap arrow function with W, A, S, D keys (hold for 3 seconds)
e. FN + Rec Macro Recording macro On-the-Fly (available only for key A)
f. FN + Q Remove macro settings (hold for 5 seconds)
g. FN + F1-F12 Function keys F1-F12
h. FN + ESC Restore factory settings (hold for 5 seconds)
i. FN + Backspace Delete
j. FN + O Insert
k. FN + P Print screen
l. FN + [ Scrol lock
m. FN + ; Home
n. FN + . End
o. FN + ‘ ‘‘ Page up
p. FN + / Page down
q. FN + E Display brightness Down (available for MAC only)
r. FN + R Display brightness Up (available for MAC only)
s. FN + T Switch between active programs (available for MAC only)
t. FN + Y Shows the list of active programs (available for MAC only)
II. BACKLIGHT SETTINGS
a. FN + TAB Backlight mode change
b. FN + U/I Change backlight brightness
c. FN + right CTRL Change the backlight color
d. FN + right Shift Speed of backlight eects
e. FN + Z Custom backlight mode
f. FN + \ On/O backlight
III. MULTIMEDIA KEYS
a. FN + F Previous
b. FN + G Play/Pause
c. FN + , Stop
d. FN + H Next
e. FN + J Volume down
f. FN + K Volume up
g. FN + L Mute
h. FN + X Email
i. FN + C My computer
j. FN + V Internet browser
k. FN + B Calculator
l. FN + N Favorites
m. FN + M Media player
EN - USER MANUAL
INSTALLATION
Pairing a new device with keyboard in Bluetooth mode
• Move the ON/OFF switch located at the bottom of the keyboard to ON position
• Turn ON Bluetooth in device which you want to pair with the keyboard
• Hold the keys FN + BT1 | BT2 | BT3 for 5 seconds to enter into pairing mode. The. LED diode will start ashing rapidly
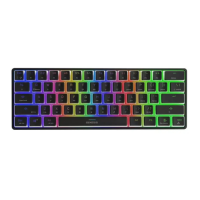
• Then go to the Bluetooth settings on your device and select from the list Thor 660
• After successful pairing, the LED on the keyboard will stop ashing
• The keyboard is ready for use
Note: The keyboard can be paired with up to 3 devices, that you can switch by pressing the keys FN + BT1|BT2|BT3.
Connecting the keyboard with the previously paired device
• Turn ON Bluetooth on your device that you have previously paired with the keyboard
• Turn ON or wake up the keyboard from hibernation
• Select required device by short press FN + BT1|BT2|BT3
• The keyboard will automatically connect with the device
Note:
• The device is equipped with intelligent technology for energy management. When the keyboard enter into hibernation (sleep)
mode, press any key for its revival.
• The keyboard is equipped with an ON/OFF switch to save the battery power when not in use for longer period.
Wired connection via USB cable
• Move the ON/OFF switch located at the bottom of the keyboard to OFF position
• Turn ON your computer or other compatible device
• Connect the cable to a free USB port on your computer, it is necessary to wait about 15 seconds for the rst connection until
the drivers are fully installed.
• The keyboard includes software that allows you to set up advanced features, if you want to use these features, you need to
download and install the software from our website www.genesis-zone.com
• Open the installation folder and then double-click the setup.exe le.
• Follow the instruction to install the program.
• After a successful installation, the software icon appears on the main bottom panel. Double-clicking the icon opens the
settings interface.
Note: The software communicates with the keyboard only through the USB cable. All saved settings will be stored in the keyboard
memory even after disconnecting the cable and switch to wireless mode.
CHARGING THE BATTERY
• Connect the included USB-C cable to the keyboard
• Connect USB plug to a suitable power source (max. output DC 5V 0,5A)
• When the battery is fully charged, the LED located under left shift will change to green color.
Note: When the battery reach the low level the FN key will starts ashing, then the keyboard will enter into energy saving mode
and turn o the backlight.
Caution: Please charge the battery every 3 months, if you do not use the keyboard for a long time. Long-term storage of the
keyboard with low battery level, or using the chargers with power over 5V 0,5A may damage the battery.
1. ARROW FUNCTION CHANGE
Hold keys FN + W for 3 seconds to swap arrow function with W, A, S, D keys function.
2. BACKLIGHT MODE CHANGE
Press the keys FN + TAB to change between 19 backlight modes.
3. BACKLIGHT BRIGHTNESS
To change the backlight brightness level press keys FN + U/I.
4. BACKLIGHT COLOR CHANGE
To change the backlight color, press keys FN + right CTRL
5. SPEED OF BACKLIGHT EFFECTS
To change the speed of backlight eects press keys FN + Right Shift
 Loading...
