5
6
5
6
Select th e Playback M ode by press ing the
Playbac k Button ( ).
Playbac k Mode will sh ow still images and movie
clips .
Select an i mage by Pres s Left and Rig ht Button.
5.4Playback
5.5Mode
5.6Menu/OK
Press Men u/OK Butto n to go to the men u selectio n.
When the me nu is displa yed on the LCD monitor, the Menu/OK Button is
used for sh ifting the c ursor to the s ub menu or for c onfirming data.
5.7Up/Play&Pause/VoiceMemo
5.8Right/Flash
5.9Down/Delete&+/-
Press the U p Button ( ) to mo ve up the subm enu cursor.
When the me nu is not disp layed on the LCD monitor, the Up Button( )
operate s as voice mem o function .
There are t wo ways you ca n add your voice over to a stored still image.
The Up Butt on also oper ates as Play & P ause function to play
movie cli p file in Play back Mode.
Press the R ight Butto n ( ) to move the cu rsor to the ri ght tab.
The Right B utton ( ) also o perates as F lash funct ion.
Press the D own Button ( ) to move the c ursor to the d own tab.
& +/-
In Shooti ng Mode, you c an press Del ete Button ( ) t o adjust the E V and
Night Sce ne Long Time Sh utter.
In Playba ck Mode, you c an press Del ete Button t o delete the S till Image ,
Movie Cli ps or Voice Cli ps.
1. Shooti ng Mode
i. Press Voi ce Memo Butt on and the ico n ( ) will show on LCD Monitor.
ii. Press S hutter But ton to take a pi cture.
iii. You can ma ke a voice memo (10 sec.) right after the image is taken.
2. Playba ck Mode
i. Select a S till Image F ile and pres s Voice Memo Button.
ii. Press t he shutter b utton to sta rt the voice m emo.
iii. 10 sec onds of voic e memo will be recorded.
Press the L eft Button t o move the cur sor to the lef t tab.
Image wil l be taken aft er
10 second s once the shu tter is rele ased.
The image w ill be taken
after 2 sec onds once th e shutter is r eleased.
Witht he10sec.Self-timer
Witht he2sec.Self -timer
():
():
StillIma geMovieClipVoiceRecording
Press Lef t/Right Bu tton to set th e Exposure Value.
You can adj ust from -2. 0EV to +2.0E V (at 0.3EV in crement) .
After the p referred v alue is chos en press Menu/OK Button to confirm.
The highe r the EV value , the bright er the image will be.
5.9.1EV(+/-)
2S
5.10Left/Self-Timer
5.9.2NightSceneLongTimeShutter(LT)
5.0Buttons&Function5.0Buttons&Function
Taking a Pict ures
1. Press PO WER Button t o power on the c amera.
2. Press Sh utter Butt on fully to ca pture.
Using the D igital Zoo m
Press the z oom lever ( ) to ward T or W
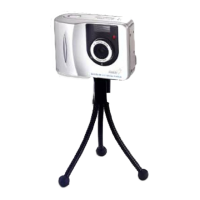
You are rec ommended t o shoot with t he camera at tached
with the tr ipod or othe r device if th e Hand Shaking( )appears.
6.0StillImageMode
6.1Shooting
6.2.1Size(Default:9M)
This feat ure is for you t o select the i mage resol ution.
(16M) 460 8 x 3456 (by int erpolation)
( 9M ) 3488 x 261 6 ( 5M ) 2560 x 1920
( 3M ) 2048 x 153 6 (VGA) 640 x 48 0
6.2.2Quality(Default:Fine)
This feat ure is for you t o select the i mage quality.
( ) S. Fine (Su per Fine)
( ) Fine
( ) Normal
6.2MenuMode
00:28:51
STA ND BY
S TA RT : S H
00 : 00 : 0 6
21
9M
21
9M
00 : 0 0 : 0 0
ST AR T: SH
00: 00:23
VG A
100 -0001
0.0EV
21
9M
21
9M
LT
AUTO
Shutter
When you ta ke a shot of a ver y close-up o f object
within th e distance o f 20 cm, please push the
Focus Swi tch up to begi n the Macro Fu nction.
The Macro i con ( ) will ap pear on the LC D Monitor.
5.11FocusSwitch
AutoFlas h
Fill-inF la sh
FlashOff
The flas h fi res a uto mati call y a s re quir ed u nder shoo ting mode .
Sug gest ion for g etti ng a good expo sure pict ure when u sing
Fla sh: T he c amer a s houl d ke ep 1 .5~2 mete rs f orm the o bjec t
you 're r ead y to capt ure.
Thi s m
ircumstances.
The mode will disable the flash to fire in any circumstances.
ode will enabl e t he f lash to f ire in an y
c
21
9M
Press the D own Button , and then sel ect Left/ Li ght Button t o
adjust th e value of the L ong Time Shutter.
The Long Tim e Shutter ra nged from Auto,1/8,1/4,1/2,1,2,3,4.
Press Men u/OK Butto n to confirm t he value you s elect.