EasyManua.ls Logo

Genius DSC-1.3MTFT User Manual

Genius DSC-1.3MTFT
13 pages
To Next Page IconTo Next Page
Page #1 background imageLoading...
Page #1 background image
1
Chapter 1 Attention
1-1 Quick Installation Guide................…......……….…..….. .2
1-2 How to acquire images from the Camera ..………..…....2
1-3 How to use Web Camera....................…….……...…......2
1-4 Operation Caution…………....................…..……...…......3
1-5 Package Contents.……….................................…...…....3
Chapter 2 Getting to Know Your Camera
2-1 Names of Parts……….....................…….……...……......4
2-2 Specifications................................………..….…......…....6
2-3 System Requirement………………………….……………6
Chapter 3 Controls, Operation, and Display
3-1LED Indicators………....................…...…………….….....7
3-2 LCD Monitor Display………..........................…..............7
3-3 Power supply.…………………………………………........8
3-4 Shutter Button………...........................……..……….......9
3-5 Mode Dial.......……….….......…...…………………….......9
3-6 MENU/ENTER Button………………..…….…….………..9
3-7 Flash Button………………………..……………….………9
3-8 Mode Display Button…………………………….……….10
3-9 Macro Button…………………………….……….……….10
Chapter 4 Navigating Modes and Menus
4-1 Mode Selection……….......................………….…........11
4-2 Record Mode..........…….....…...……………..…...….....11
4-3 Play Mode.…………......……………….……….….........12
4-4 Movie Mode……….. .........................…………..............13
4-5 Setup Mode………...............................…………...........14
Chapter 5 Preparing Your Camera
5-1 Attaching the Strap…………...................………..…......16
5-2 Loading Batteries..............…………..........……….........16
5-3 Loading and Removing the Memory Card....……..…....17
5-4 Setting Up the OSD Language………..…………….......18
5-5 Setting Up the Date/Time………………………..…….....18
Chapter 6 Getting Started
6-1 Setup Mode………......…....……………………………....19
6-2 Record Mode.……......…....……………………………....19
6-3 Play Mode.………….........…………….…………….........20
6-4 Movie Mode……….. .........................…………..............21
6-5 PC Mode……………………………………………………21
6-6 TV-OUT Operation…………………..…………….………22
Chapter 7 Driver Installation
7-1 Installing the Camera Driver for PC.......……....………...22
7-2 Installing the Applications for PC………………………...23
7-3 Camera Setting on Windows XP…………………………25
Table of Contents
2
Chapter 1 Attentio
n
1-1 Quick Installation Guide
1.Insert the CD-ROM into your CD drive and software installation
menu will appear on the computer screen automatically.
2.Click Utility driver to install the digital camera software. Follow the
on-screen instructions to proceed.
3.Once Setup finishes installing all the necessary files on your
computer, Please restart your computer to complete Setup.
To select the PC Camera or Mass Storage items in the PC
Connection menu, perform the following.
Power on the camera and toggle the Mode Dial to PC. The
PC Camera and Mass Storage two menu items will appears on the
LCD Monitor.
Pressing the arrow buttons / on the MENU/ENTER
Button to move and and select the desired menu items. Pressing
the or button to confirm save the settings.
4.To select the PC Camera, Pressing the or button to confirm
and save the settings.
5. If a “Connect USB” message pops up on the LCD Monitor, Please
connect the USB cable to the camera and PC to complete the
configuration. Press the Shutter to confirm, and the system will
configure the device automatically.
6. Unplug USB cable and re-power on the camera, then To select
the Mass Storage, Pressing the or button to confirm
and save the settings.
7. If a “Connect USB” message pops up on the LCD Monitor,
please connect the USB cable to the camera and PC to
complete the configuration. Press the Shutter to confirm, and
the system will configure the device automatically.
8.Installing the Applications for PC(Install Arcsoft Software)
1-2 How to acquire images from the camera
1.When selecting the Mass Sstorage mode, Press the Shutter to
confirm, In my Computer, it will appear a Removable Drive.
You can access the images recorded in the camera from the
PC.
2. Installing the Applications for PC(Install Arcsoft Software as
PhotoImpression), The following is the instruction of how to
get Images from Arcsoft PhotoImpression
(A).Open up Arcsoft PhotoImpression, select “From Folder
(B).Click on Browse, and then select the path “Removable Disk\
Dcim\100FSCAM” to Acquire images
1-3 How to use Web Camera
1. Installing the Applications for PC(Install Arcsoft Software as
PhotoImpression or VideoImpression).
2. When selecting the PC Camera mode, Press the Shutter to
confirm, your computer software applications show real-time
Video images. The camera can be used for Video conferencing
or recording movies.
Question and Answer IconNeed help?

Do you have a question about the Genius DSC-1.3MTFT and is the answer not in the manual?

Genius DSC-1.3MTFT Specifications

General IconGeneral
Sensor TypeCMOS
DisplayTFT LCD
Digital Zoom4x
LCD Screen Size1.5 inches
StorageSD card support
Image Sensor1.3 Mega Pixels CMOS Sensor
BatteryTwo AA alkaline batteries

Summary

Chapter 1 Attention and Quick Guide

1-4 Operation Caution

Provides important warnings and precautions for safe and proper camera operation.

1-5 Package Contents

Lists all the items included in the camera package for user verification.

Chapter 2 Getting to Know Your Camera

2-1 Names of Parts

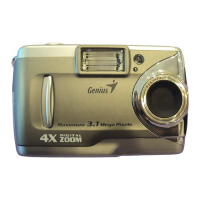
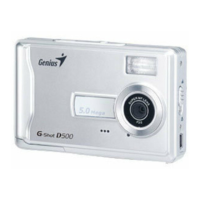
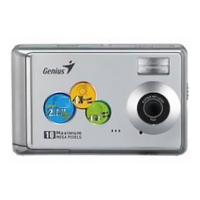
Identifies and labels the external physical components of the digital camera.

2-2 Specifications

Details the technical specifications and features of the camera, such as resolution and sensor size.

2-3 System Requirements

Outlines the minimum computer system requirements for using the camera's PC functions.

Chapter 3 Controls, Operation, and Display

3-1 LED Indicators

Explains the meaning and status of the various LED indicator lights on the camera.

3-2 LCD Monitor Display

Describes the icons, information, and layout shown on the camera's LCD screen.

3-3 Power Supply

Details how to turn the camera on and off, and explains the auto power-off feature.

3-4 Shutter Button

Explains the two-step operation of the shutter button for capturing images.

3-5 Mode Dial

Illustrates how to use the Mode Dial to select different camera operating modes.

3-6 MENU/ENTER Button

Describes the function of the MENU/ENTER button for navigation and selection.

3-7 Flash Button

Details how to select the desired flash modes while in Record Mode.

Chapter 4 Navigating Modes and Menus

4-1 Mode Selection

Guides users on selecting between PC Camera and Mass Storage modes.

4-2 Record Mode

Explains the process and settings for taking still pictures in Record Mode.

4-3 Play Mode

Details how to review, delete, and manage recorded still and movie pictures.

4-4 Movie Mode

Provides instructions on how to record movie clips using the camera.

4-5 Setup Mode

Covers initial setup options like Resolution, Quality, Self-Timer, and White Balance.

4-5 Setup Mode

Continues setup options including EV Compensation, Language, Date/Time, and Formatting.

Chapter 5 Preparing Your Camera

5-1 Attaching the Strap

Instructions on how to properly attach the wrist strap to the camera for secure handling.

5-2 Loading Batteries

Guides users on inserting AA or CRV-3 batteries for camera power.

5-3 Loading and Removing the Memory Card

Explains the process of inserting and removing the memory card, including formatting.

5-4 Setting Up the OSD Language

Details how to select the desired On-Screen Display (OSD) language for the camera menu.

5-5 Date/Time

Instructions on setting the correct date and time for accurate photo timestamping.

Chapter 6 Getting Started

6-1 Setup Mode

Explains how to access and use the camera's Setup Mode for various settings.

6-2 Record Mode

Provides a step-by-step guide for taking ideal pictures in Record Mode.

6-3 Play Mode

Details how to review recorded still and movie pictures in Play Mode.

6-4 Movie Mode

Instructions on how to record movie pictures, including starting and stopping recording.

6-5 PC Mode

Guides on connecting the camera to a PC as either a PC Camera or Mass Storage device.

6-6 TV-Out Operation

Explains how to transfer images to external display devices like TVs using the TV-Out function.

Chapter 7 Driver Installation

7-1 Installing the Camera Driver for PC

Provides instructions for installing the necessary camera driver software for PC connectivity.

7-2 Installing the Applications for PC

Guides users through installing bundled software like ArcSoft PhotoImpression.

7-3 Camera Setting on Windows XP

Explains how to configure camera settings specifically on a Windows XP operating system.

Related product manuals