Do you have a question about the Genius D211 and is the answer not in the manual?
Precautions for CD-ROM, camera handling, pre-use testing, and copyright.
Safety guidelines for camera operation environments and maintenance tips.
Lists all items included in the camera's packaging.
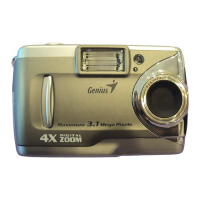
Identifies and describes the external components on the front of the camera.
Identifies and describes the external components on the rear of the camera.
Details the technical specifications of the digital camera.
Lists the minimum system requirements for using the camera with a PC.
Explains LED indicators and describes the LCD monitor display elements.
Instructions on how to turn the camera on/off and notes on auto power off.
Details the shutter function and explains how to select camera modes using the dial.
Describes the function of the MENU/ENTER button for navigation and selection.
Explains how to select different flash modes while taking pictures.
Details how to change LCD display modes and turn the camera on/off.
Explains how to activate Macro mode and the associated LED indicator.
Illustrates mode selection and provides instructions for using Record Mode.
Details how to review recorded images and movies in Play Mode.
Explains the process for deleting pictures, including single, all, or none.
Describes how to create and start a slideshow of recorded images.
Details DPOF settings for printing images and requirements for its operation.
Guide on using the Movie Mode to record video clips.
Explains how to adjust Image Resolution settings within the Setup Mode.
Details image quality selection and instructions for setting the self-timer.
Explains how to adjust white balance settings for different lighting conditions.
Describes how to adjust exposure value compensation for brighter or darker images.
Instructions for selecting the On-Screen Display language.
Details setting date/time and using the TV-Out function for display.
Instructions for selecting the correct light frequency (50Hz or 60Hz).
Details how to format the memory card or internal memory.
Explains how to restore the camera to its factory default settings.
Step-by-step guide on how to attach the camera strap.
Instructions for inserting and securing the camera's batteries.
Guide on inserting and removing the memory card from the camera.
Instructions for selecting the On-Screen Display language for the camera.
Guide on setting the camera's date and time.
Overview of adjusting basic camera functions via the Setup Mode.
Detailed steps on how to operate the camera in Record Mode.
Instructions for reviewing recorded images and movies in Play Mode.
Guide on using the Movie Mode to record video clips.
Instructions for connecting the camera to a PC in PC Camera or Mass Storage mode.
Steps to launch the VideoImpression software on a PC.
Navigating the Album screen within the VideoImpression software.
Using the Capture screen and Record function in VideoImpression software.
Guide on using the TV-Out function to display images on external devices.
Step-by-step guide for installing the camera driver from the CD-ROM.
Guide for installing software applications like ArcSoft PhotoImpression.
Instructions for transferring photos and videos from the camera to the PC.
| Brand | Genius |
|---|---|
| Model | D211 |
| Category | Digital Camera |
| Language | English |