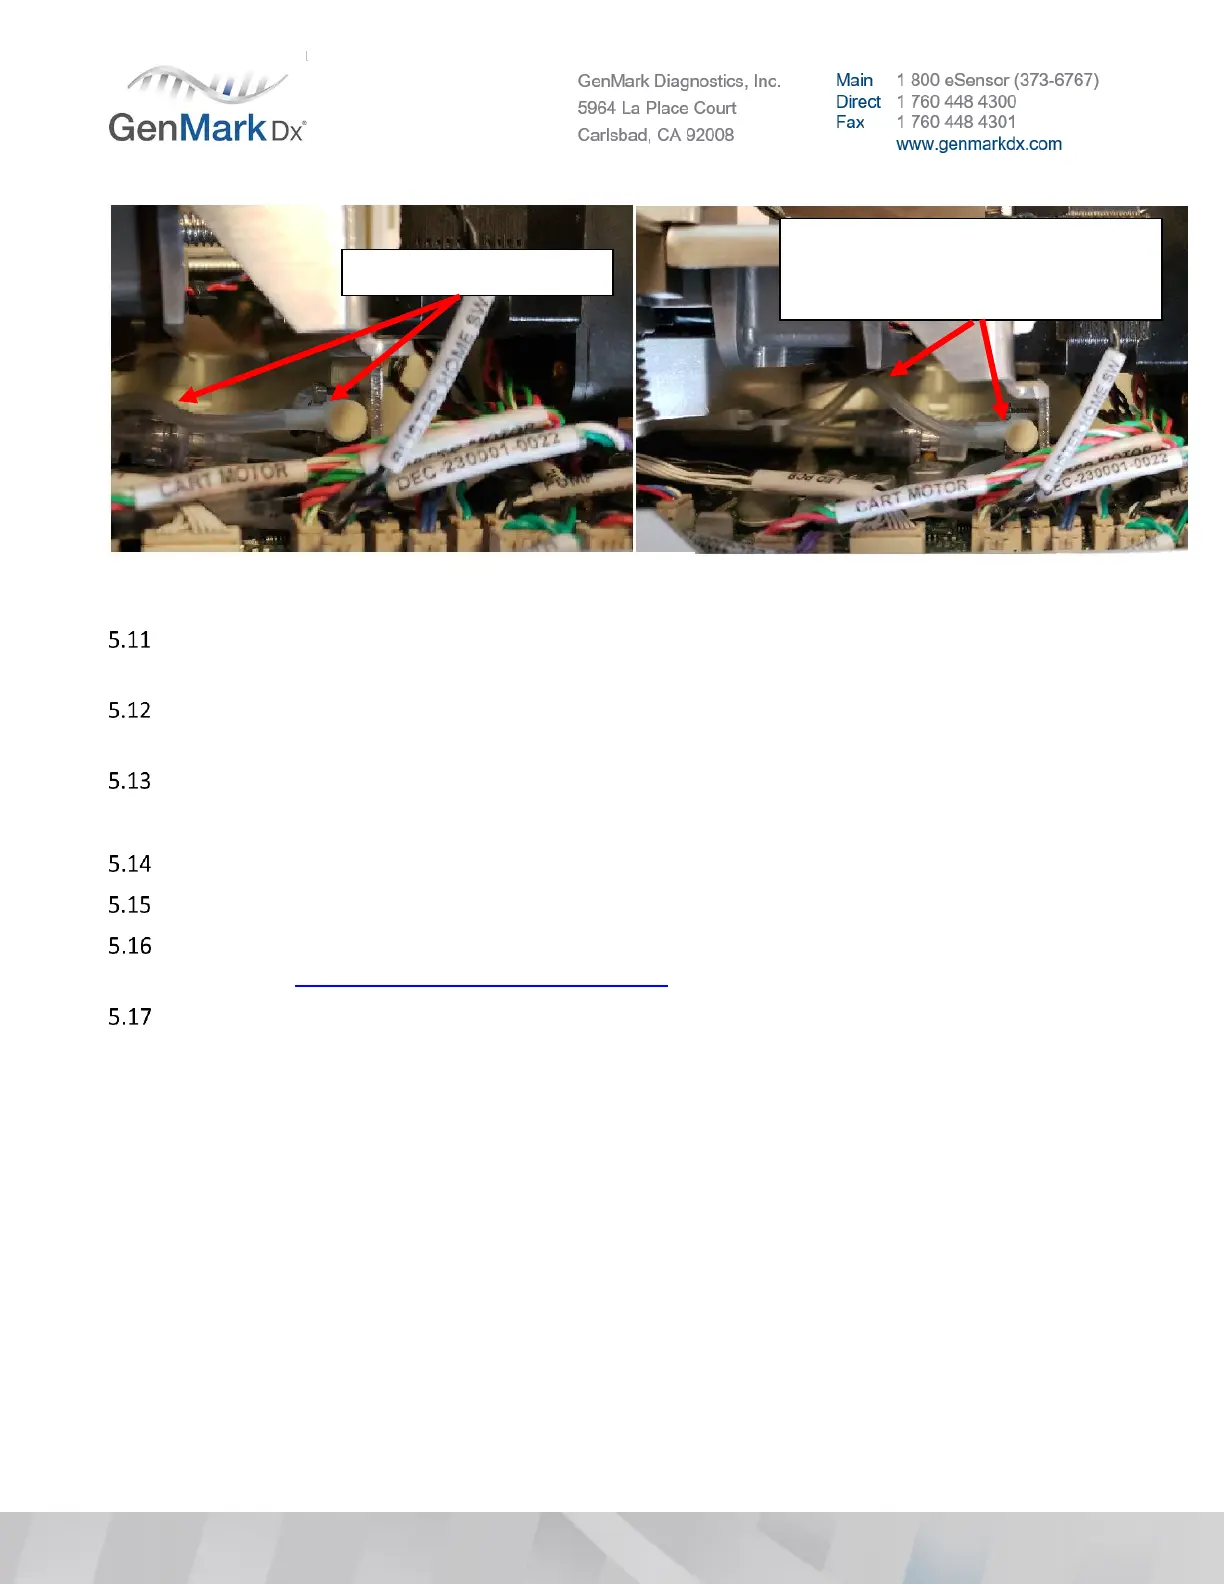
Figure 22 Tubing assembly routing
If the tubing is assembled incorrectly, reseat the tubing, ensuring the tube face is flush against the
valve wall, and the service loop in the tubing is roughly parallel to the main PCBA.
Bays should sit at room temperature for approximately 30 minutes or more to ensure that the OQ
does not fail due to temperature gradients from shipping/storage temperatures.
Insert the Bay into an empty slot in the Tower.
Note: Light force may be required to properly seat a bay
Secure the Bay with a ¼ turn to the lock bolts on each side of the Bay using a #M3 hex wrench.
Repeat steps 5.4 - 5.14 for each Bay.
If a Bay cannot be properly installed, record the serial number, process a RMA (contact Technical
Support at: technicalsupport.eu@genmarkdx.com) as an out of box failure (OOBF).
Set the Bay dip switches with the approved tool according to Figure 23 and Figure 24 below for each
Bay according to its location.
Note: Each Tower position is based on the physical position of the Tower as laid out in Figure 8.
Notice the gap between the
tubing and valve body, and the
radial bend of the tubing