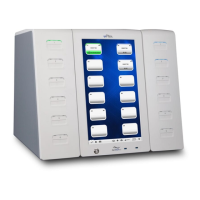
Settings > Network
Refer to the Interface Checklist Guide to see if an email set up has been requested. If not,
move to next step. If yes, enter the information that was included in the Interface Checklist
Guide according to the customer specifications and select Apply. Once complete, press the
Test Email button to verify that the email has been successfully set up.
Ensure that the Network Drives requested by the customer have been added into the ePlex
system and are connected. Connection can be tested by exporting a file to the mapped drive
and confirming its arrival to the appropriate location.
Install USB “E” Drive (Optional)
You will need two USB flash drives to perform this step. One will used to define the D:\ drive (the
first USB drive), while the other (the second USB drive) will be permanently left in the system as the
E:\ to facilitate CTS use of Remote Access.
Insert the first USB drive in to the front of the system. You may choose to use the laboratory’s
dedicated drive, or any spare drive you may have.
Confirm that the system recognizes this as the D:\ drive by navigating to the Settings > General Tab.
Click on the Install Software button. The system should recognize your drive as D:\.
After confirmation of the drive selection, back out of the install screen and proceed to step 20.6.
If the system does not recognize the drive, or does not recognize it as D, remove the USB drive, and
return to 20.1 with a new drive that has not been previously inserted in to the system.
Insert the second, un-used, USB drive in to a USB 3.0 slot on the back of the system.
Remove the first USB drive from the front of the system.
Confirm that the second USB drive is recognized as the E:\ drive, by repeating step 20.3, only this
time ensuring the E drive is recognized.
If the drive is not recognized, or is not recognized as the E:\, repeat procedure with unused drives,
or contact technical support for instructions on manually programming the drive letter using
windows device manager.
Parafilm Pogo Pin Cleaning
Go to Settings > Bay Configuration select all bays and Perform OQ
Select all bays and Set as Qualified
Cut and place parafilm on an unused ePlex cartridge according to Figure 55.
Note: Cutting parafilm and completely covering the electrode pads is required to prime the pogo pins in
the ePlex bays. Take caution not to cover the pads with tape.
 Loading...