14 / 15
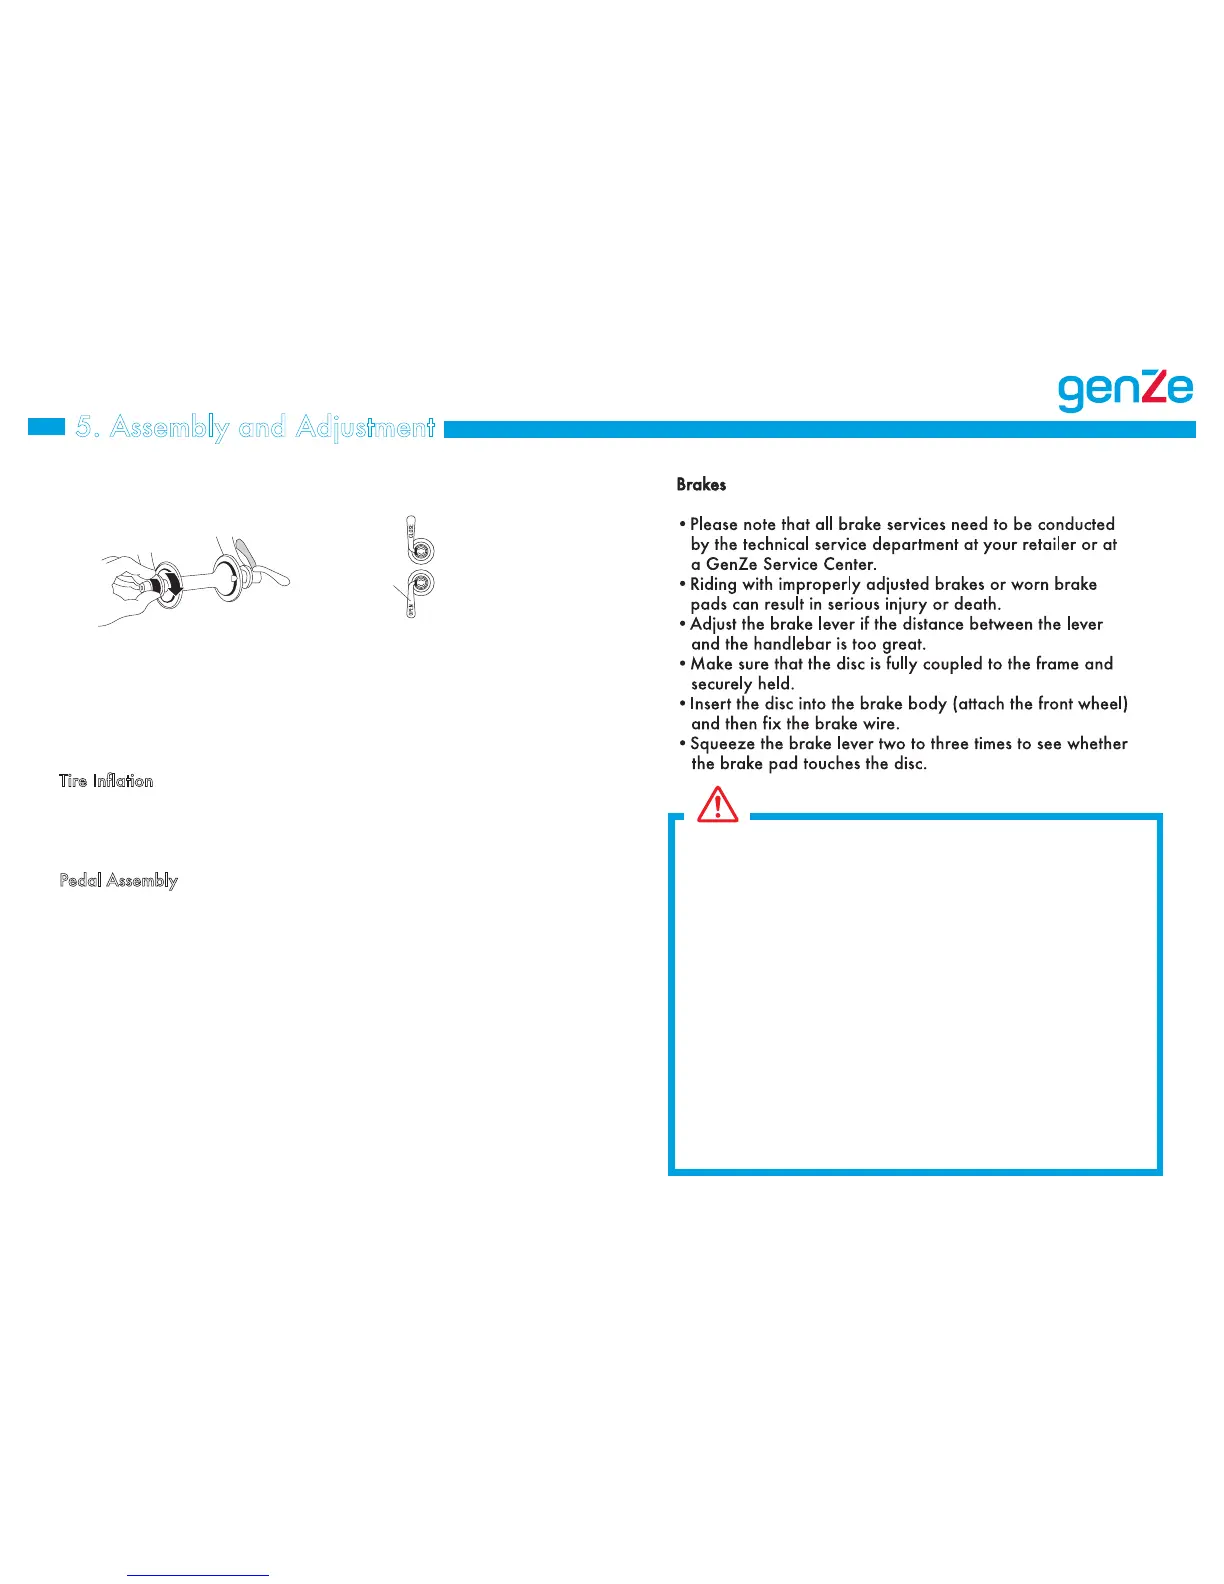
• Fasten the quick release lever on the axle as shown in
Figures 3 and 4 below.
• You should exert considerable force when fastening the
quick release. If the lever opens with ease, it may not have
been securely fastened.
Tire Inflation
• Fill tires to recommended pressure as indicated on the
sidewall of the tire.
Pedal Assembly
*Make sure that the pedals are mounted on their respective
sides, as labeled. Failure to do so will prevent their being
removed or reattached.*
• The left and right pedals are fastened by screws rotating
in the opposite directions.
• The pedal with “R” marked on one side is the Right Pedal.
The pedal with the “L” marked on one side is the Left Pedal.
• Use a 15mm spanner and make sure that the pedal axle
and the gear crank arm are perpendicular to each other
when attaching the pedals.
5. Assembly and Adjustment
Figure 3 Figure 4
To tighten
Closed
Closed
Open
Open
Adjusting nut
Quick release lever
Lever
Warning
•Please use extra caution to keep your fingers away from
the rotating disc brake rotor and spokes. This disc brake
rotor is sharp and can inflict serious injury to your fingers
if caught within the openings of the rotor or spokes.
•If the disc brake is cracked in anyway, contact your
GenZe dealer
•Be careful not to let any grease or oil on the rotor or
pads. This may cause the brakes to not work
or respond correctly.
•Check the brake rotors and cables for any rust or
fraying. If any is found contact your GenZe dealer.
• When removing or installing the tire be sure that the
quick release lever does not interfere with the movement
of the brake rotor.
This could cause a dangerous situation.