Or you can press the Start/Pause button to cancel the
preheating, the Time display will stop blinking. Then press
Start/Pause button again, the unit will get into the Menu
operation immediately.
During operation, if there is Fan button or 360°button semi-lit,
it means you can add it. If the button is fully-lit, you can press
to cancel and it will become semi-lit.
After use, unplug the unit from the outlet after use.
10.
11.
Select a location for the unit. Do not place the unit under
cabinets or too close to the wall or other equipment to allow the
heat to flow. Plug the unit into a designated electrical outlet.
Unbox the Unit, remove the packing materials and any stickers.
Remove the detachable accessories from air fryer oven.
Rinse the accessories with warm water and dry thoroughly.
Plug in the Unit. Press the POWER button and set the oven to
any menu presets and follow the steps below:
a. Place slices of lemon in it.
b. Press Temp button and using the + and - button set to 350°F.
c. Press Time button and using the + and - button set to 5
minutes.
1.
2.
3.
4.
SET UP AND USE THE AIR FRYER OVEN
USING FOR THE FIRST TIME:
NOTE:
Wait for the Unit to begin heating and help to remove the
smell.
5.
Initial start-up operation may produce a smell and smoke (For
about 15 mins). This is normal. It is due to the protective
substance on heating elements which protects them while
they are stored.
There should be at least 30mm space between the food and
the upper heating element. Observe proper spacing. Do not
overfill the unit with the food.
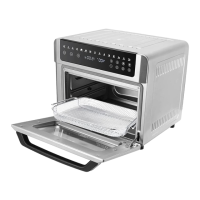
Place the cooking accessories at the bottom of the Internal
Heating Compartment and close the oven door.
Always monitor the food when cook at high setting to ensure
that you are not overcooking. Check or turn over halfway
through the cooking process.
The inner chamber is equipped with different height of slots
for variations of cooking in order to get a perfect result.
Please make sure the crumb tray is always placed in the
bottom of the inner chamber.
1.
2.
3.
4.
5.
6.
 Loading...