Signet 9900 Relay Module Instruction Sheet
3-9900.093 Rev.3 12/18 English
*3-9900.093*
Relay Module is not available
for Field Mount units.
Mfr. Part No. Code Description
3-9900.393 159 001 698 Relay Module - 2 DCR
6682-1103 159 001 711 Relay Module Plug, 3 Pos, Right Angle
CAUTION: Switching active loads (most commonly inductive) can cause contact arcing
sufficient to damage the relays. The RC Filter Kit or “snubber” (part number 3-8050.396) is
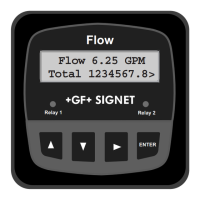
The red LED relay status indicators on the front panel of the 9900 are hardwired to relays 2 and 3.
Hysteresis and time delay are adjustable for each individual relay.
The plug-in Relay Module may be installed either before
or after the base unit is installed in the wall mount
enclosure.
The Relay Module plugs in and attaches with two screws.
1. It may be helpful to use a standard screwdriver
to gently pry removable terminals away from the
receptacle on the module.
2. Remove terminals from the module receptacle prior
to installation.
The optional Relay Module adds two programmable dry-contact
relays. The open collector output in the 9900 base unit uses the Relay
1 setting. The optional Relay Module is assigned to relays 2 and 3 in
the menus.
NOTE: Relay Module is not functional when using loop power.
DC Power
Rating:
5A VAC
~
5A 30 VDC
3-9900.393 Relay Module
Loop Voltage
Panel Mount Only
Terminals accept 12 to 24 AWG wire.
Strip 10 to 12 mm (0.4 to 0.5 in.) of insulation from wire tips and tin bare ends to eliminate fraying.
Insert wire tip or ferrule completely into the terminal and secure with the screw.
Do not allow any AC leads that may be connected to the internal relays to come in contact with
low voltage wiring.
Avoid Electrostatic Discharge (ESD):
Minimize handling of module to reduce the
possibility of damage due to ESD.
Handle module by the edges. Never touch any
exposed circuitry or contacts.
Wear an anti-static wristband or stand on an anti-
static mat, or keep one hand touching a properly
grounded pipe or other properly grounded piece of
metal when handling module.
CAUTION: Exercise care when installing module.
Do not bend connecting pins.
Align pins and connectors then push module
firmly into place, then attach with screw.
English
• English
• Deutsch
• Français
• Español
• Italiano
• ዐ࿔