reverse order.
WARNING! Check that the petrol pipe (4) is
intact and secured correctly before pouring in
new fuel.
B) Cleaning the tank
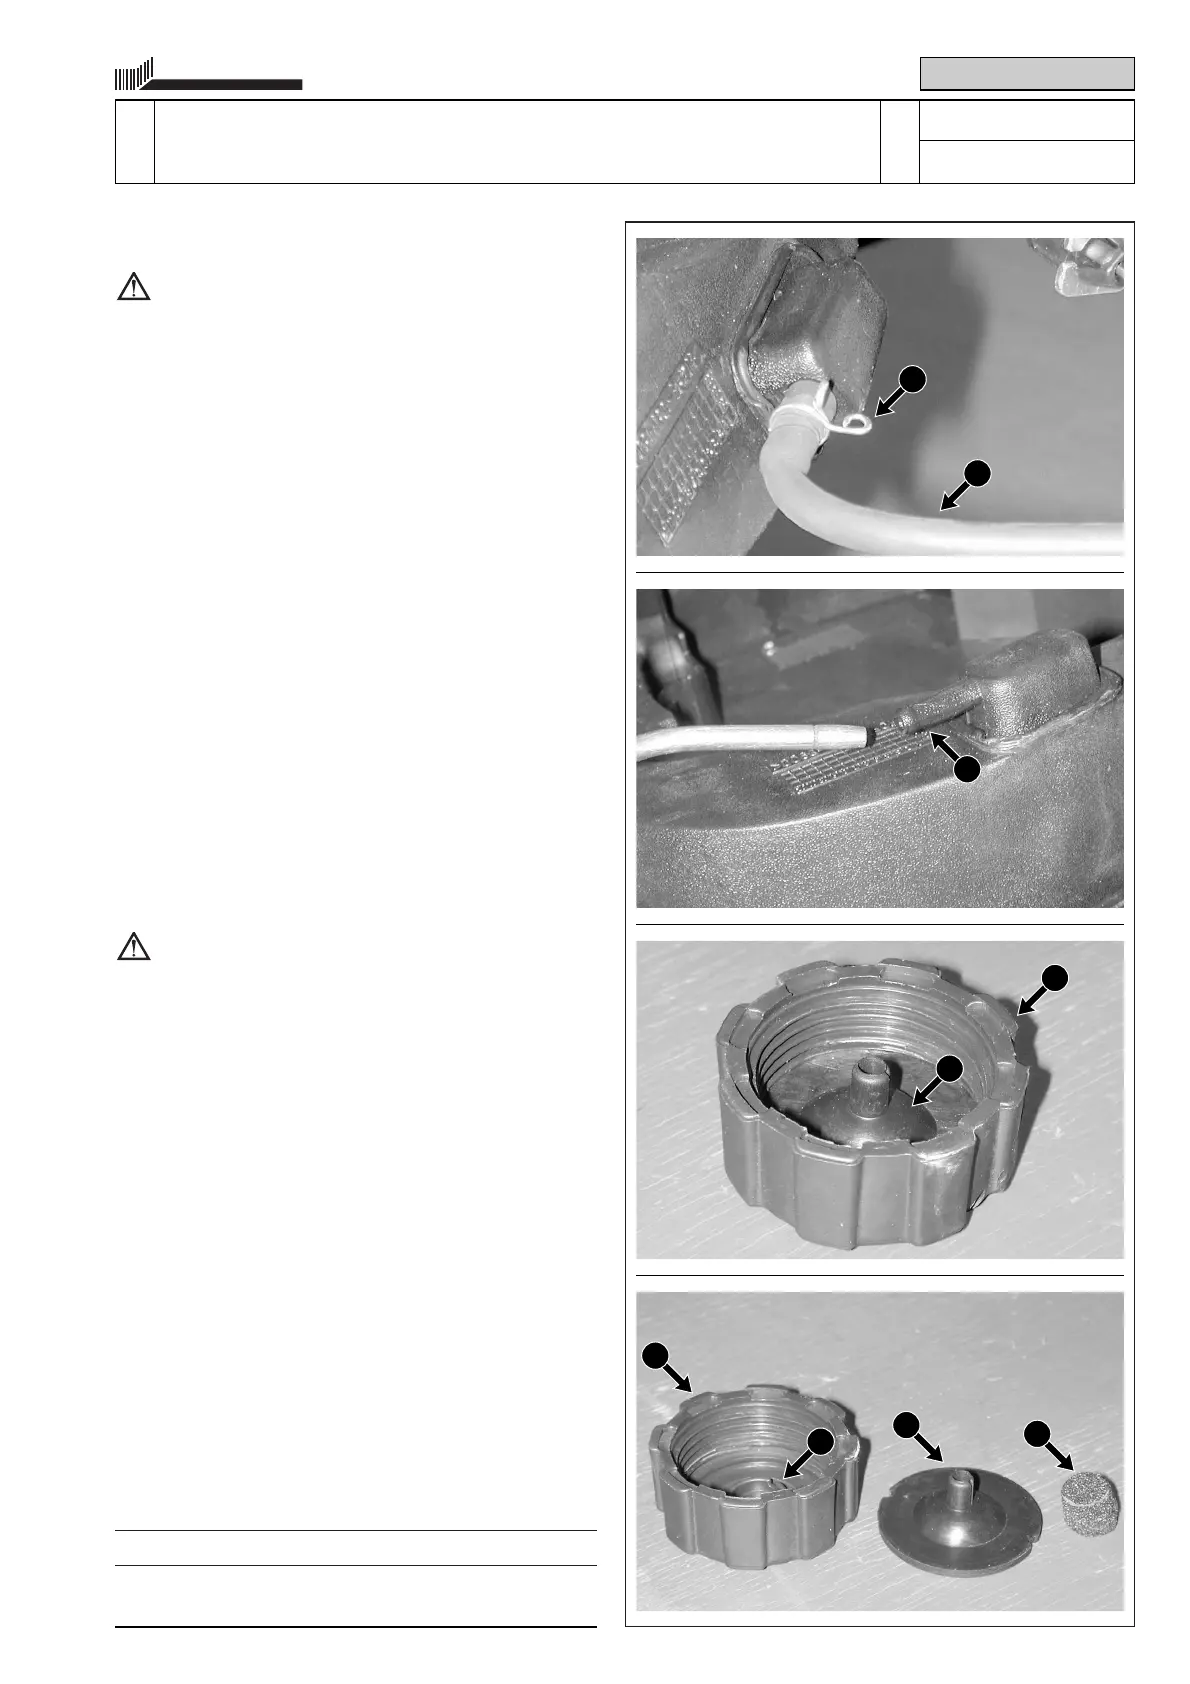
11 Remove the conveyor (1) secured by three nuts
(2).
12 Remove the ring (5) from the tank side, discon-
nect the petrol pipe (4) and drain all the fuel from
the tank into a suitable container.
13 Remove the tank cap (6) and blow compressed
air through the tube (7) to remove deposits from
the internal mesh filter.
14 Keep the tube hole (7) closed, pour in approx.
100 cl of clean petrol and shake well to clean
inside the tank.
15 Empty the tank and dispose of the petrol used
for cleaning in accordance with the laws in
force.
16 Remount the conveyor.
WARNING! Check that the petrol pipe (4) is
intact and secured correctly before pouring in
new fuel.
C) Checking and cleaning the breather pipe
21 Remove the cap (6) and pull out the gasket (8)
and the sponge (9).
22 Check that:
– the gasket (8) is intact and without cracks or
fissures;
– the air passages (10) inside the cap are not
clogged;
– the sponge (9) is not crushed or broken.
NOTE
Always replace the entire cap if the gasket or
sponge is damaged.
Tightening torques
2 Conveyor nuts ...................................... 4-7 Nm
SV 150
6.1.0
TANK AND SUPPLY
2 / 2
WORKSHOP MANUAL
page
from
2004 to ••••
01/2005
10
8
6
5
4
6
8
9
7

 Loading...