17
can cause the wheel to wobble or disengage, which could cause you to
loose control and fall, resulting in serious injury or death.
2. Removing and Installing Quick Release Wheels
a. Removing a Quick Release Front Wheel
CAUTION: If your bike has a disc front brake, exercise care in touching
it. Discs have sharp edges and can get very hot during
use.
(1) If your bike has rim brakes, disengage the brake’s
quick-release mechanism to increase the clearance
between the tire and the brake pads (See Section 4.C g. 11
through 15).
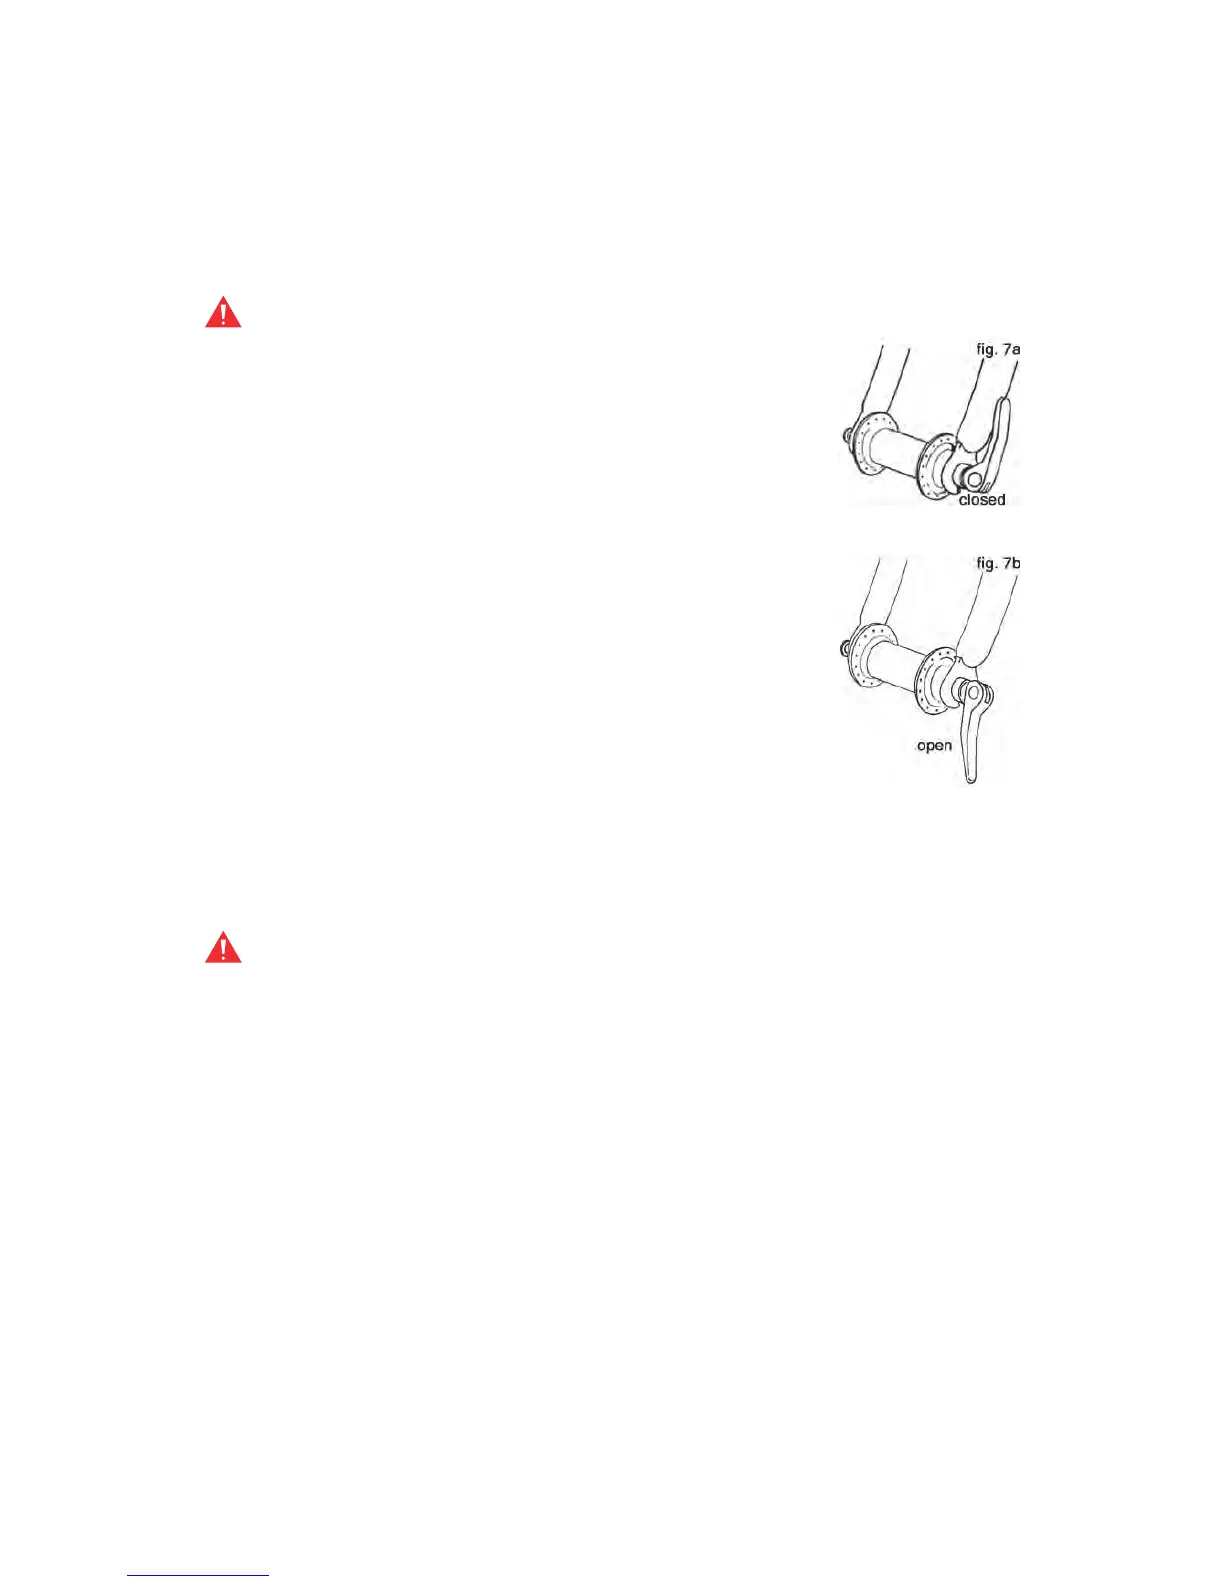
(2) Move the wheel’s quick-release lever from the locked or CLOSED
position to the OPEN position (gs. 7a & b).
(3) If your front fork does not have a secondary retention
device go to step (5).
(4) If your front fork has a clip-on type secondary
retention device, disengage it and go to step (5). If your front
fork has an integral secondary retention device, loosen the
tension adjusting nut enough to allow removing the wheel;
then go to the next step.
(5) Raise the front wheel a few inches off the ground and
tap the top of the wheel with the palm of your hand to release the wheel from
the front fork.
b. Installing a Quick Release Front Wheel
CAUTION: If your bike is equipped with disk brakes, be careful not to
damage the disk, caliper or brake pads when re-inserting the disk into
the caliper. Never activate a disk brake’s control lever unless the disk is
correctly inserted in the caliper. See also Section 4.C.
(1) Move the quick-release lever so that it curves away from the wheel (g.
7b). This is the OPEN position.
(2) With the steering fork facing forward, insert the wheel between the fork
blades so that the axle seats rmly at the top of the slots which are at the
tips of the fork blades — the fork dropouts. The quick-release lever should
be on the left side of the bicycle (g.7a & b). If your bike has a clip-on type
secondary retention device, engage it.
(3) Holding the quick-release lever in the OPEN position with your right
hand, tighten the tension adjusting nut with your left hand until it is nger tight
against the fork dropout (g. 6).
(4) While pushing the wheel rmly to the top of the slots in the fork
dropouts, and at the same time centering the wheel rim in the fork, move the
quick-release lever upwards and swing it into the CLOSED position (g. 6 &
7a). The lever should now be parallel to the fork blade and curved toward the



 To Next Page