36. Insert the crankshaft (#22) with the mounted bearings (#20) through the near side of the crankcase
(#1). Make certain that the numbers (or colors) or the crankshaft correspond to the numbers (or colors)
on the connecting rods (#24). Reinstall the near side bearing race by inserting it into the crankcase.
Supporting the crankshaft with one hand, tap the race with a rubber mallet until the edge is ush with
the crankcase.
37. Replace any shims (#20A, 20B) and position the bearing cover (#14) as before. Tighten the bearing
cover bolts (#17) evenly to position the bearing race. Torque the bolts to 125 inch-pounds. Once the
crankshaft reassembly is complete, oil the crankshaft races freely before replacing the connecting rod
(#24) end caps.
38. Reassemble the connecting rods (#24), matching the numbered (or colored) halves. Torque the con-
necting rod bolts (#24A) to 250 inch-pounds (28 Nm).
39. To replace the oil seal (#31) apply Locktite to the outside edges of the seal and install from the front
of the crankcase (#1). The side of the seal with the spring must face the oil. Make sure that the face
of the seal is ush with the crankcase.
Reassembly Sequence
REPAIR INSTRUCTIONS - MP SERIES
40. Clean the back edge of the crankcase and replace the crankcase cover (#4). be careful not to pinch
the crankcase cover o-ring (#5).
41. Fill the crankcase with 32 uid ounces of Giant oil or the equivalent SAE 85W-140 Industrial Gear oil
and check the oil level with the dip stick (#8). The proper level is center of the two lines. Reinstall the
Giant MP Series pump into your system.
MP SERIES TORQUE SPECIFICATIONS
Position Item# Description Torque Amount - in.-lbs. (Nm)
17 07114 Hex Screw, Bearing Cover 125 (14)
24 07253 Hex Screw, Connecting Rod 250 (28)
29C 13007 Bolt, Plunger 300 (34)
50 07158 Nut, Manifold Stud 700 (79)
NOTE: Contact Giant Industries for
Service School Information.
Phone: (419)-531-4600
11
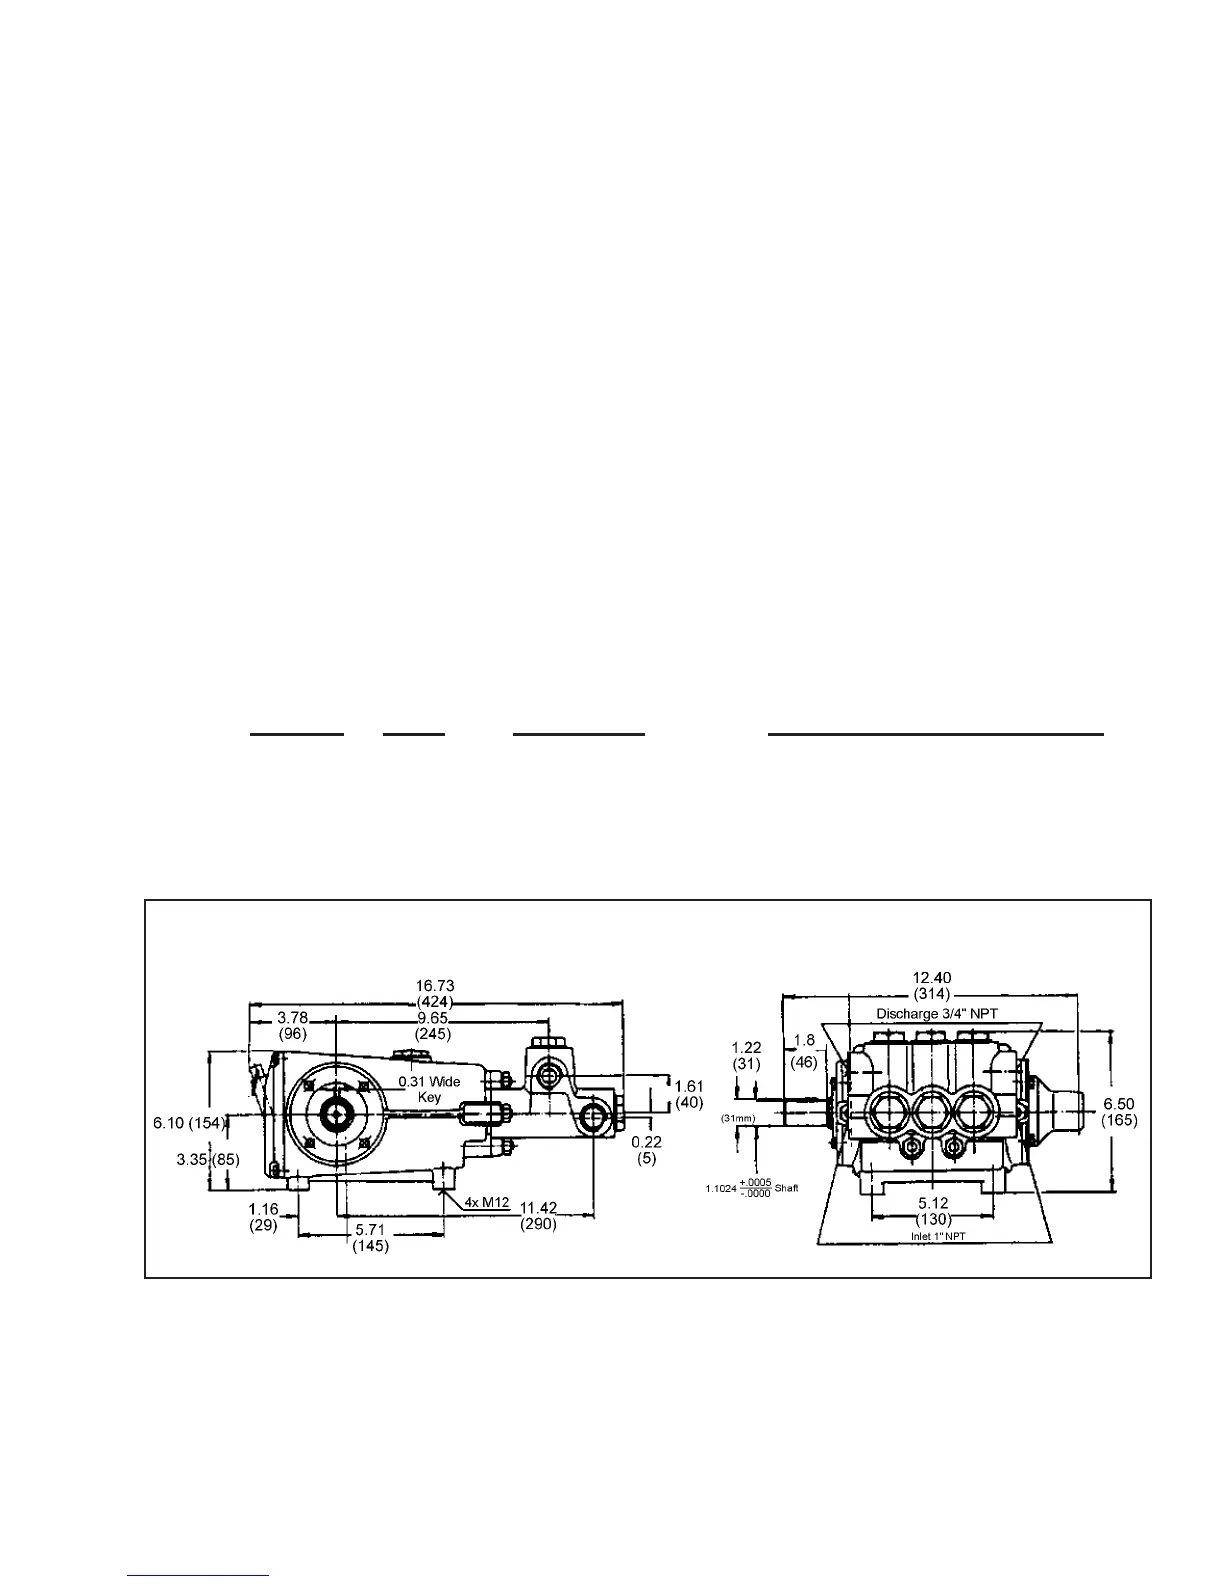
MP SERIES DIMENSIONS - Inches (mm)
 Loading...