1. With a 27mm wrench, re-
move the three discharge
plugs (#48) and three inlet
plugs (#42A) from the
manifold (#43).
2. Inspect the plug o-rings
(#48A and #42B) and
replace as necessary.
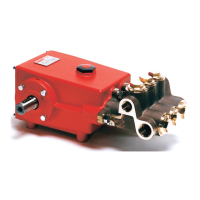
3. From the discharge port remove
the spring retainer (#47)
spring (#46) and the valve plate
(#45). Using the valve puller
(Available from Snap-On Tools)
remove the valve seat (#44)
REPAIR INSTRUCTION - MP SERIES
Disassembly sequence of the GIANT MP Series Pumps
4. Inspect all parts, especially the seating surface
of the valve plate (#45), and replace as neces-
sary.
5. Remove the six manifold stud nuts
(#50) with a 19mm wrench. Re-
move the spring washers (#50A).
Tap the back of the manifold with a
rubber mallet to dislodge and slide
it off the studs (#49). The spacer
(#51) can now be removed by pry-
ing gently outward with a screw-
driver through the front of the inlet
port.
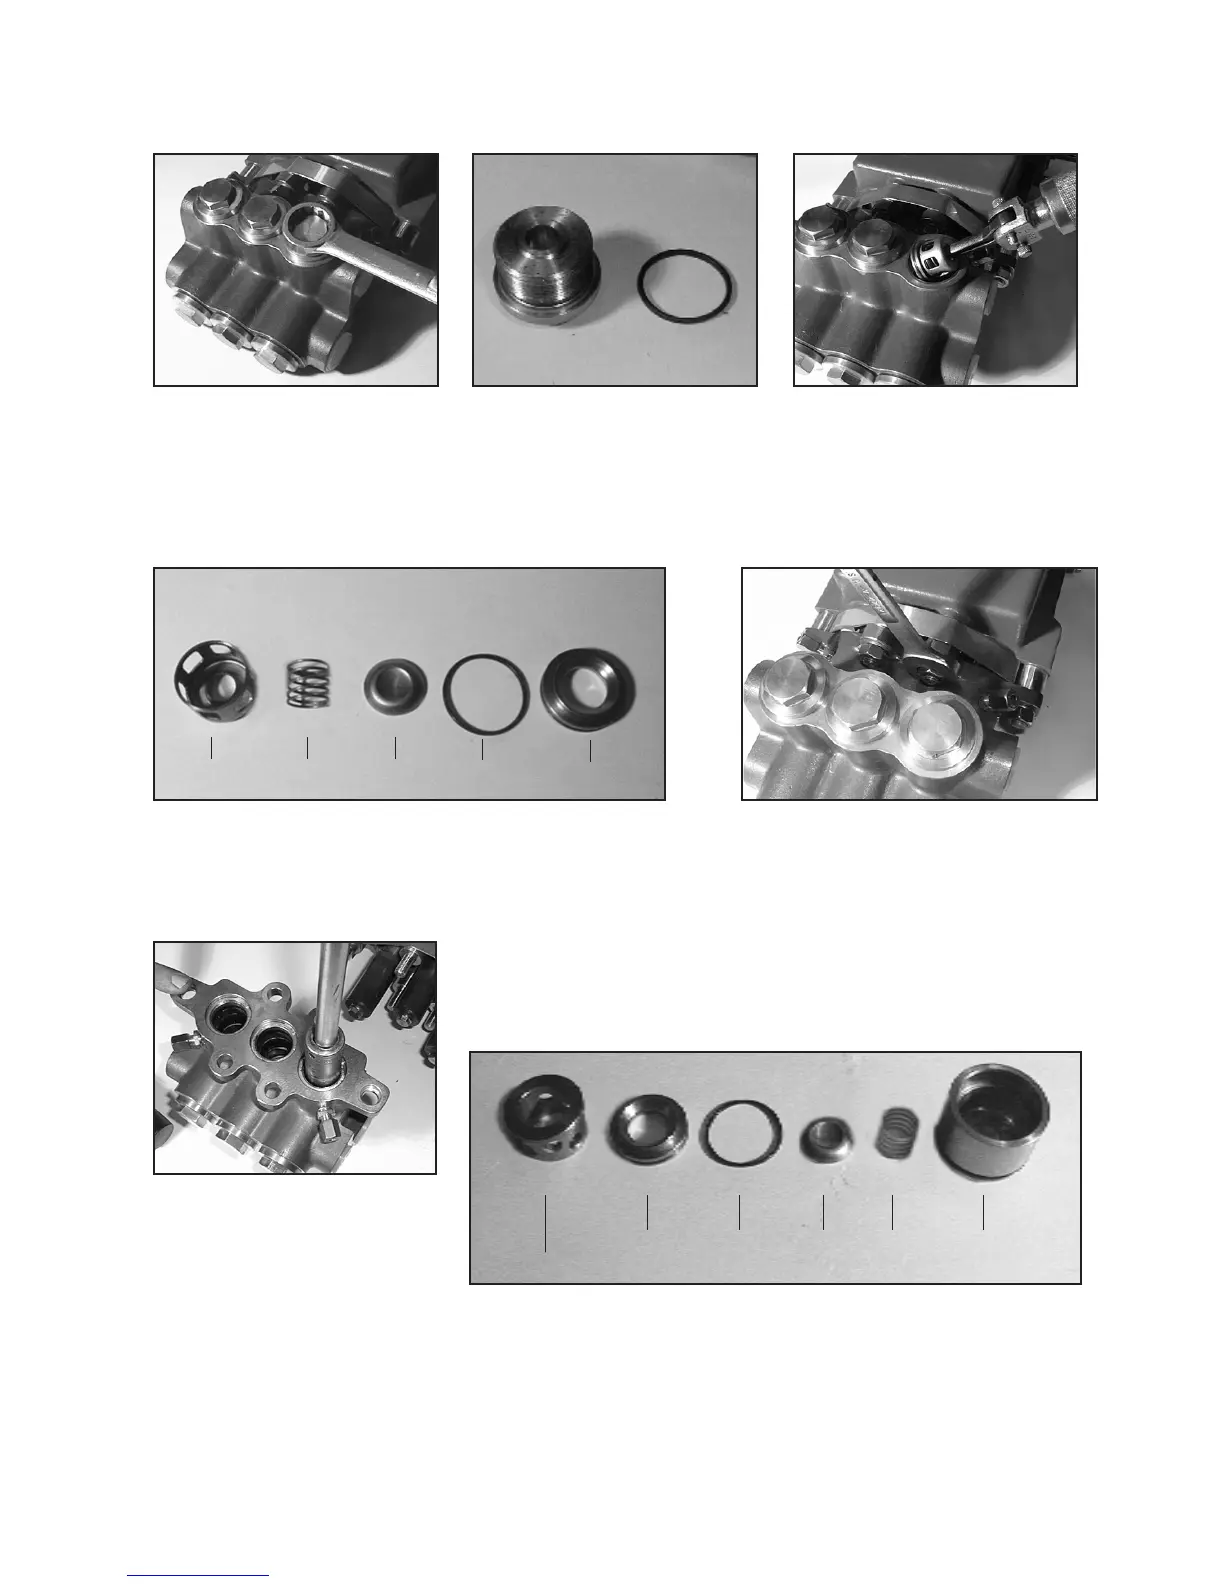
6. To remove the inlet valve
assembly, insert a 13mm
socket with extension
through the rear of the
inlet manifold (#43) port
and tap it rmly with a
hammer. This will force
the tension spring (#46A),
valve housing (#52) and
the remainder of the inlet
valve assembly out through
the front of the inlet port.
7. Pull the inlet valve assembly apart for inspection. Any resis-
tance may be overcome by placing the valve housing (#52) in
a brass jawed vise and carefully tapping the back of the valve
plate (#45) with a screwdriver. Inspect the valve seats (#44),
spring (#46A), o-ring (#44A) and o-ring (#53A for MP4120W/
MP4124W) for wear and replace them as necessary.
51 44 44A 45 46A 52
47 46 45 44A 44
7
 Loading...