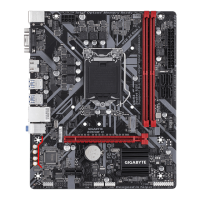
5) SATA3 2/3/4/5 (SATA 6Gb/s Connectors)
The SATA connectors conform to SATA 6Gb/s standard and are compatible with SATA 3Gb/s and SATA
1.5Gb/s standard. Each SATA connector supports a single SATA device. The Intel
®
ChipsetsupportsRAID0,
RAID1,RAID5,andRAID10.RefertoChapter3,"ConguringaRAIDSet,"forinstructionsonconguring
aRAIDarray.
Pin No. Denition
1 GND
2 TXP
3 TXN
4 GND
5 RXN
6 RXP
7 GND
Toenablehot-pluggingfortheSATAports,refertoChapter2,"BIOSSetup,""Peripherals\SATA
AndRSTConguration,"formoreinformation.
1 1
7 7
SATA3
5 4
3 2
6) M2M (M.2 Socket 3 Connector)
TheM.2connectorsupportsM.2SATASSDsorM.2PCIeSSDsandsupportRAIDconguration.Please
notethatanM.2PCIeSSDcannotbeusedtocreateaRAIDsetwithaSATAharddrive.TocreateaRAID
arraywithanM.2PCIeSSD,youmustsetupthecongurationinUEFIBIOSmode.RefertoChapter3,
"ConguringaRAIDSet,"forinstructionsonconguringaRAIDarray.
80 60 42
FollowthestepsbelowtocorrectlyinstallanM.2SSDintheM.2connector.
Step 1:
LocatethepropermountingholefortheM.2SSDtobeinstalledandtheninstallthemountingcliprst.
Step 2:
SlidetheM.2SSDintotheconnectoratanangle.
Step 3:
PresstheM.2SSDdownandthensecureitbypressingtheclippinintothemountinghole.
SelecttheproperholeforthemountingclipaccordingtothelengthoftheM.2SSDtobeinstalled.
- 14 -

 Loading...