EasyManuals Logo

Gigabyte GA-73PVM-S2 User Manual

Gigabyte GA-73PVM-S2
100 pages
To Next Page IconTo Next Page
To Previous Page IconTo Previous Page
Page #87 background imageLoading...
Page #87 background image
Appendix- 87 -
5-2-3 Configuring Microphone Recording
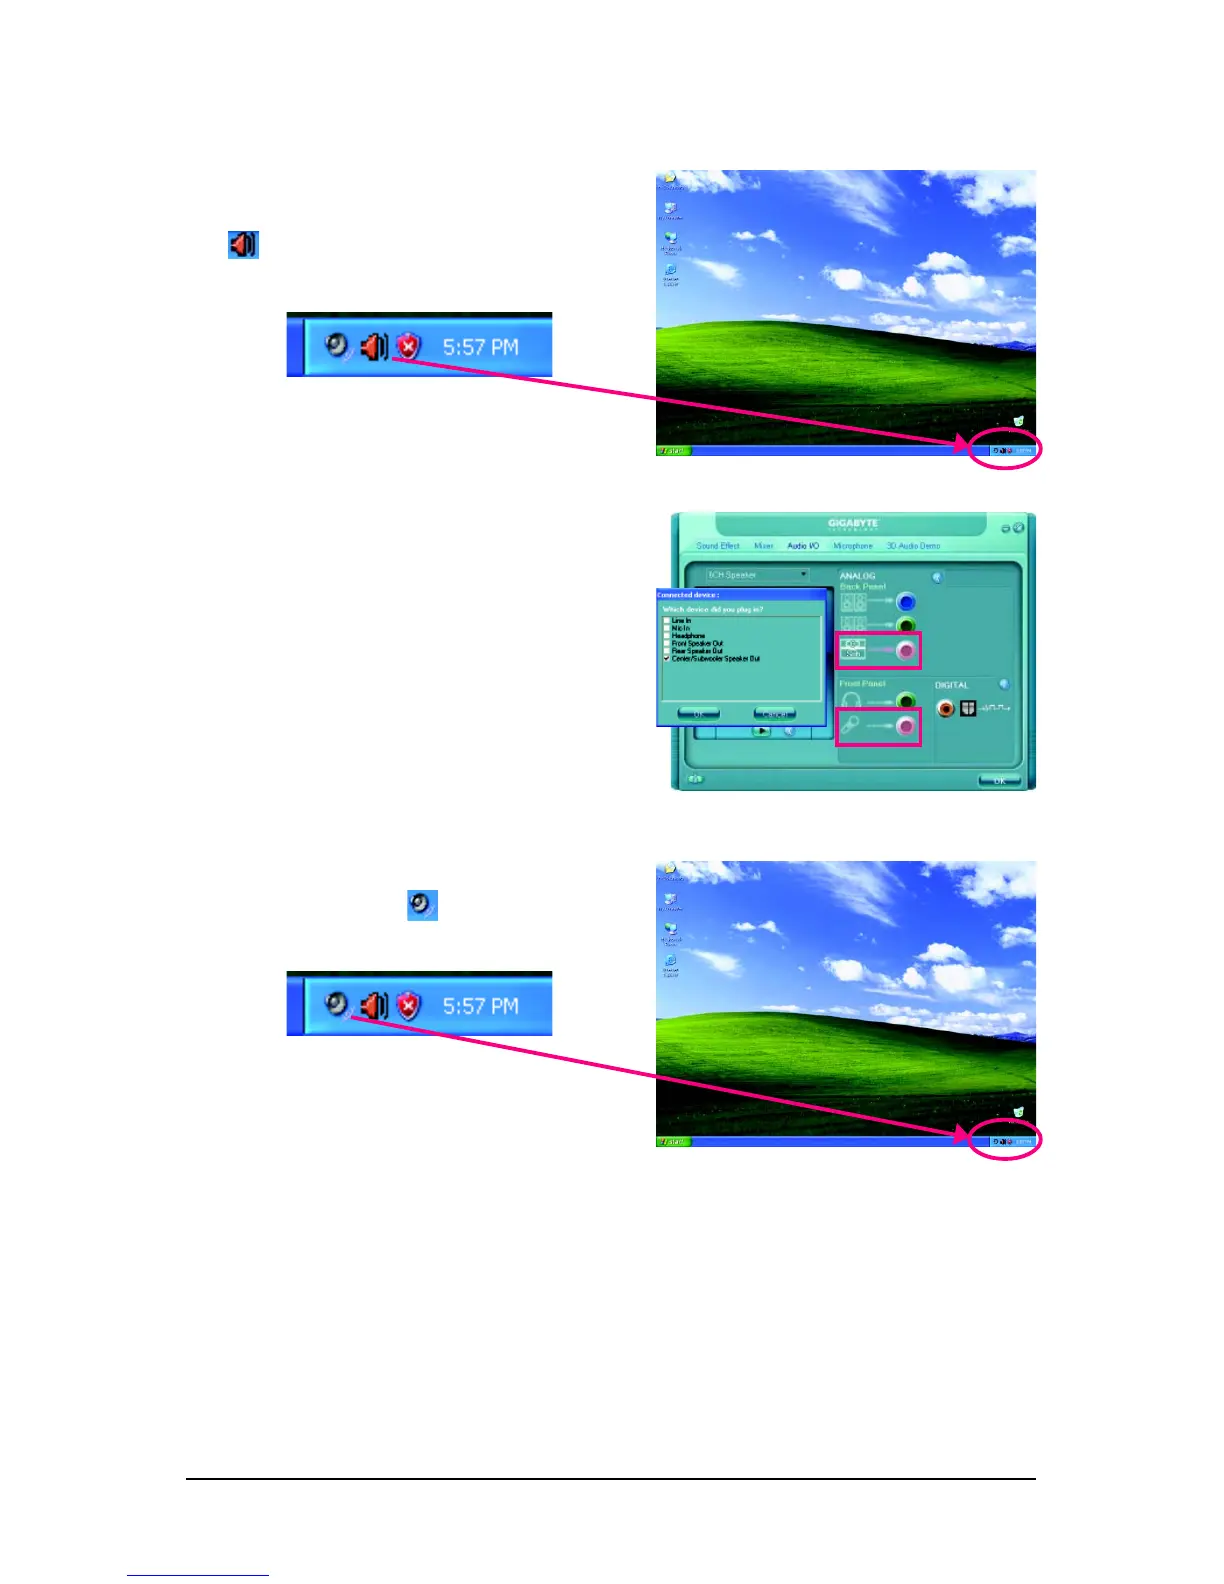
Step 1:
After installing the audio driver, the Audio Manager
icon will appear in your system tray. Double-
click the icon to access the Audio Control Panel.
Step 2:
Connect your microphone to the Mic in jack (pink)
on the back panel or the Line in jack on the front
panel. Then configure the jack for microphone
functionality.
Note: The microphone functions on the front panel
and back panel cannot be used at the same time.
Step 3:
Locate the Volume icon in your system tray
and click it to open the volume control panel.

Table of Contents

Other manuals for Gigabyte GA-73PVM-S2

Questions and Answers:

Question and Answer IconNeed help?

Do you have a question about the Gigabyte GA-73PVM-S2 and is the answer not in the manual?

Gigabyte GA-73PVM-S2 Specifications

General IconGeneral
BrandGigabyte
ModelGA-73PVM-S2
CategoryMotherboard
LanguageEnglish

Related product manuals