EasyManua.ls Logo

Gigabyte GA-Z77-HD4 User Manual

Gigabyte GA-Z77-HD4
104 pages
To Next Page IconTo Next Page
Page #1 background imageLoading...
Page #1 background image
GA-Z77-HD4
User's Manual
Rev. 1001
12ME-Z77HD4-1001R

Table of Contents

Question and Answer IconNeed help?

Do you have a question about the Gigabyte GA-Z77-HD4 and is the answer not in the manual?

Gigabyte GA-Z77-HD4 Specifications

General IconGeneral
Form FactorATX
SocketLGA 1155
ChipsetIntel Z77
Memory TypeDDR3
Memory Slots4
Max Memory Support32GB
PCIe 3.0 x16 Slots1
PCIe 2.0 x16 Slots1
PCIe x1 Slots2
PCI Slots2
SATA 6Gb/s Ports2
SATA 3Gb/s Ports4
USB 3.0 Ports4
Memory StandardDDR3 1600/1333/1066 MHz
LANRealtek GbE LAN
AudioRealtek ALC887
RAID Support0, 1, 5, 10

Summary

Chapter 1 Hardware Installation

1-1 Installation Precautions

Essential safety and handling guidelines to prevent damage during installation.

1-3 Installing the CPU and CPU Cooler

CPU Installation Precautions

Guidelines before installing the CPU to prevent damage and ensure correct placement.

1-3-1 Installing the CPU

Step-by-step instructions for correctly installing the CPU into the socket.

CPU Installation Steps

Step 1-3: Socket Lever and CPU Alignment

Detailed steps for opening the socket lever and aligning the CPU for insertion.

Step 4-5: Securing the CPU and Lever

Instructions for securing the CPU and closing the socket lever after installation.

1-3-2 Installing the CPU Cooler

CPU Cooler Installation Steps

Step-by-step guide for mounting the CPU cooler securely onto the motherboard.

1-4 Installing the Memory

Memory Installation Precautions

Guidelines before installing memory modules to prevent damage.

1-4-2 Installing a Memory Module

Memory Module Installation Steps

Detailed steps for inserting a memory module into the DIMM socket correctly.

1-5 Installing an Expansion Card

PCI Express Graphics Card Installation/Removal

Specific instructions for installing and removing a graphics card.

Chapter 2 BIOS Setup

BIOS Overview and Access

Introduction to BIOS functions and how to enter the setup utility.

BIOS Update Utilities

Overview of GIGABYTE's Q-Flash and @BIOS utilities.

The Main BIOS Menu

BIOS Setup Menu Navigation

M.I.T. (Memory Intelligent Tweaker)

Advanced Frequency Settings

Options for adjusting CPU, PCIe, and memory frequencies.

M.I.T. Advanced Frequency Settings

CPU/PCIe Base Clock Control

Allows manual adjustment of the CPU base clock and PCIe bus frequency.

CPU Clock Ratio and Frequency

Settings for CPU clock multiplier and current operating frequency.

M.I.T. CPU Core Features

CPU Core Voltage and Ratio Settings

Adjustments for CPU core voltage, PLL overvoltage, and turbo ratios.

M.I.T. Advanced CPU Core Features

Memory Performance Tuning

Settings for XMP profiles, system memory multiplier, and frequency.

M.I.T. Advanced Memory Settings

XMP, Performance Enhance, and DRAM Timing

Tuning memory performance via XMP, performance levels, and DRAM timing selection.

M.I.T. Memory Timing and Voltage Control

Channel A/B Memory Timing Settings

Detailed memory timing configurations for memory channels A and B.

Advanced Voltage Settings

Advanced options for controlling system voltages.

M.I.T. 3D Power Control

PWM Phase Control and Vcore Voltage Response

Controls for PWM phase and Vcore voltage response time.

Vcore Loadline Calibration and Protection

Settings for Vcore loadline calibration and over-voltage protection.

M.I.T. Voltage Protection and Core Voltage

CPU Core Voltage and DRAM Voltage Control

Options for controlling CPU core and DRAM voltages.

PC Health Status Monitoring

PC Health Status Details

Fan Speed Control Settings

Configuration options for CPU and system fan speed control.

BIOS Features: Boot Options

Boot Option Priorities

Specifies the order in which devices are checked for booting.

BIOS Features: Security and System Options

BIOS Features: Boot Modes and ROM Priorities

BIOS Features: Password Management

Peripherals Configuration: SATA Controller

SATA Mode Selection (IDE/RAID/AHCI)

Configures SATA controllers to IDE, RAID, or AHCI mode.

Peripherals: USB and Audio Controllers

Peripherals: Display, Graphics, and Other Devices

Peripherals: Super IO and Smart Connect

2-7 Power Management

Power Management Options

2-8 Save & Exit BIOS Setup

Saving Changes and Exiting BIOS

Options to save changes, exit, or exit without saving.

Loading Defaults and Boot Override

Options to load default settings and select a boot device.

Chapter 3 Drivers Installation

3-1 Installing Chipset Drivers

Step-by-step guide for installing the motherboard chipset drivers.

Chapter 4 Unique Features

BIOS Update Utilities Overview

Introduces GIGABYTE's BIOS update tools: Q-Flash and @BIOS.

4-1-1 Updating the BIOS with the Q-Flash Utility

Step-by-step guide for updating the BIOS using the Q-Flash utility.

Updating BIOS with Q-Flash Utility

B. Updating the BIOS via USB Drive

Procedure for updating BIOS using a USB flash drive with Q-Flash.

Step 1-3: Q-Flash Procedure Steps

Detailed steps for inserting the drive, selecting file, and completing the update.

Completing BIOS Update with Q-Flash

Step 4: Load BIOS Defaults After Update

Recommended step to load optimized defaults after a BIOS update.

Step 5: Save & Exit BIOS Setup

Final steps to save changes and exit the BIOS setup.

4-1-2 Updating the BIOS with the @BIOS Utility

B. Using @BIOS for Updates

Instructions for updating BIOS via internet or from a file.

4-2 EasyTune 6 System Tuning Utility

EasyTune 6 Tabs Information

Details on the functions of CPU, Memory, Tuner, Graphics, Smart, and HW Monitor tabs.

4-4 Smart Recovery 2 Backup Utility

Smart Recovery 2 System Recovery

4-5 eXtreme Hard Drive (X.H.D)

A. Setting Up a RAID-Ready System

Steps to configure the system BIOS and drivers for RAID setup.

B. Using GIGABYTE X.H.D Utility

Instructions for using the X.H.D utility to set up RAID 0 arrays.

4-6 Auto Green Power Saving Utility

4-7 EZ Setup Utilities

Installing EZ Setup Application

Guide for installing the EZ Setup application from the driver disk.

Launching and Installing EZ Setup Utilities

Steps to launch EZ Setup and select utilities for installation.

4-7-1 Installing EZ Smart Response

EZ Smart Response Installation Steps

Step-by-step guide for installing and enabling EZ Smart Response.

4-7-2 Installing EZ Rapid Start

EZ Rapid Start Installation Steps

Step-by-step guide for installing and enabling EZ Rapid Start.

4-7-3 Installing EZ Smart Connect

EZ Smart Connect Installation and Configuration

Steps for installing, configuring, and enabling EZ Smart Connect.

Chapter 5 Appendix

5-1 Configuring SATA Hard Drive(s)

Guide on configuring SATA hard drives, including RAID setup.

5-1-1 Configuring SATA Controllers

Steps for installing SATA hard drives and configuring controller mode.

Configuring SATA Controller Mode in BIOS

B. Configuring SATA Controller Mode in BIOS Setup

Instructions for setting SATA controller mode (IDE, AHCI, RAID) in BIOS.

Configuring RAID Array in RAID BIOS

C. Configuring a RAID Array in RAID BIOS

Steps to enter the RAID BIOS utility and create a RAID array.

Creating RAID Volume

Step 3: Name Volume and Select RAID Level

Steps to name the RAID volume and choose the RAID level.

Step 4: Select Disks and Stripe Size

Instructions for selecting hard drives and setting the stripe block size.

Completing RAID Array Creation

Step 5: Set Array Capacity and Create Volume

Final steps to set array capacity and confirm volume creation.

Recovery Volume Options

Configuring Recovery Volume

Step 3: Select Master and Recovery Disks

Choose the master and recovery disks for the volume.

Managing RAID and Acceleration Options

Installing SATA RAID/AHCI Driver and Operating System

A. Installing Windows 7 Drivers

Guide for installing drivers in Windows 7 after OS installation.

B. Installing Windows XP Drivers

Steps for installing SATA RAID/AHCI drivers during Windows XP setup.

Installing SATA RAID/AHCI Driver in Windows XP

Step 1: Restart System and Press F6

Initiate driver installation during Windows XP setup by pressing F6.

Step 2: Select Controller and Install Driver

Choose the correct controller and install the driver from the floppy disk.

Rebuilding a RAID Array

Performing RAID Rebuild in Operating System

Restoring Master Drive from Recovery Volume

Chapter 5 Appendix: Audio Configuration

5-2-1 Configuring Multi-Channel Audio

Steps for setting up 2, 4, 5.1, or 7.1 channel audio configurations.

Configuring Audio Output Channels

Audio Configuration: AC'97 and S/PDIF Out

5-2-3 Configuring Microphone Recording

Microphone Recording: Enabling Stereo Mix

5-2-4 Using the Sound Recorder

Chapter 5 Appendix: Troubleshooting

5-3-1 Frequently Asked Questions (FAQs)

Answers to common questions regarding motherboard issues.

Troubleshooting Procedure: Startup Issues

Troubleshooting Flowchart for Startup Problems

A step-by-step flowchart to diagnose and solve system startup problems.
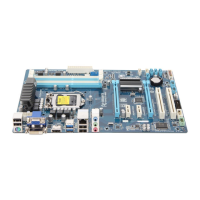
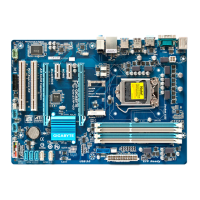
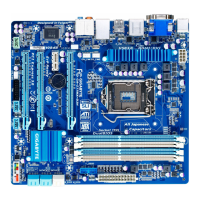
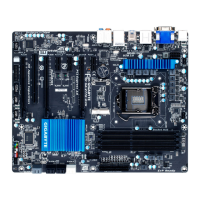
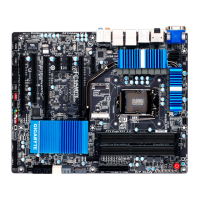
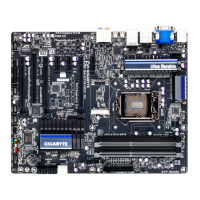
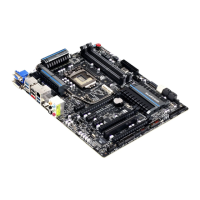
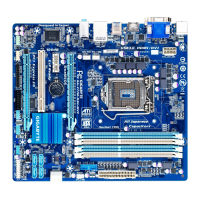
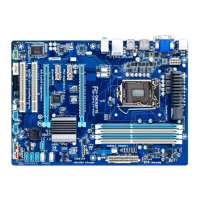
Troubleshooting Procedure: Boot Issues

Related product manuals