- 13 -
The CPU carrier frame must be slided into the CPU rail frame with the CPU. Do not remove the
CPU from the CPU carrier frame.
1-3-1 Installing the CPU
1-3 Installing the CPU and CPU Cooler
Read the following guidelines before you begin to install the CPU:
• Make sure that the motherboard supports the CPU.
(Go to GIGABYTE's website for the latest CPU support list.)
• Prepare a T20 star screwdriver.
• Always turn off the computer and unplug the power cord from the power outlet before installing the
CPU to prevent hardware damage.
• Apply an even and thin layer of thermal grease on the surface of the CPU.
• Do not turn on the computer if the CPU cooler is not installed, otherwise overheating and damage
of the CPU may occur.
• SettheCPUhostfrequencyinaccordancewiththeCPUspecications.Itisnotrecommended
thatthesystembusfrequencybesetbeyondhardwarespecicationssinceitdoesnotmeetthe
standard requirements for the peripherals. If you wish to set the frequency beyond the standard
specications,pleasedosoaccordingtoyourhardwarespecicationsincludingtheCPU,graphics
card, memory, hard drive, etc.
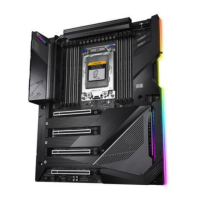
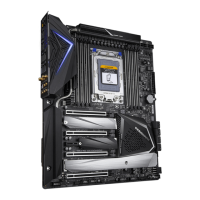
CPU
Pin One Triangle
CPU Carrier Frame
AMD Socket sTRX4
CPU Load Plate Screw
CPU Load Plate Screw
Pin One Triangle
 Loading...