Do you have a question about the Gigaset N510 and is the answer not in the manual?
Determine the specific Gigaset phone model for successful setup.
Ensure the phone is loaded with the appropriate firmware version.
A functional DHCP server is required for phone network configuration.
Confirm your PBXware system version for compatibility.
Connect the phone using its power adapter and to the network.
Utilize Power over Ethernet for phone connectivity and power.
Learn how to locate the Gigaset phone's IP address.
Steps to restore the Gigaset phone to its default factory configuration.
Detailed steps for manually configuring phone registration.
Configure User Account Details (UAD) for phone registration.
Process for creating a new PBXware extension for the phone.
Configure phone settings through its web administration interface.
Set the Domain, Proxy, and Registration server details.
Configure UAD for auto provisioning via DHCP or static IP.
Create PBXware extensions with auto provisioning enabled.
Configure DHCP option 66 for automatic phone provisioning.
Configure HTTP settings for phone auto provisioning.
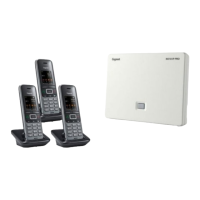
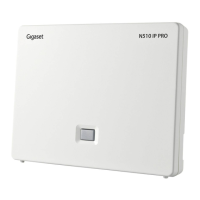
The Gigaset N510 IP PRO is a base station designed to integrate with a PBXware system, enabling Voice over IP (VoIP) communication for cordless DECT phones. It acts as a central hub, allowing multiple Gigaset DECT handsets to register and utilize the features provided by the PBXware. This device is primarily intended for business environments, offering a scalable and flexible communication solution.
The core function of the Gigaset N510 IP PRO is to provide a bridge between DECT cordless telephony and an IP-based PBX system, specifically PBXware. It registers as an extension on the PBXware, allowing connected DECT handsets to make and receive calls, access voicemail, and utilize other PBX features. The base station supports multiple simultaneous calls and multiple registered handsets, making it suitable for small to medium-sized offices.
It leverages standard network protocols for communication, including DHCP for IP address assignment and HTTP for configuration and auto-provisioning. The device can be powered either through a standard AC power adapter or via Power over Ethernet (PoE), offering flexibility in deployment and reducing cable clutter.
The Gigaset N510 IP PRO is designed for straightforward integration and operation within a PBXware environment.
The installation process involves connecting the device to the network and power. For power, users can choose between a DC power adapter or Power over Ethernet (PoE) if their network infrastructure supports it. Connecting the Ethernet cable from the device's Internet port to a router or switch provides network access.
Once physically connected, the device requires configuration to register with the PBXware. This can be done through two primary methods: manual configuration or auto-provisioning.
To access the device's web administration interface for configuration, the IP address of the Gigaset N510 IP PRO needs to be identified. This can typically be found by navigating through the menu of a registered DECT handset: Menu > Settings > System > Local network. The IP address will be displayed there.
After obtaining the IP address, a user can open a web browser and enter the IP address (e.g., http://192.168.1.22) to access the login screen. The factory default login password is "0000". This interface is the primary tool for managing the device's settings.
Manual configuration involves logging into the device's web administration interface and manually entering the necessary PBXware extension details. This includes setting the authentication name (PBXware extension number), authentication password (secret), username, display name, domain (PBXware IP address or domain name), proxy server address, and registration server. These settings are typically found under the "Settings" and "Telephony" tabs within the web interface. After entering the details, the settings are saved, and the device reboots to apply the changes.
For larger deployments or simplified setup, auto-provisioning is a more efficient method. This requires configuring the PBXware's User Agent Device (UAD) settings and the DHCP server.
http://[Hostname or IP Address]/prov/%MACD.After auto-provisioning, the device reboots, picks up the configuration file, and registers with the PBXware.
After either manual configuration or auto-provisioning, users can dial "*123" from a registered DECT handset to verify successful registration with the PBXware.
The Gigaset N510 IP PRO includes several features to facilitate maintenance and ensure optimal performance.
Keeping the device's firmware up-to-date is crucial for security, stability, and access to new features. The device's web administration interface allows users to check the current firmware version (e.g., 42.247) and perform firmware updates. In auto-provisioning scenarios, firmware updates can often be managed centrally through the PBXware.
If a device has been previously used or encounters persistent configuration issues, a factory reset can restore it to its default settings. This process involves:
The web administration interface provides access to various settings and status indicators that can aid in troubleshooting. Users can check network settings, registration status, and other parameters to diagnose connectivity or registration problems. The ability to manually configure settings also offers a way to test specific parameters if auto-provisioning fails.
The PBXware system itself provides detailed information about its version and running components (e.g., PBXware Edition, Release, Running, API, libmemcached version). This information is valuable for compatibility checks and when seeking support.
In summary, the Gigaset N510 IP PRO is a robust and flexible DECT IP base station designed for seamless integration with PBXware. Its usage features cater to both manual and automated deployment, while its maintenance capabilities ensure long-term reliability and ease of management.
| DECT technology | Yes |
|---|---|
| Max handsets | 6 |
| Max parallel calls | 4 |
| VoIP accounts | 6 |
| Ethernet ports | 1 |
| Power over Ethernet (PoE) | Yes |
| Protocols | SIP |
| Weight | 120 g |
| Caller ID | Yes |
| Call Waiting | Yes |
| Conference Call | Yes |
| Codecs supported | G.711, G.726 |
| DECT Standards | DECT, GAP |
| Range | Up to 300m outdoors, up to 50m indoors |
| Speakerphone | Yes |
| Frequency | 1880-1900 MHz |