ASSEMBLY INSTRUCTIONS
First, unpack your e-bike carefully and save all packing material. Be sure to
locate your charger, pedals, front axle, keys, and any small parts like nuts
or screws inside the shipping carton. Sometimes small parts like nuts or
screws may come loose during shipping so be sure and check the bottom
of the carton and protective wrapping carefully. We recommend you don’t
discard packing materials until after you are through assembling your
e-bike and know that it is complete and running properly.
This e-bike was fully assembled, inspected, and tuned at the factory and
then partially disassembled for shipping. Your bike arrives in the shipping
carton about 90% assembled.
You can find an assembly video online at https://youtu.be/AHz0PDdsUQc
If you have questions about assembling, or your ability to assemble this
product, please call our technical support or consult a qualified bicycle
technician. We recommend that two people work together to assemble the
e-bike.
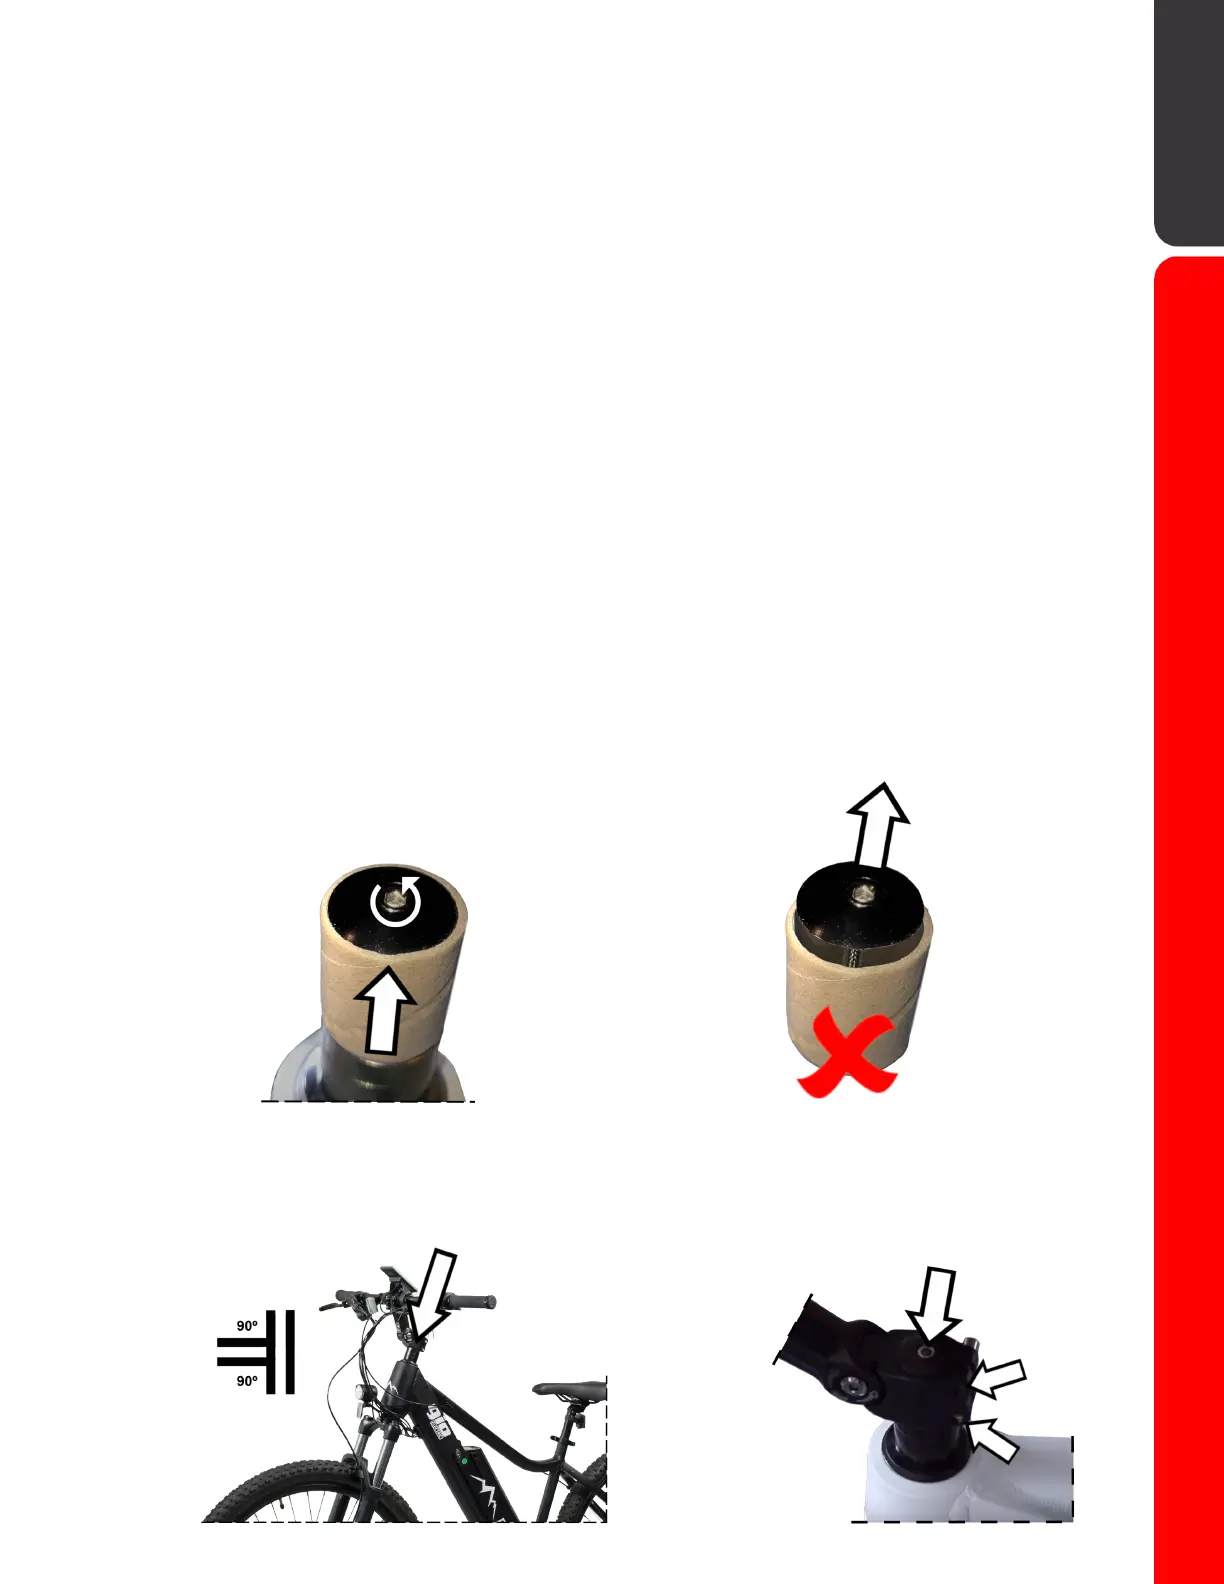
Attach and adjust the handlebars
Remove the cap from the top of the steerer tube by loosening the bolt
securing it to the tube. Remove and discard the cardboard tube portion,
you will only need the bolt and black cap to install the handle bars.t to the
tube.
Insert the handlebar stem over top of the steerer tube and align straight
forward. (perpendicular to the front wheel) Then replace the bolt and cap
into the hole it was originally in, in the steering tube, as well as the 2 bolts
on the rear of the stem.
04