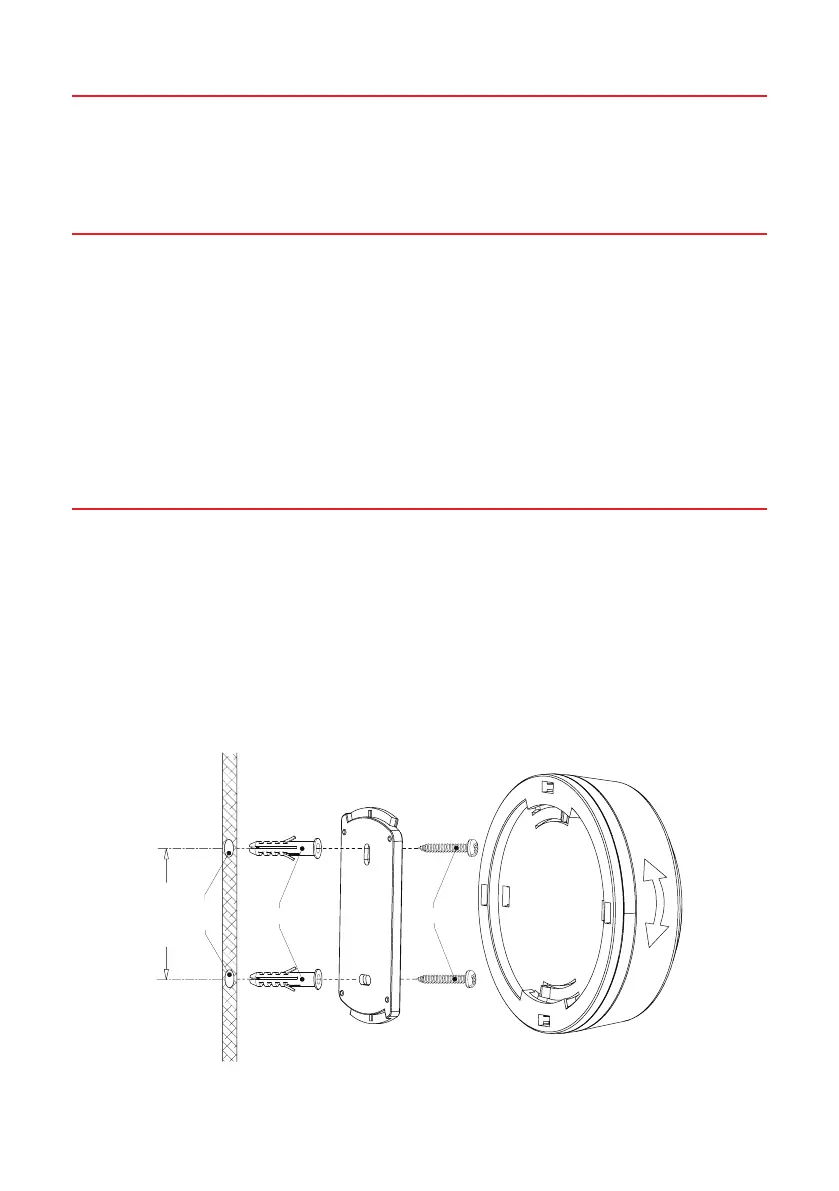
ROTATE
REMOVE
Wall Plugs
Carbon Monoxide AlarmWall
Wall
Bracket
Install
Hole
4.4±0.15cm
CHOOSING A LOCATION
It is best to install the GL-P103 at eye level, out of the reach of children, in order to clearly see
the screen and indicator lights. The device should be installed close enough to sleeping areas to
awaken residents in the case of an emergency. It is suggested that CO detectors are installed on
each level of a multilevel property.
LOCATIONS TO AVOID
Alarms should not be installed within 5 feet of a fuel burning device and away ceiling fans, vents,
doors and windows. The device should also not be fitted behind curtains or furniture or in any
other areas where air may not circulate, such as at the peak of vaulted ceilings. This will all
reduce how much carbon monoxide can reach the fitting and effect the accuracy of the reading.
It is important to keep the alarm away from dusty, dirty or greasy areas, as well as damp and
humid places. Household chemicals, dust, dirt and moisture can all effect the sensor, so it is best
to avoid installing in bathrooms and kitchens.
Alarms should not be placed in rooms where the temperature may get outside the range of
operating temperatures (0 and 40°C).
INSTALLATION
1. Remove the fixing bracket from the alarm body.
2. Using the bracket as a template, vertically drill two 5mm installation holes and inserting the
wall plugs (gently tapping in with a hammer if necessary).
3. Secure the fixing bracket to the wall by inserting screws into wall plugs.
4. Fit the alarm to the bracket by placing it on the bracket and turning clockwise until it is locked
in place. The device will now turn on.
 Loading...