EasyManua.ls Logo

Glacier bay HD67552-0401 User Manual

Glacier bay HD67552-0401
16 pages
To Next Page IconTo Next Page
Page #1 background imageLoading...
Page #1 background image
THANK YOU
INSTALLATION AND CARE GUIDE
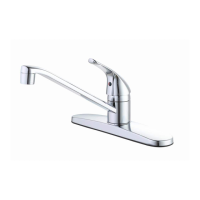
SINGLE-HANDLE STANDARD KITCHEN FAUCET
We appreciate the trust and confidence you have placed in Glacier Bay through the purchase of this kitchen
faucet. We strive to continually create quality products designed to enhance your home. Visit us online to see
our full line of products available for your home improvement needs. Thank you for choosing Glacier Bay!
Questions, problems, missing parts?
Before returning to the store, call Glacier Bay Customer Service
8 a.m. - 7 p.m., EST, Monday - Friday
9 a.m. - 6 p.m., EST, Saturday
1-855-HD-GLACIER (1-855-434-5224)
HOMEDEPOT.COM/GLACIERBAY
10/2020 REV.02THD
Model#
HD67552-0401
HD67552-0408D2
HD67552-1401
SKU#
1005655250
1005655271
1005655267
Questions and Answers:

Glacier bay HD67552-0401 Specifications

General IconGeneral
BrandGlacier bay
ModelHD67552-0401
CategoryKitchen & Bath Fixtures
LanguageEnglish

Summary

Important Information

Warranty

Pre-Installation

Planning Installation

Ensure all parts are present before beginning installation. Compare parts with the Package Contents list.

Tools and Hardware Required

Lists the necessary tools and hardware for installation, such as adjustable wrench, safety goggles, sealant, and supply lines.

Package Contents

Details the parts included in the package with their descriptions and quantities, including faucet, gasket, mounting nuts, and sprayer parts.

Installation

Preparing for Installation

Instructions for preparing the installation area, including shutting off water supply, cleaning the surface, and checking the gasket.

Installing the Sprayer Support

Steps for installing the sprayer support, involving the sprayer flange and mounting nut, noting it requires a 4-hole sink.

Connecting the Spray Hose

Guide on connecting the spray hose to the faucet using quick connectors, ensuring a secure snap and moderate hose pull.

Installing the Faucet Assembly

Procedure for placing the faucet through mounting holes and securing it with provided mounting nuts. Silicone sealant is required.

Water Supply Connections

Details on connecting water supply lines using IPS connections or coupling nuts, and notes on plugging inlet tubes if needed.

Operation

Flushing and Checking for Leaks

Steps to flush water lines by removing the aerator, turning on water, checking for leaks, and then reinstalling the aerator.

Removing the Quick Connector

Instructions on how to disconnect the quick connector by squeezing tabs and pulling down. Also covers plugging inlet tubes.

Care and Cleaning

Care and Cleaning Guidelines

Guidelines for cleaning the faucet using a damp cloth, advising against abrasive cleaners, steel wool, or harsh chemicals to avoid voiding the warranty.

Troubleshooting

Troubleshooting Common Issues

Addresses common problems like leaks from the handle, irregular water flow, and water not shutting off, with possible causes and solutions.

Service Parts

Service Parts Identification

Diagram and list of all available replacement parts for the faucet, including part numbers and descriptions, with notes on specifying finish.

Related product manuals