- 2 -
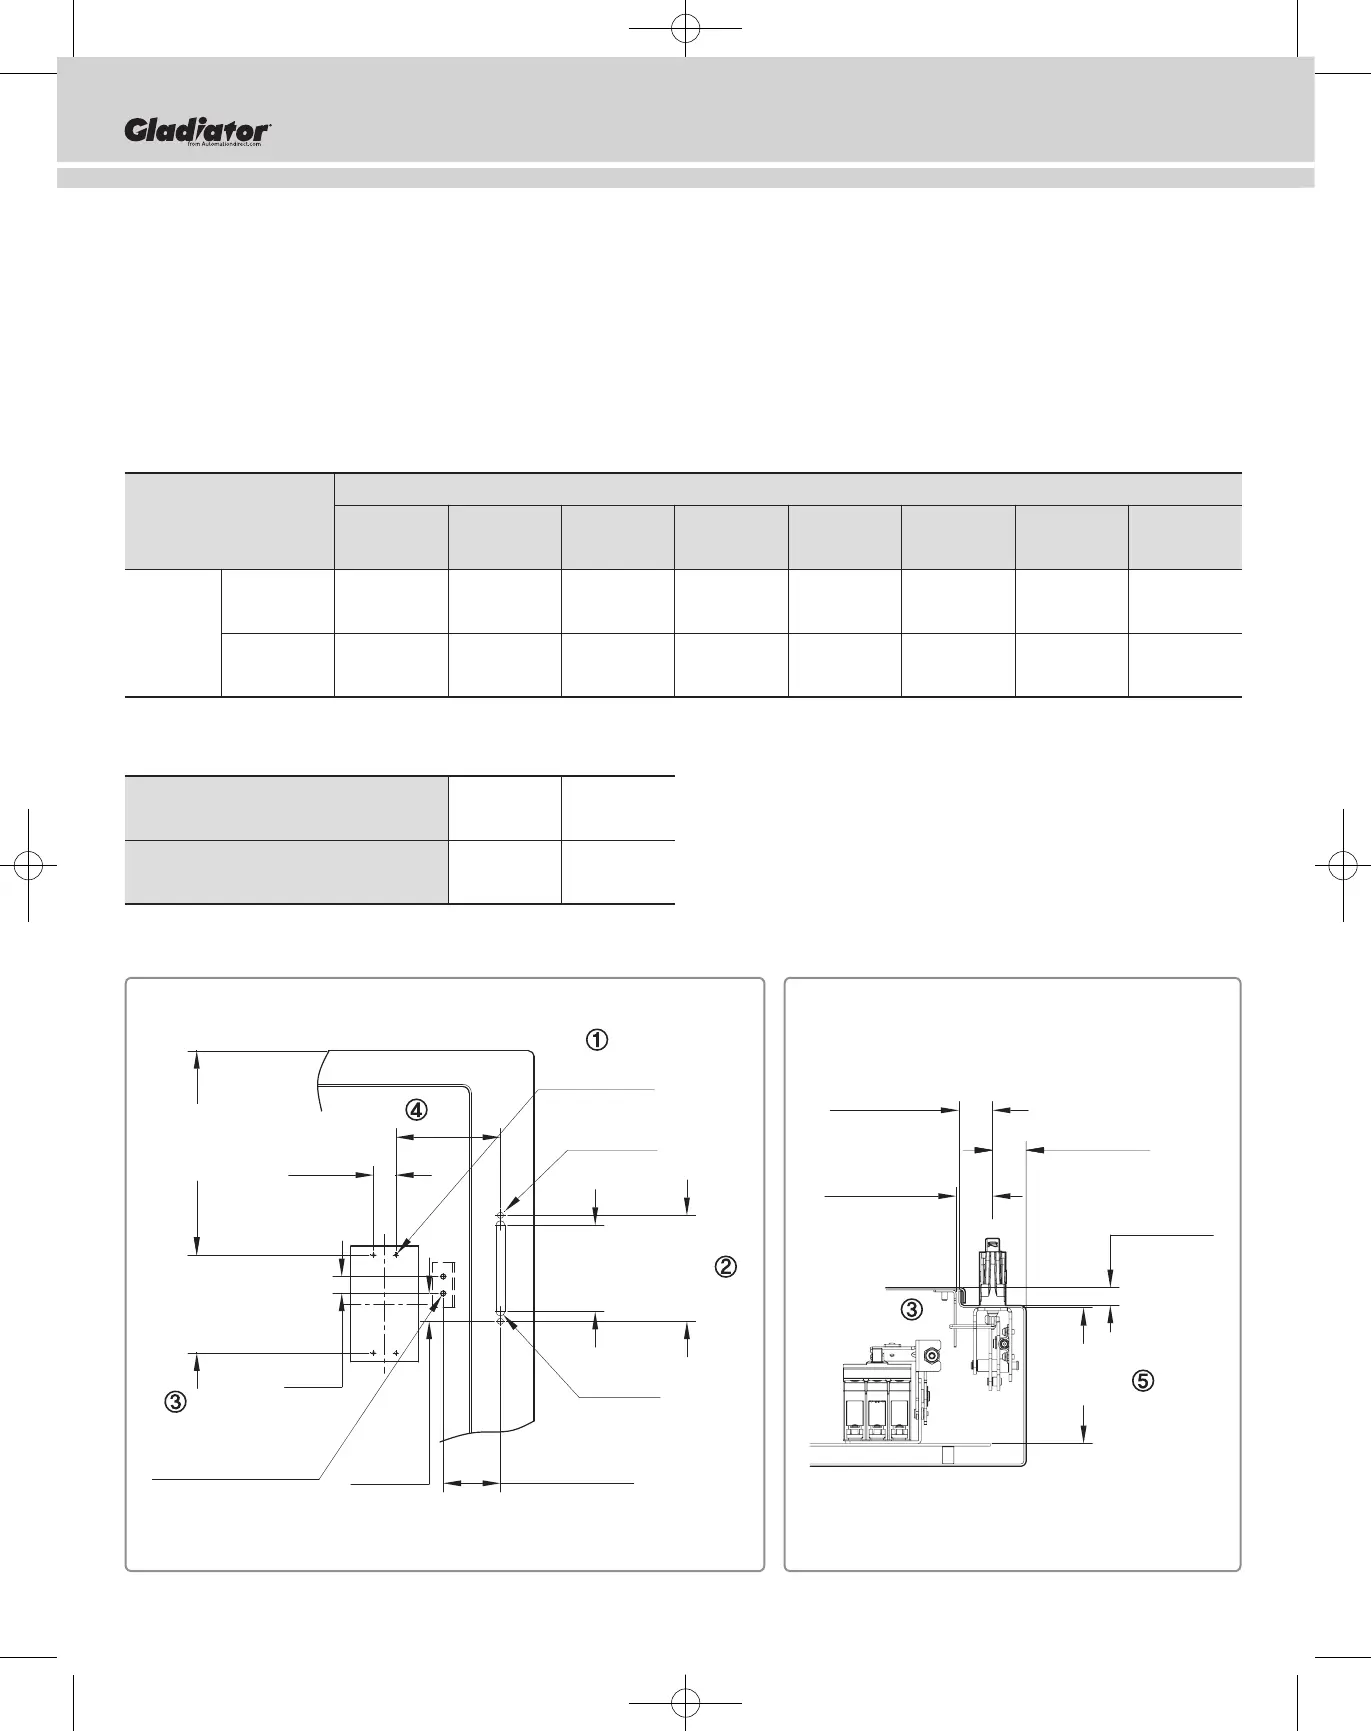
2. Tap & Hole Measure needed to install COM and Flange Handle
① Prepare 4 spots of Tap 6-32UNC to adhere COM.
② Prepare to adhere the Flange Handle Assembly.
③ Prepare 2 slots of Bolt Stud 1/4-20UNC to adhere Lock to Door.
④ Installation spot may change depending on Cable Extension.
Cable Extension: 60/72 inch (1524.0/1828.8 mm)
⑤ Enclosure Depth “D” has to be at least 8.66 inch (220.0 mm).
※ Maximum Measure to Install COM
[Unit: inch (mm)]
Installation Enclosure Depth
Spot Measure 10 12 16 18 20 24 30 36
“E” max (254.0) (304.8) (406.4) (457.2) (508.0) (609.6) (762.0) (914.4)
60 25 24 23 22 21 20 19 18
Cable (1524.0) (635.0) (609.6) (584.2) (558.8) (533.4) (508.0) (482.6) (457.2)
Lengths 72 30 29 28 27 26 25 24 23
(1828.8) (762.0) (736.6) (711.2) (685.8) (660.4) (635.0) (609.6) (584.2)
※ Minimum Measure for Enclosure “D”
[Unit: inch (mm)]
Standard Measure “E” to install COM
0~1.77 1.77~
(0~45.0) (45.0~)
Enclosure Depth “D” Min
8.86 4.72
(225.0) (119.9)
4-(6-32UNC)
0.75
[19]
0.98
[25]
4.33
[110]
3.82
[97]
4.69
[119]
MIN 4.72
[120]
E
2-(1/4-20UNC)
STUD BOLT
R0.2
[R5]
MAX 2.52
[64]
1.24
[31.4]
2-Ø 0.26
[2-Ø 6.6]
MIN<1.18>
[30]
MAX<0.79>
[20]
MAX<2.01>
[51]
MAX<1.89>
[45]
MIN<8.66>
[220.0]
"D"
Installation Instruction
 Loading...