EasyManua.ls Logo

Glendale GL1152 User Manual

Glendale GL1152
5 pages
To Next Page IconTo Next Page
Page #1 background imageLoading...
Page #1 background image
Page | 1
Please check if you have all the fittings listed below
Component Parts
Please check if you have all the parts as listed Note: The quantities below are the correct amount to
complete the assembly. In some cases more fittings may be supplied than are required.
GL1152 Venice gazebo 3x4m Assembly Instructions
If you need help with assembly or missing parts please call our customer care team on: 0121 616 1939
IMPORTANT Please read these instructions carefully before assembling
WE RECOMMEND 2 PEOPLE TO ASSEMBLE THIS GAZEBO
Question and Answer IconNeed help?

Do you have a question about the Glendale GL1152 and is the answer not in the manual?

Glendale GL1152 Specifications

General IconGeneral
BrandGlendale
ModelGL1152
CategoryOutdoor Furnishing
LanguageEnglish

Summary

Assembly Instructions

Step 1 & 2: Connecting Upright Leg and Foot Plate

Connect the upright leg (1) with the foot plate (10) and add clip (14) to the top of the leg, do not over tighten.

Step 3 & 4: Adding Frame Supports

Add cross supporting members using inserts G & F, and supporting side parts (5), plus curtain tracking bar.

Step 5: Building the Roof Frame

Assemble the spider roof support frame (16) by connecting roof poles and corner poles (8) and securing with bolt H2.

Step 6: Attaching Roof Canopy and Curtains

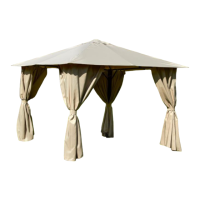
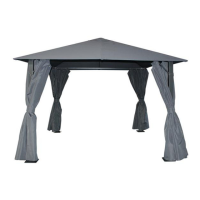
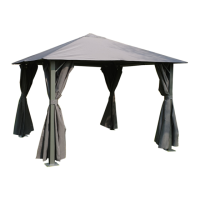
Throw the roof canopy (M) over the top section, secure elasticated ends, then attach curtains to each corner.

Safety and Care Advice

Ground Securing and Wind Damage Prevention

Crucially, secure the gazebo to the ground immediately after building. Remove canopy in heavy winds to prevent damage.

Related product manuals