This document provides assembly instructions and care advice for the Glendale GL1802 Highfield gazebo, a 3x4m outdoor structure designed for leisure and garden use.
Function Description:
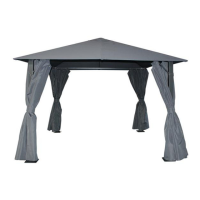
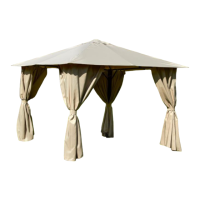
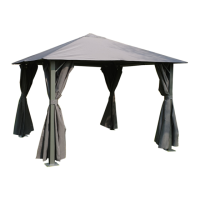
The Glendale GL1802 Highfield gazebo serves as a temporary or semi-permanent outdoor shelter, providing shade and a defined space for relaxation or entertainment. It features a robust frame and a canopy with curtains, offering protection from sun and light weather conditions. The design emphasizes ease of assembly and maintenance, with a focus on securing the structure for safety.
Important Technical Specifications:
- Model: GL1802 Highfield gazebo
- External Dimensions:
- Width: 300 cm
- Depth: 400 cm
- Height: 250 cm
- Assembly Requirements:
- Number of people required to assemble: 2
- Approximate assembly time: 45-1 Hour
- Components (Part# and Quantity):
- Part 1: Upright leg (4)
- Part 2: (2)
- Part 3: (2)
- Part 4: (2)
- Part 5: Supporting side parts (8)
- Part 7: (4)
- Part 8: Corner roof poles (4)
- Part 10: Foot plate part (4)
- Part 11: (4)
- Part 12: (4)
- Part 13: (2)
- Part 14: Clips (10)
- Part 15: (2)
- Part 16: Spider roof support frame part (1)
- Part 17: (6)
- Part F: Inserts (8)
- Part G: Inserts (8)
- Part H1: Screws (M6*15) (66)
- Part H2: Bolts (M6*30) (10)
- Part H3: Screws (M6*40) (16)
- Part I: (10)
- Part M: Roof canopy (1)
- Part N: Curtains (2)
- Part O: (2)
Usage Features:
The gazebo is designed for outdoor use in gardens and leisure areas.
- Assembly Process: The assembly is broken down into steps:
- Step 1 & 2: Involves connecting upright legs (1) with foot plate parts (10) and adding clips (14) to the top of the legs and pre-drilled legs. Users are advised not to overtighten screws at this stage.
- Step 3 & 4: Focuses on adding cross supporting members using inserts G & F, attaching supporting side parts (5), and installing the curtain tracking bar inside the frame.
- Step 5: Details the assembly of the spider roof support frame (16), connecting all roof poles, ensuring corner poles (8) are correctly positioned, and securing the frame with bolts H2.
- Step 6: Guides users through applying the roof canopy (M) and curtains (N). The canopy should be spread evenly, securing elasticated ends and mid-sections first, leaving the four corners for last. The curtains are zipped together, with one curtain fitting every corner across one leg.
- Security: It is critically important to secure the gazebo to the ground immediately after assembly. Tent pegs are provided for grass surfaces, while fixing bolts must be used for hard surface patios.
- Wind Safety: In heavy winds, the canopy should be removed to prevent wind damage.
- Safety Precaution: Do not use a BBQ under the gazebo.
Maintenance Features:
- Frame Durability: The gazebo frame is designed to be left outside all year round.
- Canopy and Curtains Storage: For longevity, the curtains and canopy should be taken off during winter months and stored in a cool, dry, frost-free place. They should not be stored wet to prevent deterioration.
- Waterproofing: To maintain the canopy's freshness and waterproofing, it is recommended to use a waterproofing spray on the outside of the roof and curtains at least three times a year. Such sprays are available at tent/camping shops.
- Customer Support: For assistance with assembly or missing parts, customers can contact the Glendale customer care team via email at support@glendale-leisure.co.uk.
- Parts Check: Users are advised to check that all parts are present as listed in the manual before assembly. The quantities listed are the correct amount for complete assembly, though more fittings than required may sometimes be supplied.