8
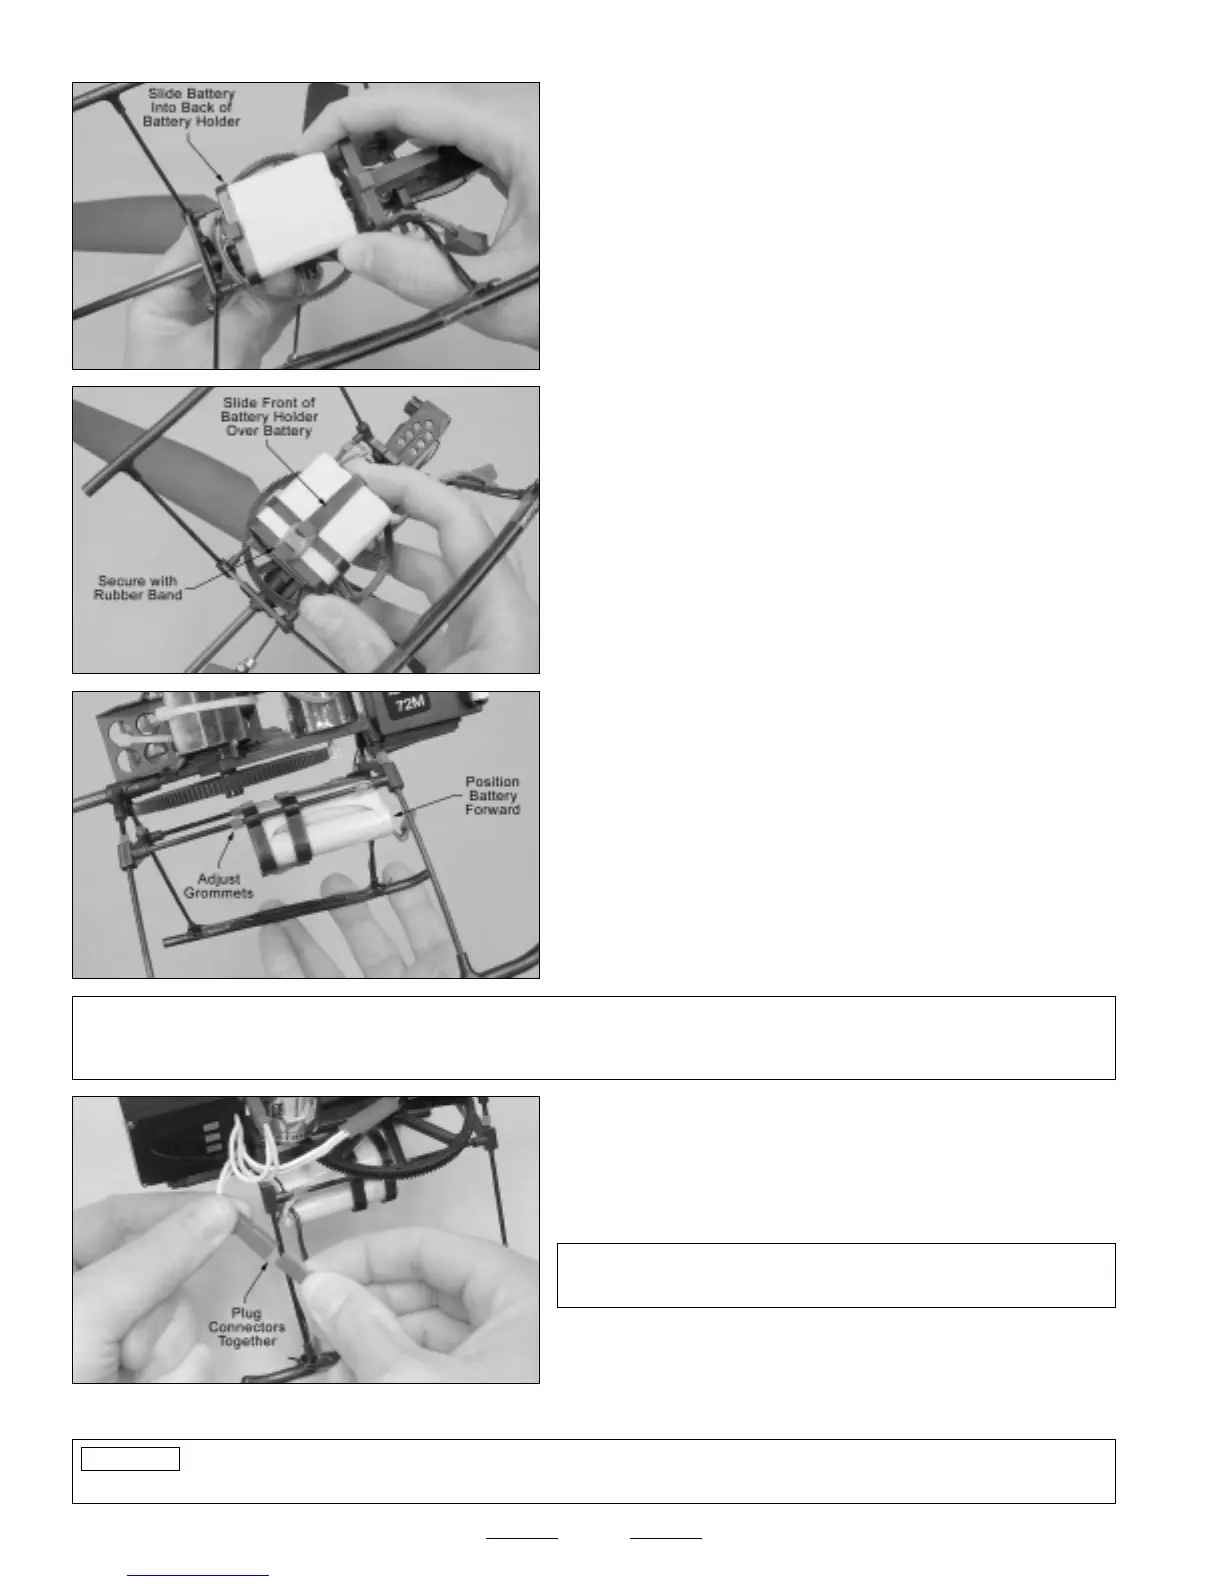
❑ Slide the flight battery holder open, then slide the back of the flight
battery into the molded recess in the back of the flight battery holder.
The battery wire with the red plug should be toward the front of
the helicopter.
☞
Notice that the flight battery will fit only one way. The flight battery
holder is molded in the same profile as the flight battery.
❑ Slide the front of the flight battery holder over the flight battery and
secure the flight battery holder together using the rubber band provided.
☞
Loop the rubber band around the molded tabs on the flight battery
holder a couple of times to ensure that the flight battery holder is held
securely closed.
❑ Carefully slide the battery holder forward so that the front of the
flight battery is even with the front of the landing skid struts. Adjust the
position of the rubber grommets to hold the battery holder in position.
❑ Plug the connector on the flight battery into the matching loose
connector on the mainframe.
✦✦
✦✦
✦IMPORTANT
✦✦
✦✦
✦ As a safety feature, the connectors can only be
plugged in one way.
✦✦
✦✦
✦IMPORANT
✦✦
✦✦
✦ The flight battery holder can be moved forward or backward by adjusting the position of the rubber grommets.
This allows you to balance the helicopter to suit your flying style. Initially, we suggest positioning the flight battery as shown
above. We will balance the helicopter later on.
PRO TIP
☞
For now, don't reinstall the fuselage body. It needs to be removed so you are able to check and adjust the swashplate assembly.
The battery plug is accessible from under the fuselage body, so it's not necessary to remove the fuselage body and
flight battery from the mainframe to charge the flight battery.


 To Next Page