Worksurface Supporting Pedestals
According to your plan, select the type of pedestal to be used for worksurface support. Identify which side of the pedestal is to be attached to the panel
slots and attach the Pedestal Connecting Brackets accordingly.
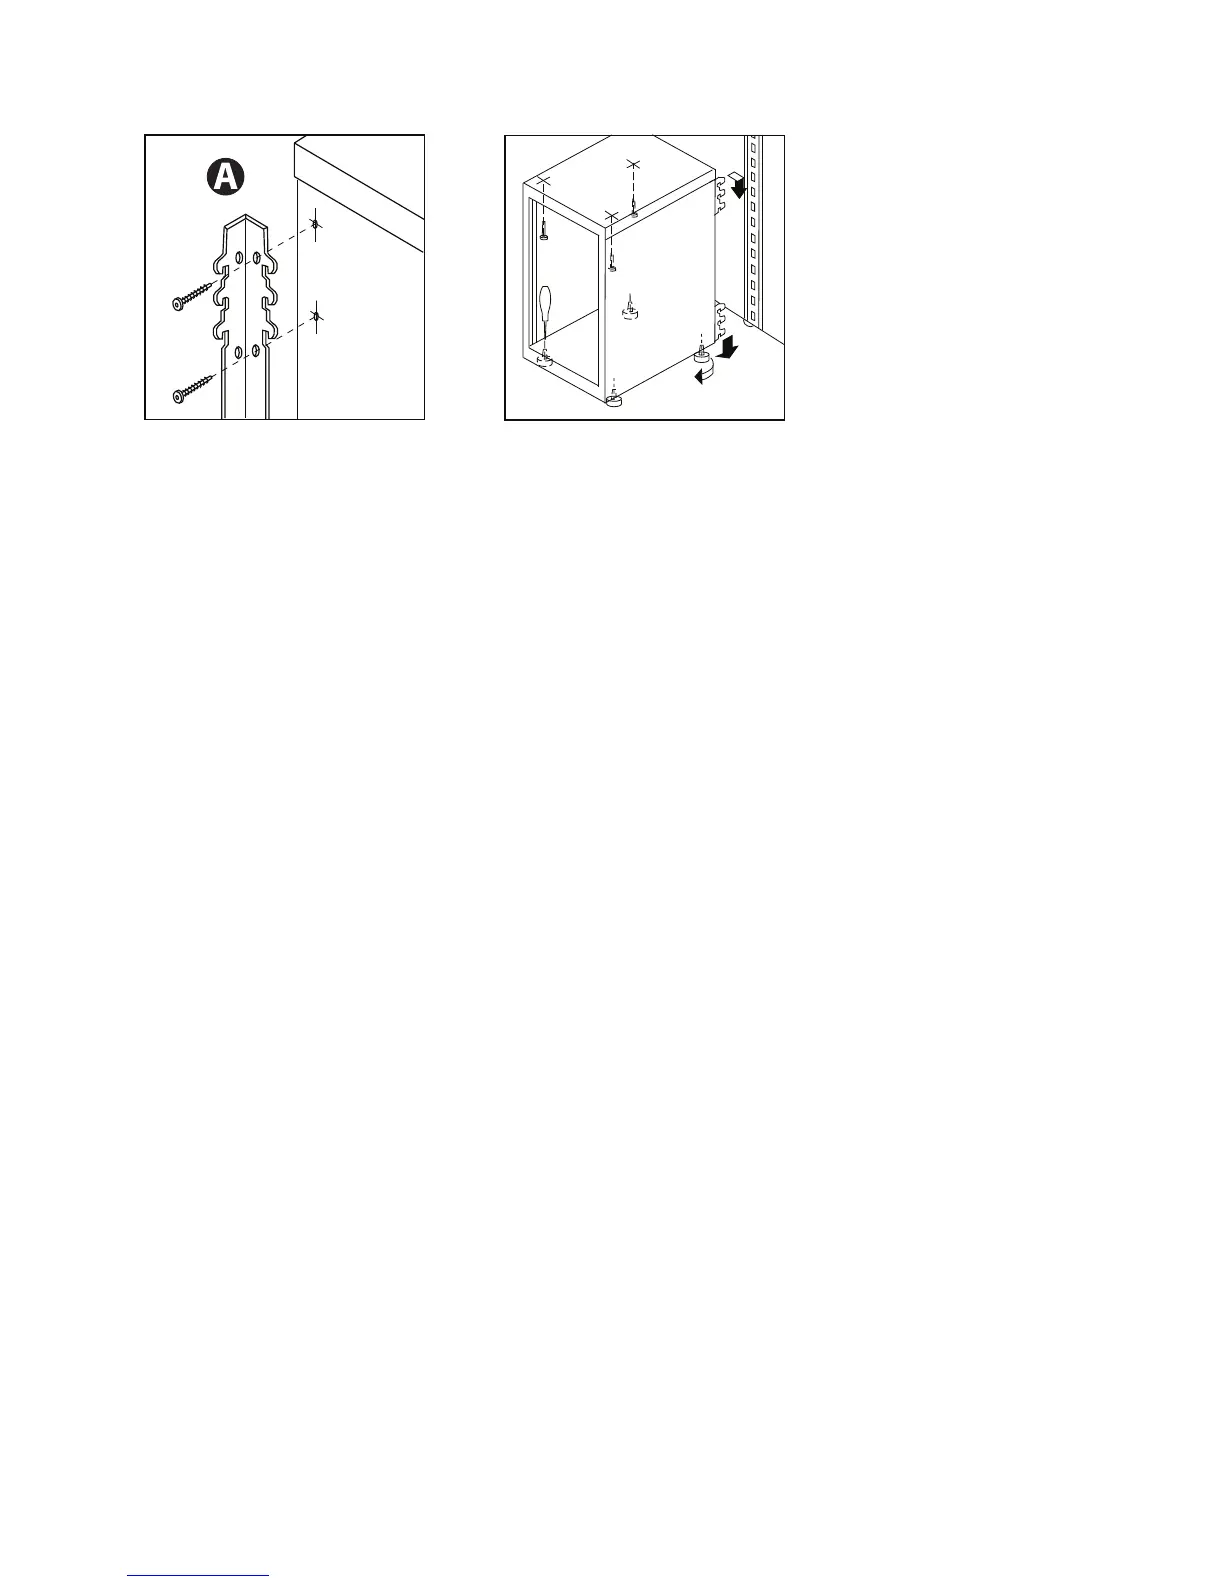
1. While ensuring that the bracket hooks are pointing downward, align the outer corner of the top Pedestal Connecting Bracket with the outer
edge of the pedestal just below the top lip (A).
2. Hold the bracket in position and drive the supplied two self-drilling screws through the bracket into the rear wall of the pedestal.
3. Align the bottom corner of the lower Pedestal Connecting Bracket with the bottom corner of the pedestal.
4. Repeat procedure #2.
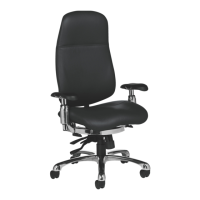
5. Screw the glides all the way into the pedestal.
6. Remove the drawers.
7. Lower the pedestal down into the panel slots so that the Pedestal Connecting Bracket hooks fully engage into the panel slots and tap the
top corner of the pedestal with a rubber mallet to ensure the hooks are seated.
8. Adjust all pedestal glides while making sure that the brackets do not become disengaged from the panel slots. Proceed with the installation
of the worksurfaces.
9. Fasten the pedestal by driving self-drilling screws (supplied) through the pedestal top into the underside of the worksurface.