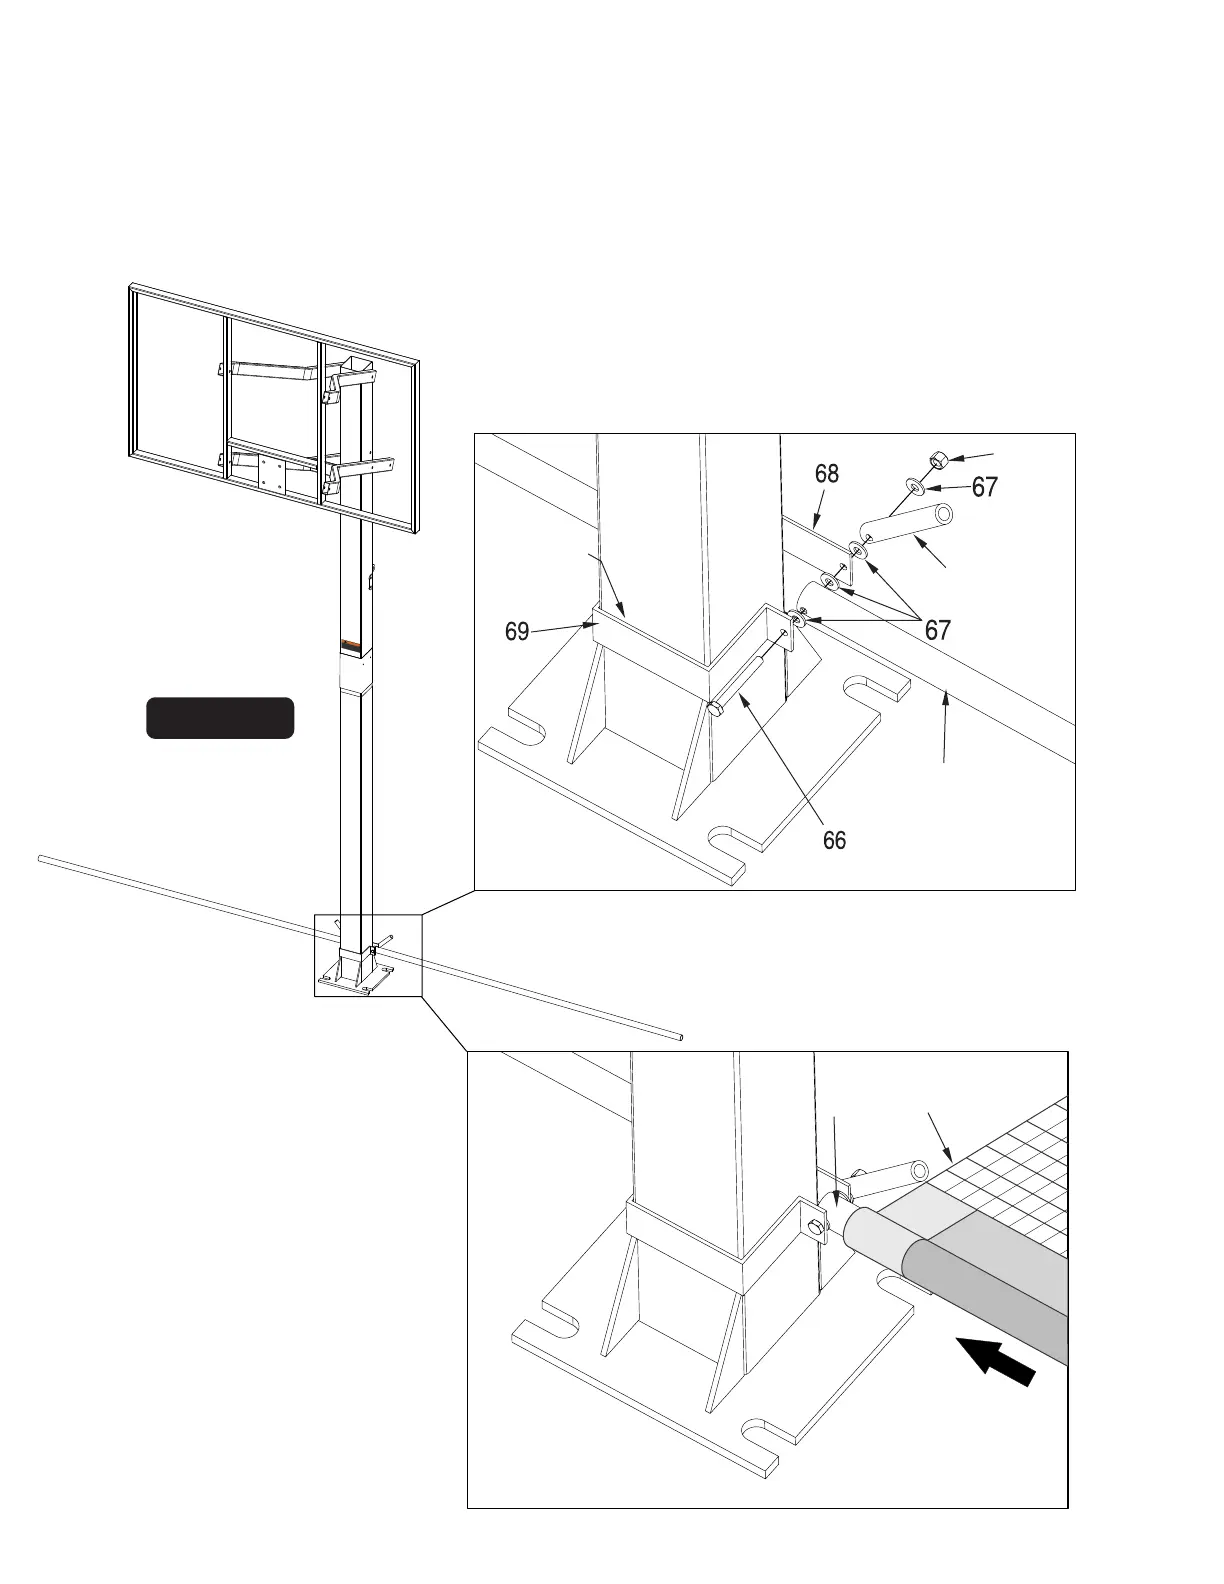
1. Put together Yard Guard bracket as shown. Using Bolt (#66), Washer (#67), Tube (#76), another Washer (#67) Back
Bracket (#68), Washer (#67), Pivot Tube (#71) Washer (#67) and Nut (#75). Tighten Nut secure so that the rods can
pivot up and down, but front to back wobble is eliminated. See Detail 1.
INSTALLING THE YARD GUARD
Detail 2
Figure 17
DO NOT DUNK ON THIS UNIT .
DO NOT HANG FROM ANY PART OF THIS
UNIT , INCLUDING THE BACKBOARD, RIM,
SUPPORT BRACES OR NET.
4L-8152-00
WARNING
!
Detail 1
76
71
75
73
76
Rubber part
goes on the
inside facing
the Pole
FRONT
OF POLE
FRONT
OF POLE
NOTE: Two adults are recommended for the Yard Guard installation.
NOTE: Make sure
Warning Label and
artwork face FRONT.
16
2. Slide Right Yard Guard net (#73 with Goaliath Decal) onto Steel Tube (#76) as shown in Detail 2. Repeat for Left Yard
Guard Net (#72 with warning Label).
NOTE: Make sure Warning Label and artwork on Yard Guard Nets face the FRONT of pole.
NOTE: DO NOT install pole pad until instructed to do so.
 Loading...