1. Read this manual carefully before starting assembly. Read each step completely before beginning
each step.
2. Some smaller parts may be shipped inside larger parts. Check inside all parts and cartons
before assembling or ordering parts.
3. To make assembly of your basketball system easier, use the Hardware Identifier on page 4
to identify and sort all fasteners. Check all cartons for kits. All hardware may not be
located in one kit.
4. Do not tighten hardware until instructed to do so. If hardware is tightened too soon, mounting holes
may not align and parts may not easily fit together. Leave locknuts slightly loose until you are instructed to
tighten them.
O W N E R ' S M A N U A L
MODEL NO.
GB54cs2.0
Please Do Not Return This Product To The Store!
Contact Escalade
®
Sports customer service department at:
Phone: 1-888-USA-GOAL T
Fax: 1-866-873-3536 T
E-mail: basketball@escaladesports.com
Mailing Address (correspondence only):
Escalade Sports
PO Box 889
Evansville, IN 47706
Please visit our World Wide Web site at: www.escaladesports.com
ON-LINE TROUBLE SHOOTING TECHNICAL ASSISTANCE
ON-LINE PARTS REQUESTS FREQUENTLY ASKED QUESTIONS
ADDITIONAL ESCALADE
®
SPORTS PRODUCT INFORMATION
2L-7539-01
Escalade
®
Sports products may be manufactured and/or licensed under the following patents:
6419596, 6179733, 5919102, 5071120, 4798381, 4424968, D326128, 7244046
Additional patents may be pending. One or more of the listed patents and/or pending patents may cover specific product.
2017 Escalade Sports
©
®
oll Free!
oll Free!
B2251
5.
An electric screwdriver is helpful in assembly. However, please set at low torque and use caution
because you could overtighten the hardware and strip the screws.
6.
Save this instruction and your proof of purchase (receipt) in the event that the manufacturer
has to be contacted for replacement parts.
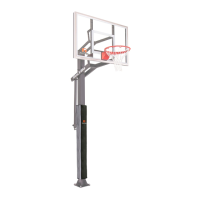
BASKETBALL SYSTEM
11 - 80 lb. bags of concrete
1 - Post hole digger (optional)
1 - wheel barrow
1 - garden hose
1 - Concrete form (see note after step 2)
ITEMS NEEDED (NOT INCLUDED)
1 - 15/16" Open end Wrench
1 - 15/16” Socket and Ratchet (optional)
1 - 9/16” Deep Well Socket & Ratchet
1 - 3/4” Socket & Ratchet
1 - 3/4” Open end Wrench
1 - Phillips Screwdriver
1 - Level
1 - Tape Measure
1 - Rubber Mallet
1 - Set of Padded
Saw Horses
1 - 9/16” Open end Wrench
1 - Cordless drill & 9/64” drill bit
1 - 5/16” socket driver (for cordless drill)
1 - Safety glasses
1 - Ladder